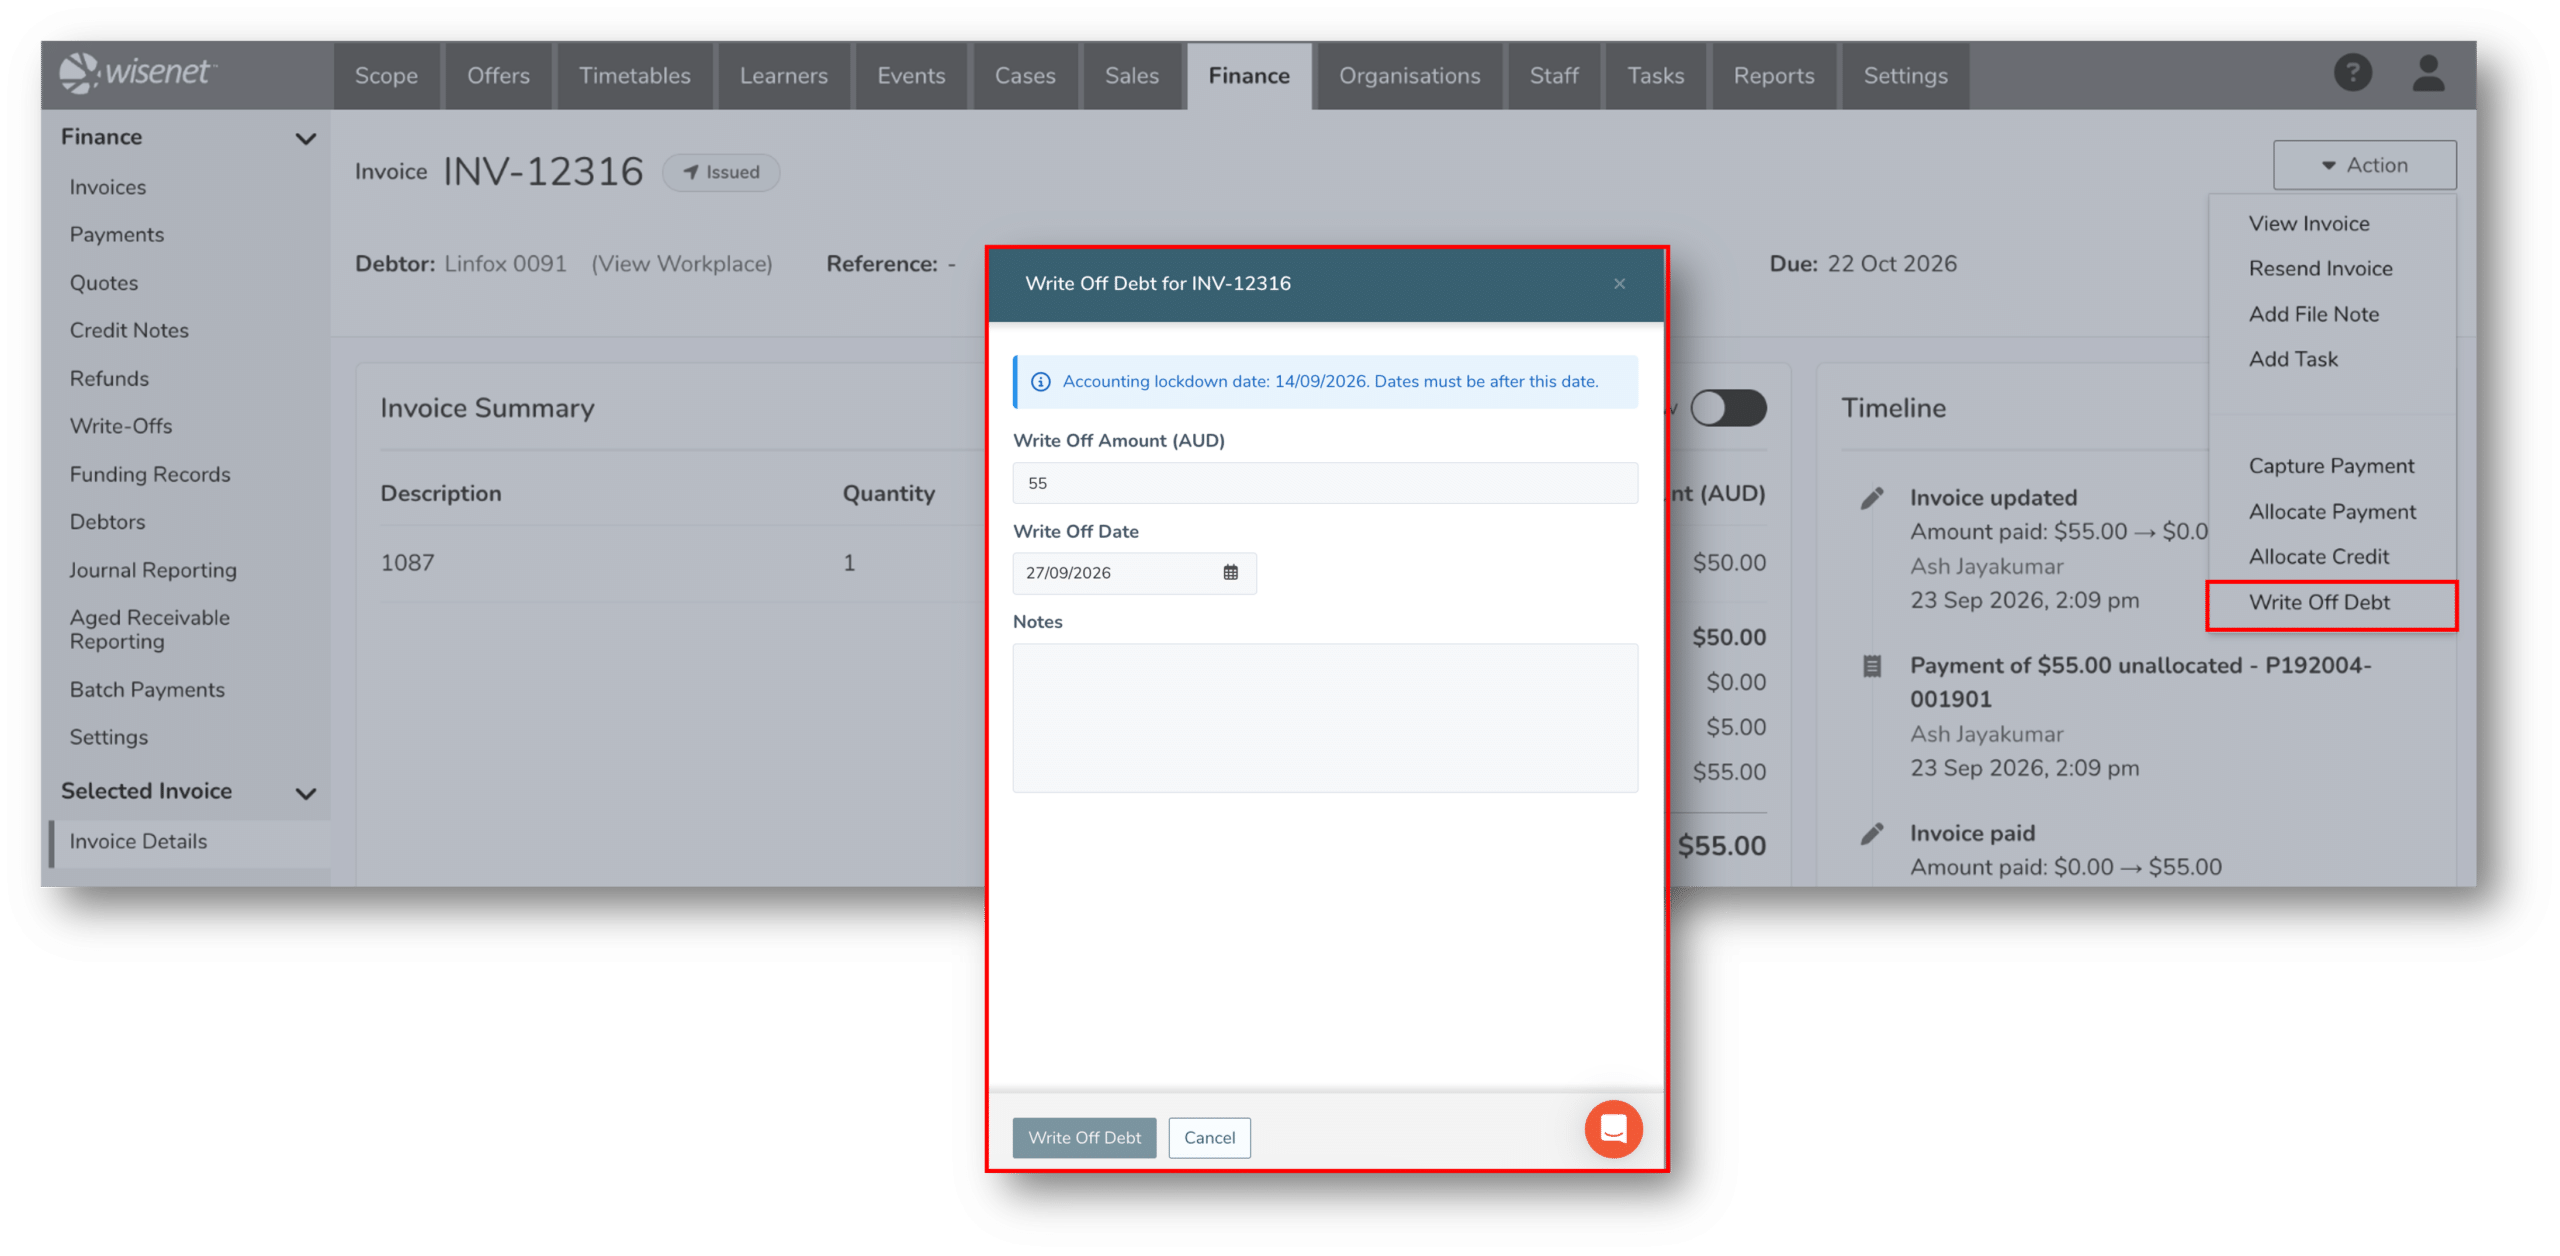
Once an Invoice has been created, you can view its details and manage the financial activity associated with it, including payments, payment allocations, credit and write-offs.
1
Search and View Invoices
- Navigate to LRM > Finance > Invoices
- You can also view Invoices for a specific debtor from:
Learner > Finance
Workplace > Finance
- You can also view Invoices for a specific debtor from:
- (Optional) search and filter data.
- Click on the Invoice Number to open the Invoice Details page, or
Click on the Debtor to open the Debtor Details page.

2
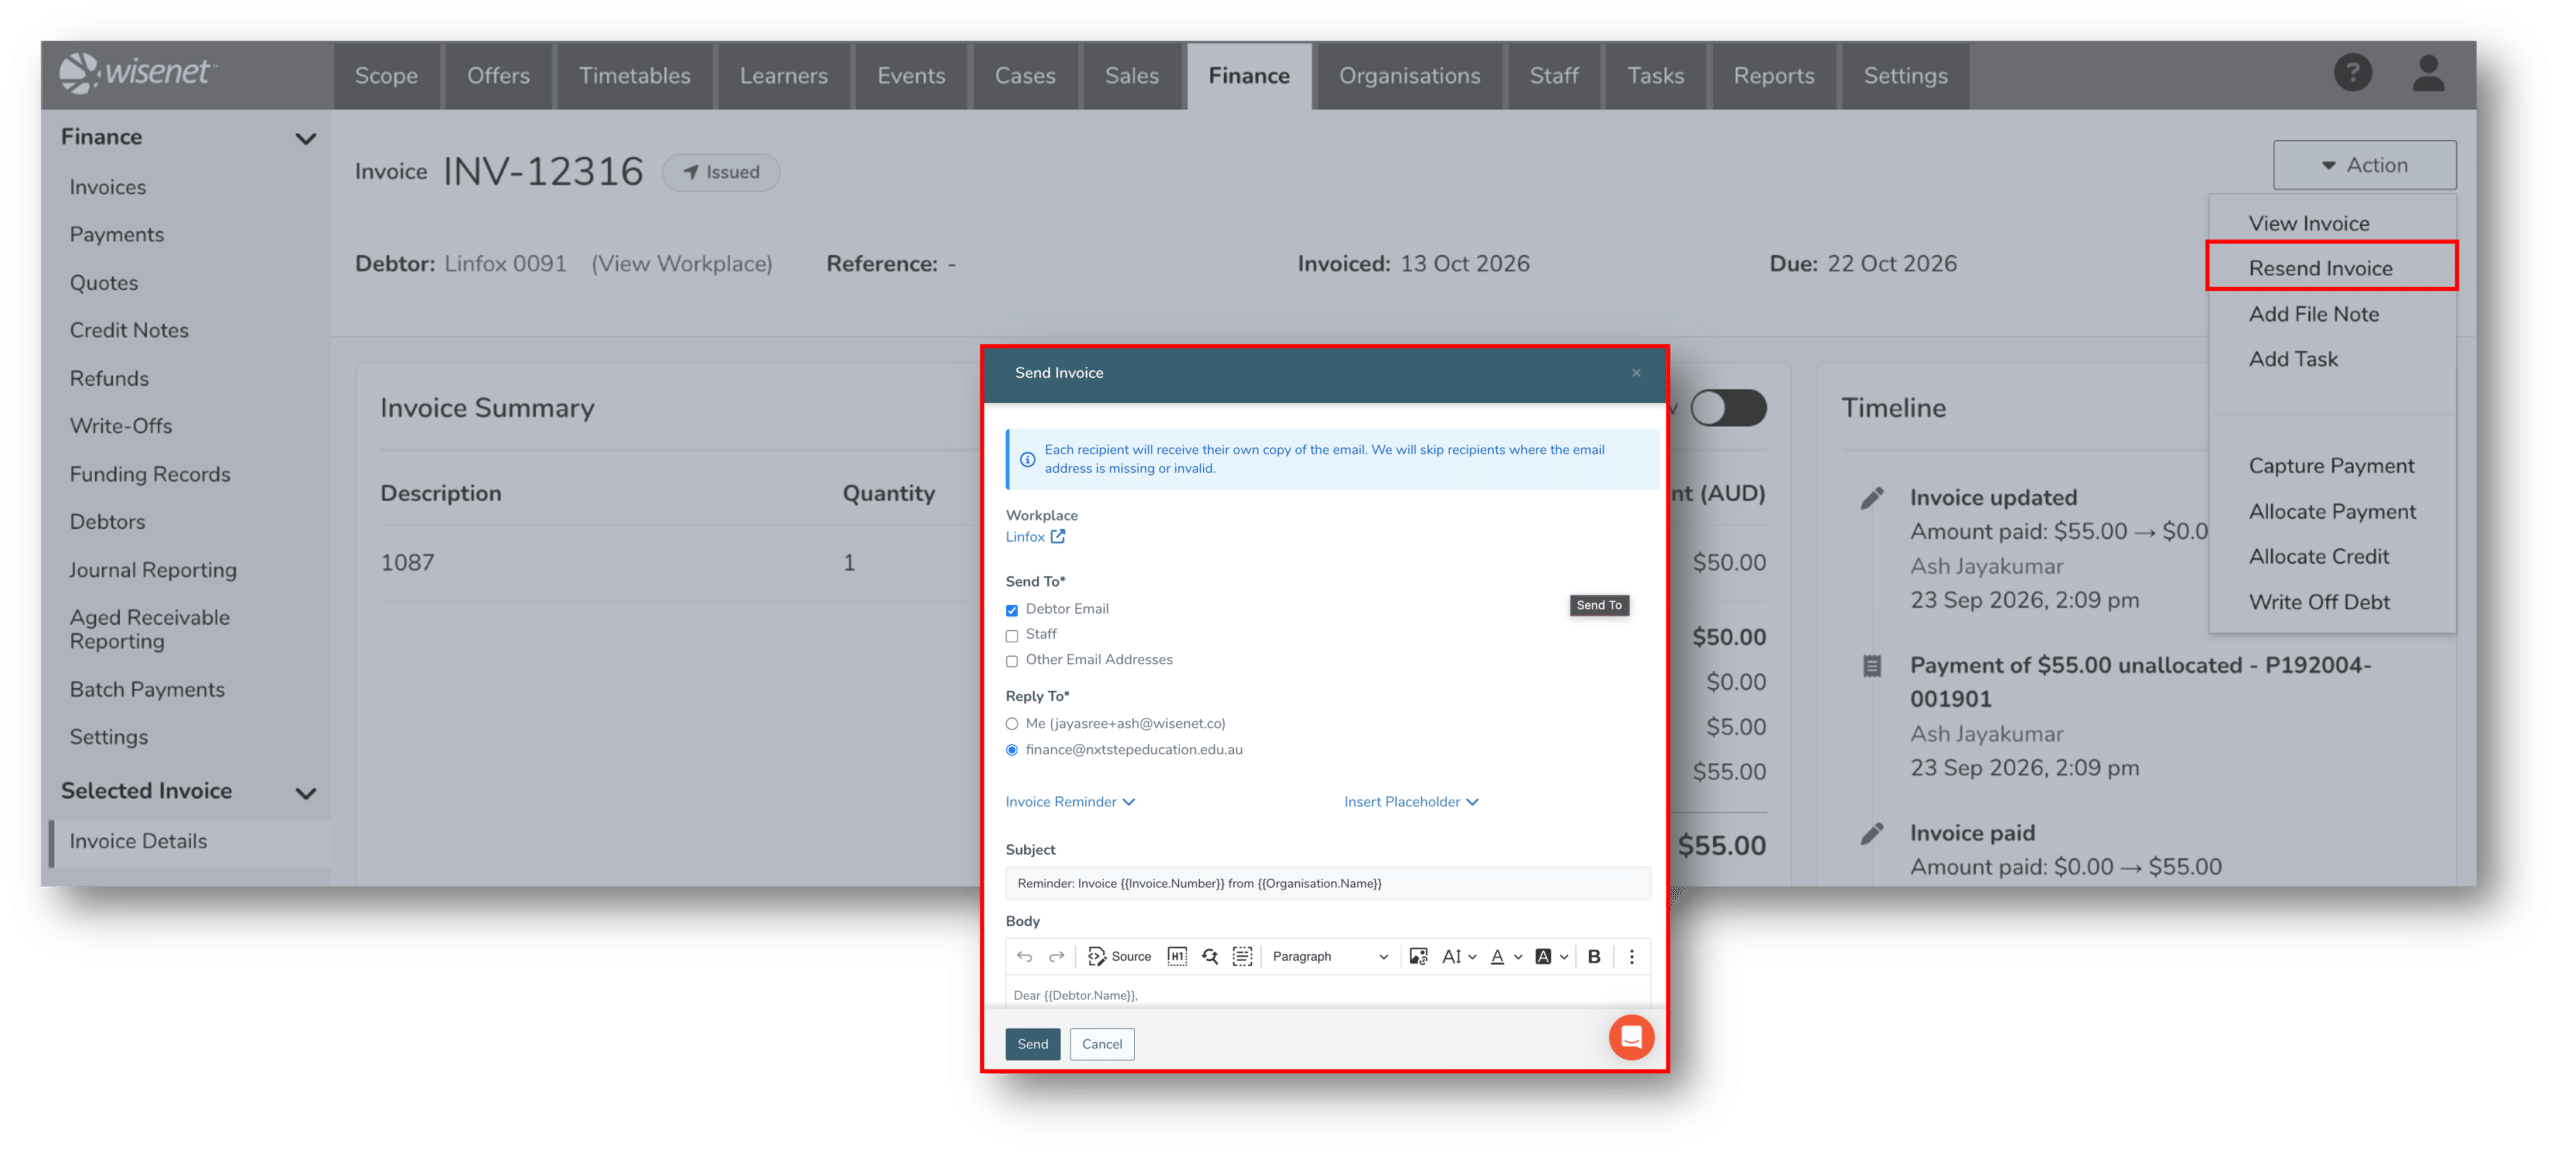
Resend Invoices
- Navigate to LRM > Finance > Invoices
- (Optional) search and filter data.
- Click the Resend icon in the Action column
OR
- Navigate to LRM > Finance > Selected Invoice > Invoice Details
- Click Action > Resend Invoice.
3
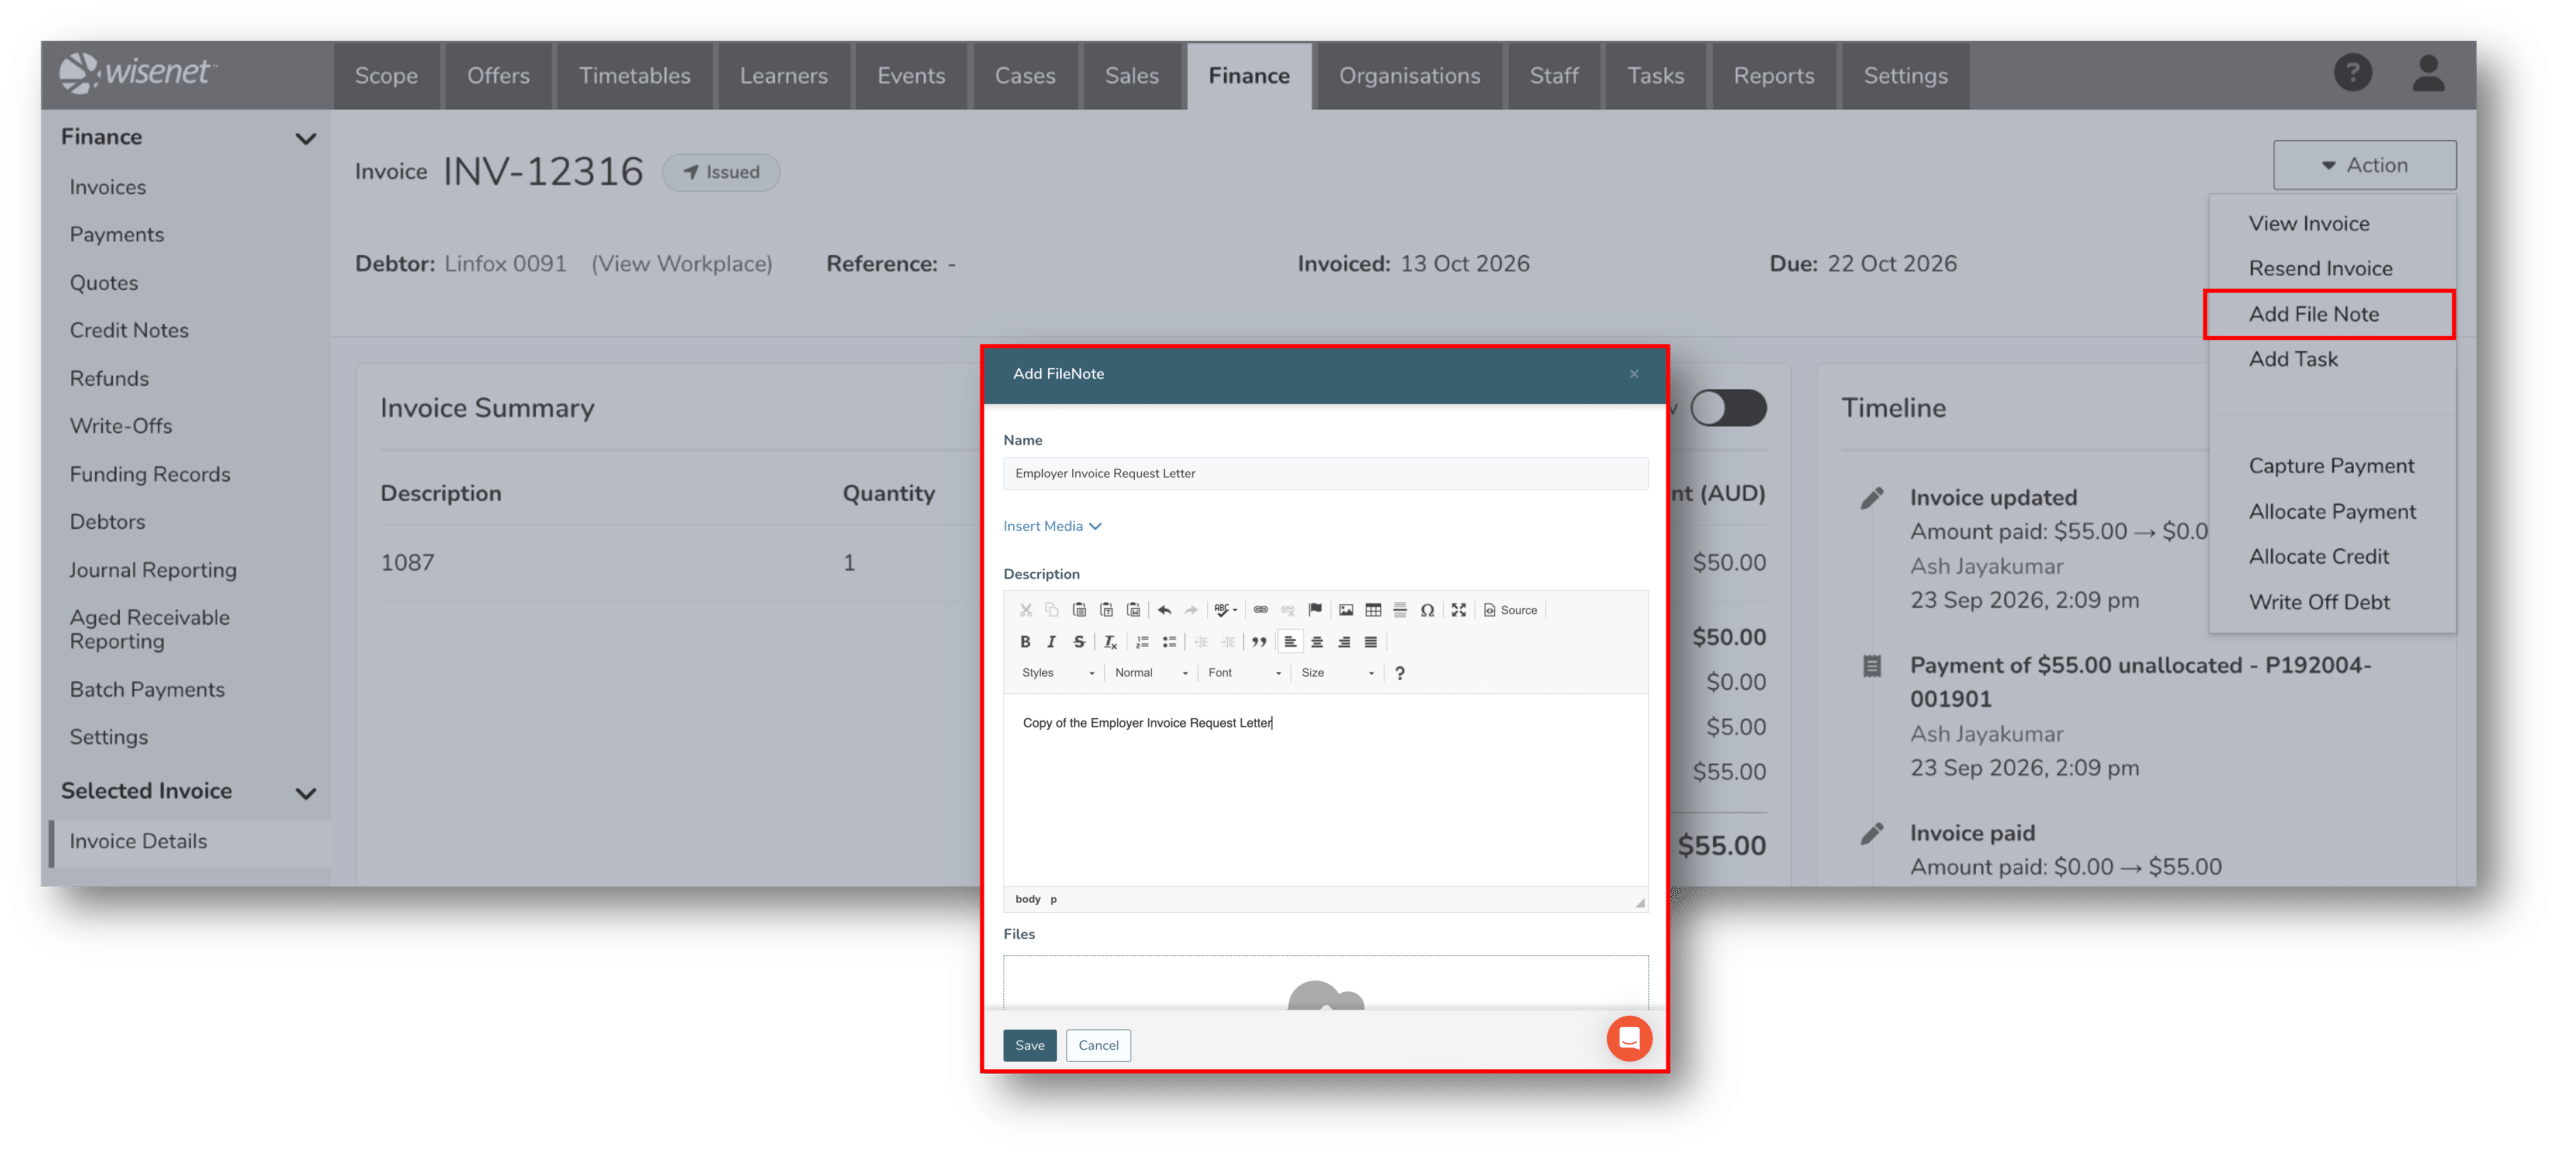
Add file notes to invoices
Use File Notes to keep internal notes and supporting information against an Invoice.
Invoice file notes are only visible internally.
Learn more How to Add File Notes
4
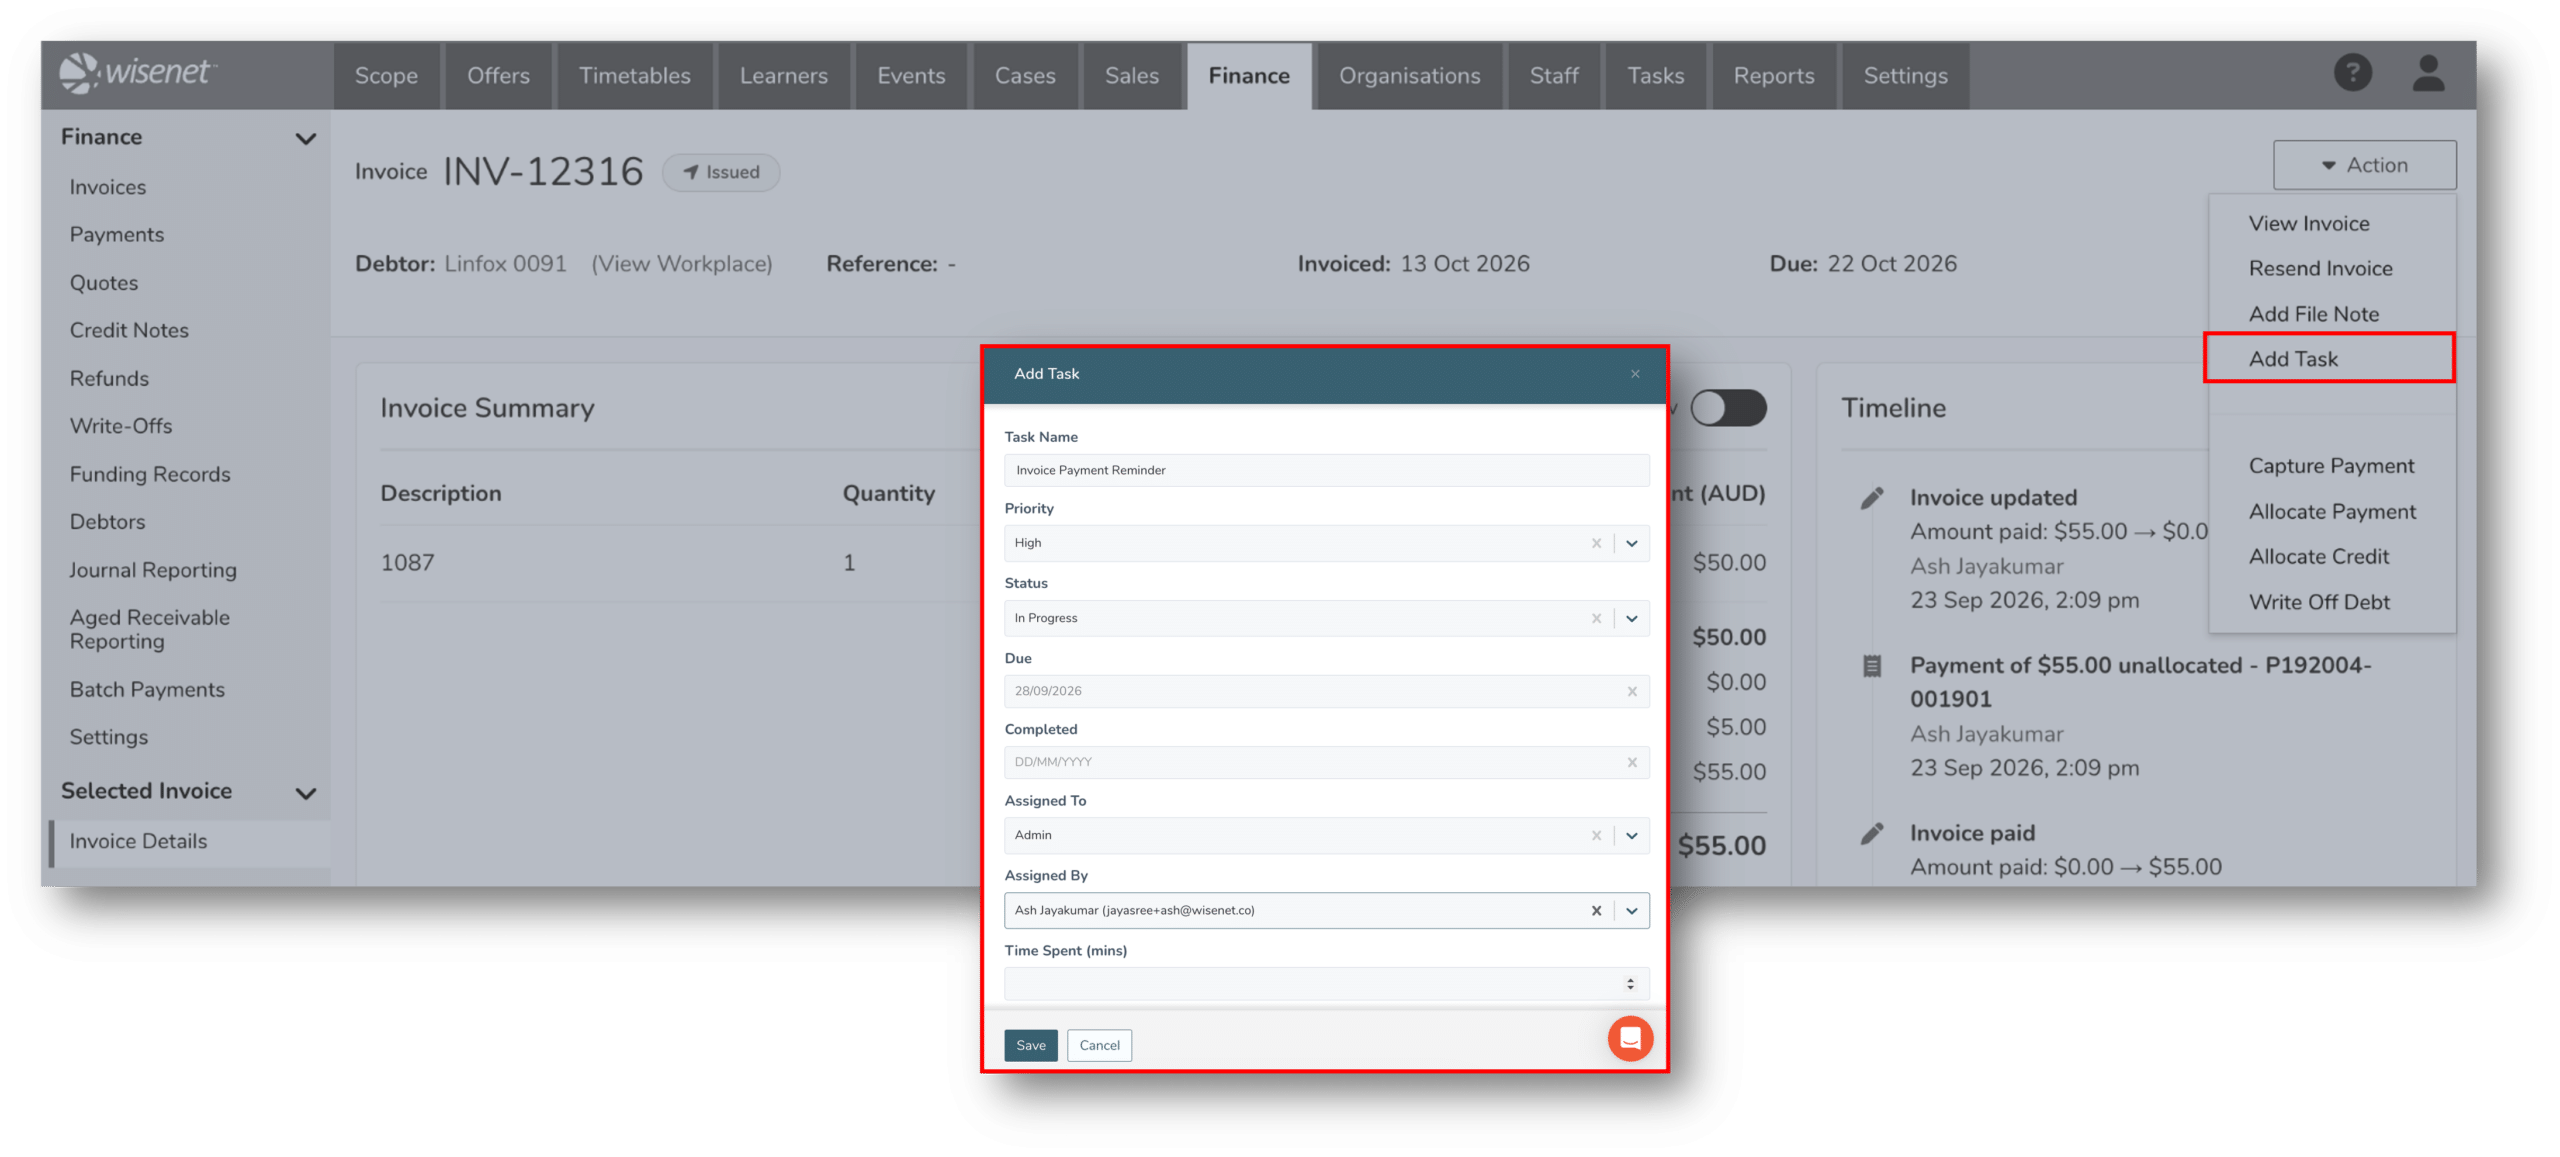
Manage Invoice Actions
From the invoice details page, the following actions may be available:
- Capture Payment
- Allocate Payment
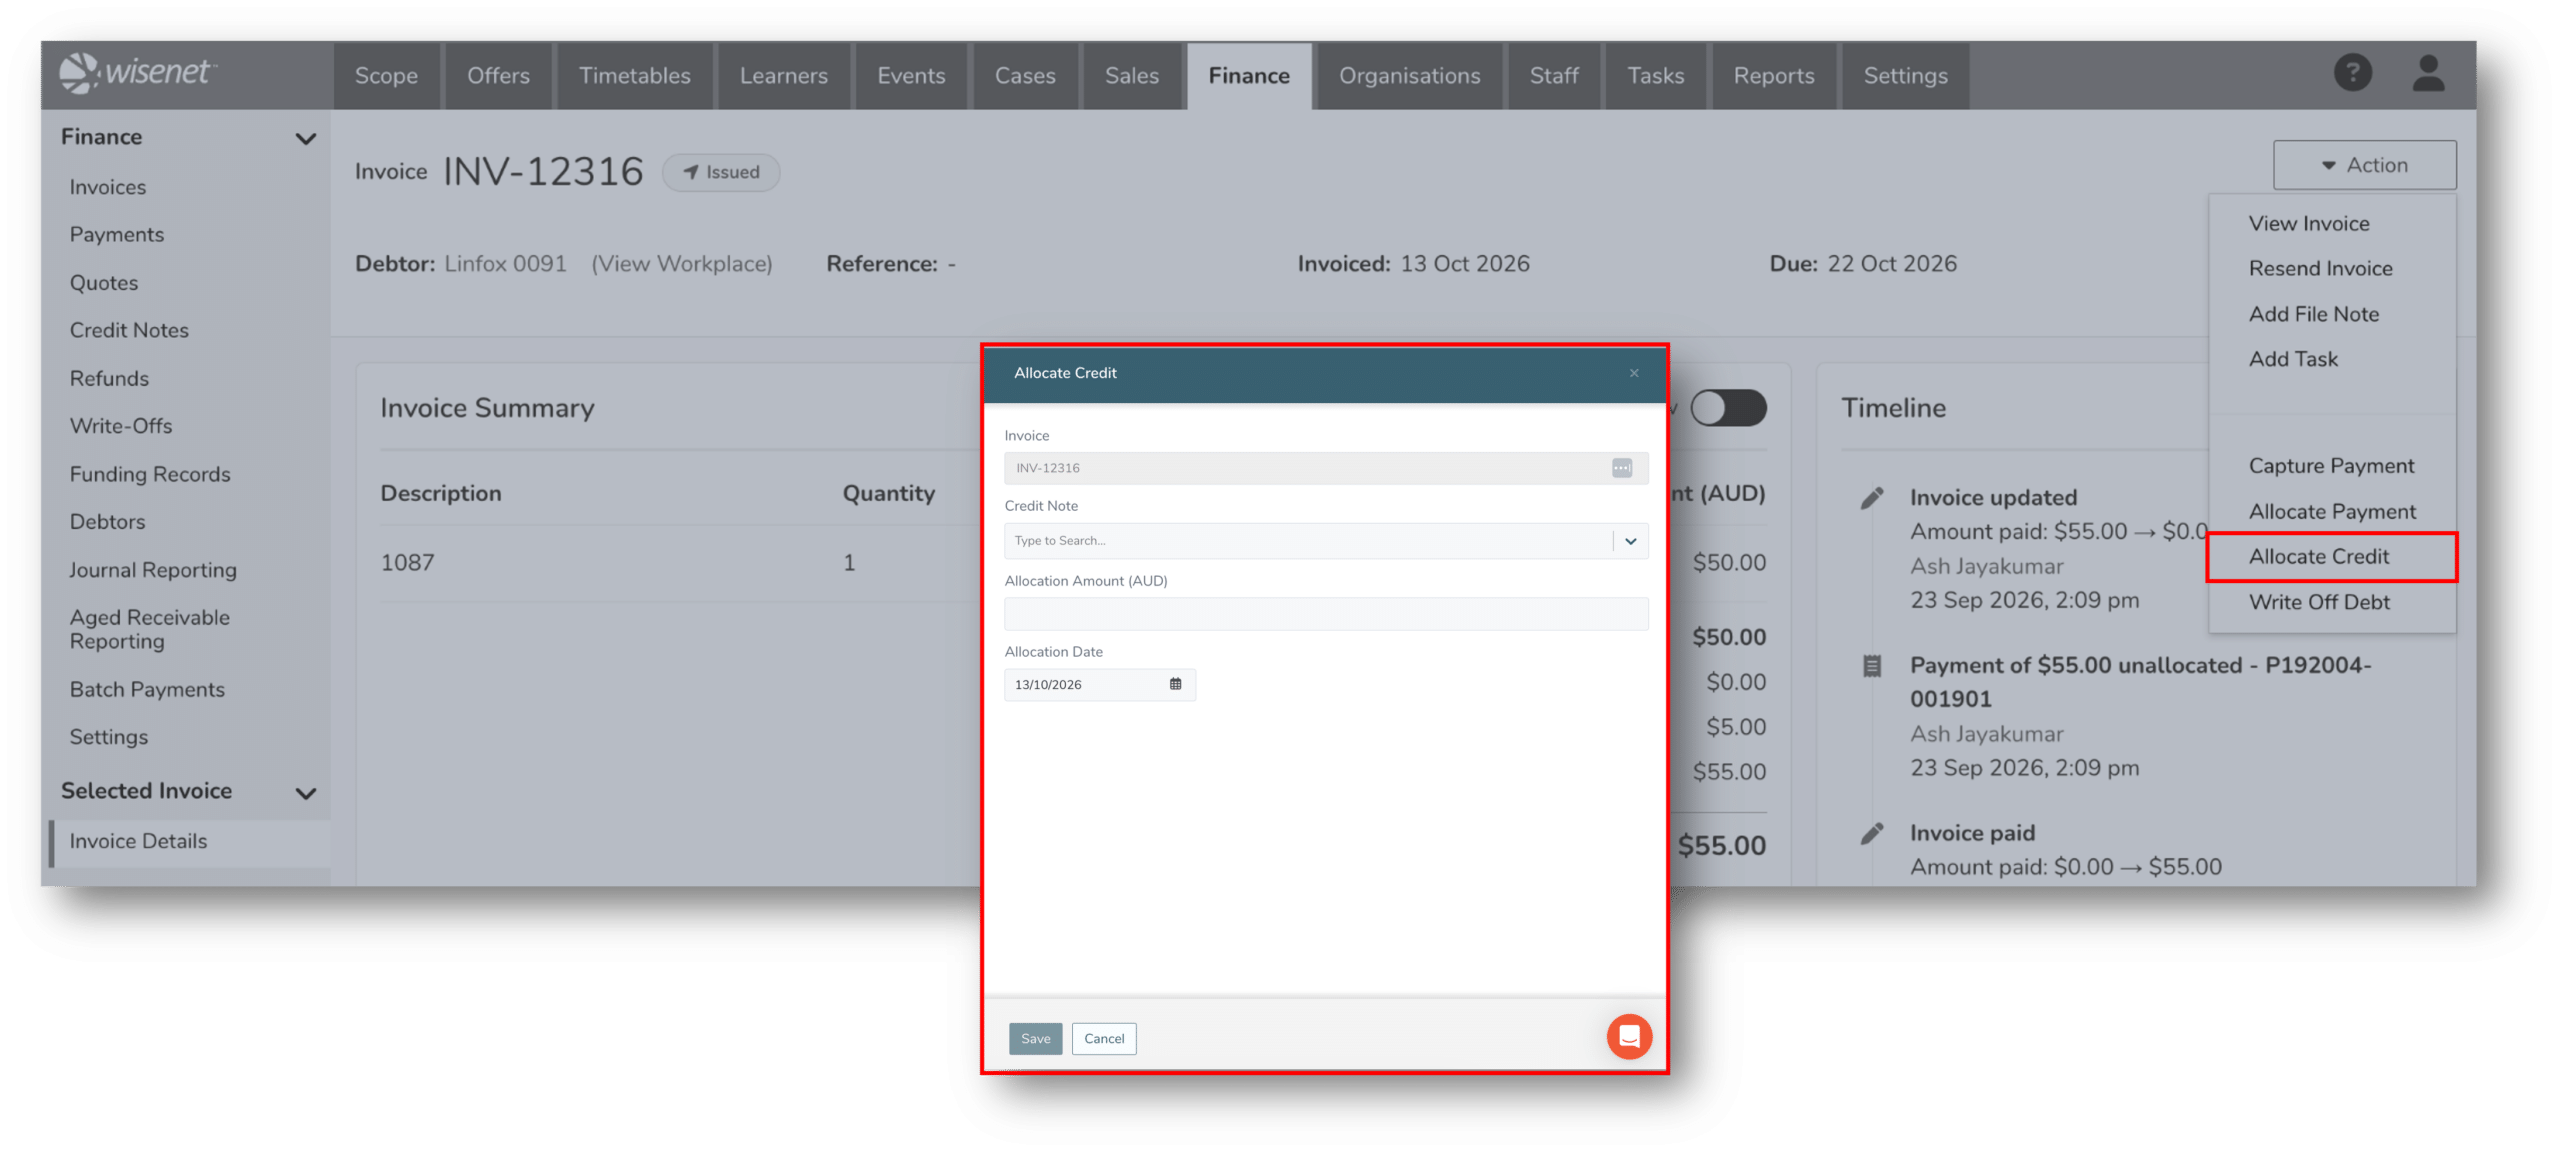
- Allocate Credit
- Write Off Debt
1
Capture a Payment
Capture a Payment directly against an Invoice when you have received payment for that Invoice.
Learn more: How to Add a Payment

2
Allocate a Payment
Allocate available funds from an existing Payment to the Invoice.
Payments can be allocated to one or more eligible Invoices for the same debtor.
Learn more: How to Allocate and Unallocate Payments

3
Allocate a Credit Note
Apply available credit from an Issued Credit Note to reduce the Invoice’s outstanding balance.
The Credit Note and Invoice must belong to the same debtor.
Learn more: How to Allocate and Unallocate Credit Notes
4
Write Off Debt
Write off all or part of an outstanding Invoice amount when you no longer expect to collect it.
You can process multiple write-offs against an Invoice, provided the total does not exceed its outstanding balance.
Learn more: How to Write Off an Invoice