
Payments can be captured directly against an Invoice or added independently from the Payments page.
When you capture a Payment from an Invoice, the Payment is associated with that Invoice as part of the workflow.
Alternatively, you can add a Payment without an Invoice and allocate it to one or more eligible Invoices when required.
1
Capture a Payment from an Invoice
- Navigate to LRM > Finance > Invoices.
- Select the relevant Invoice to open the Invoice Details page.
- Select Action > Capture Payment.
- Select the Payment Method.
- Enter the Amount Received.
- Enter the Payment Date.
- Add Notes, if required.
- Click Post.
- Review the details and confirm.
Note: The Payment Date must be after the Accounting Lockdown Date.

2
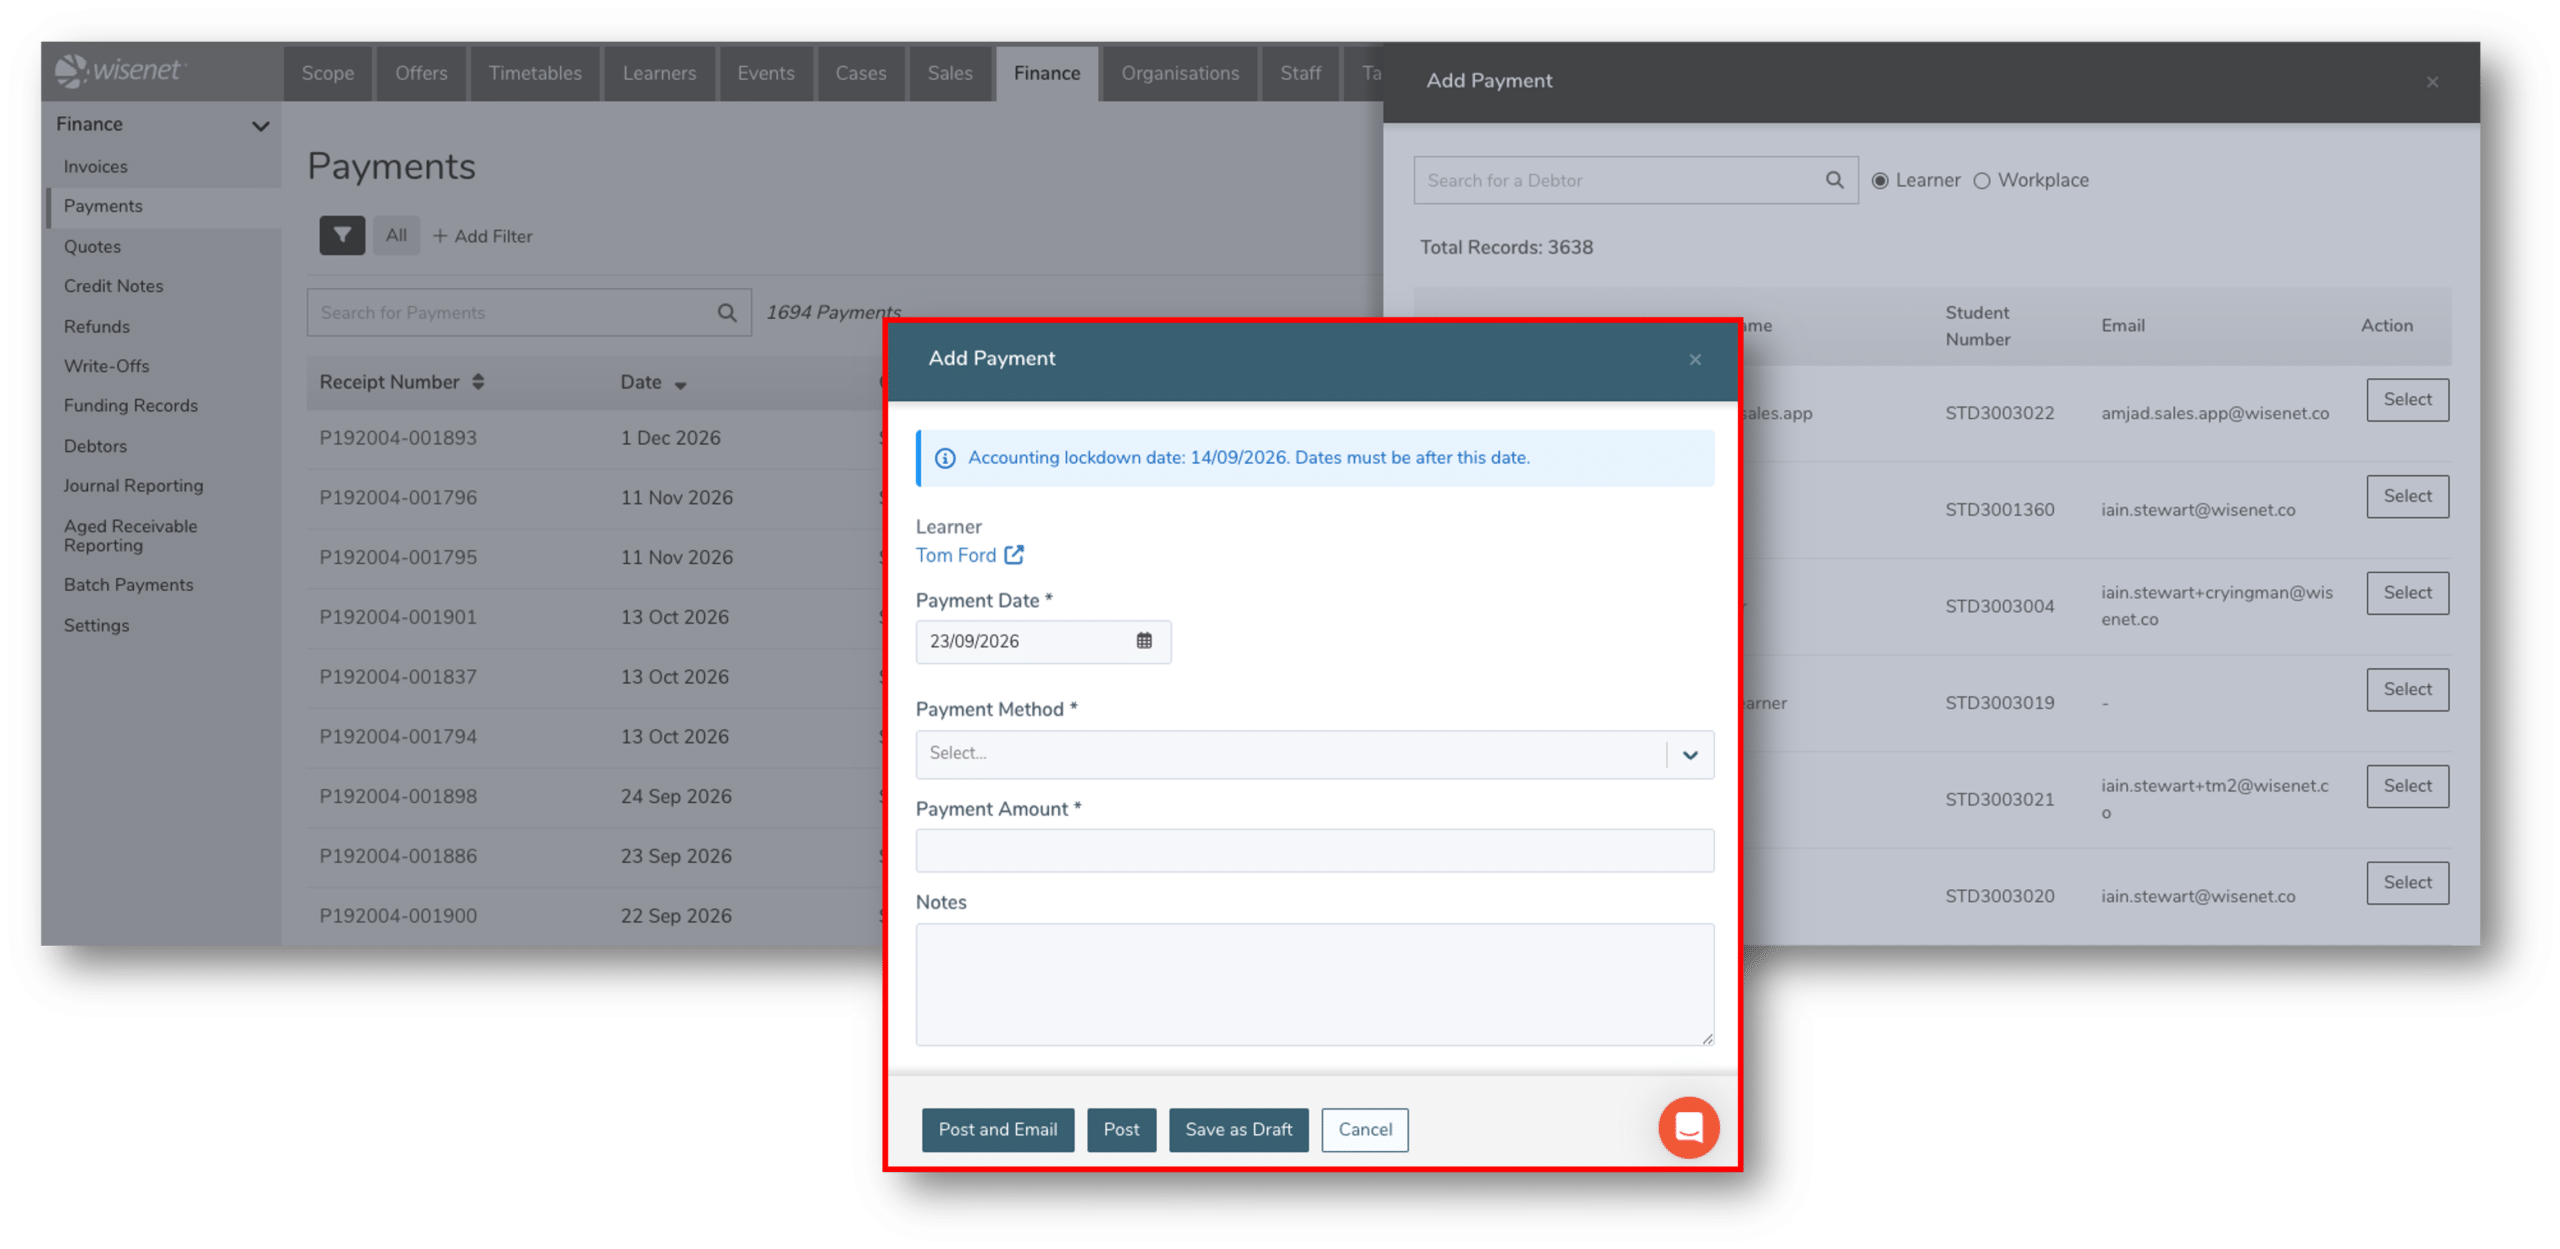
Add a Payment from Payments
- Navigate to LRM > Finance > Payments.
- Click Add Payment.
- Select whether the payment is from a Learner or Workplace.
- Search for and select the relevant Learner or Workplace record.
- Enter the payment details:
- Payment Date
- Payment Method
- Payment Amount
- Notes, if required
- Choose how you want to save the payment:
- Post and Email to post the payment and send a payment confirmation.
- Post to post the payment without sending an email.
- Save as Draft.
Note: The Payment Date must be after the Accounting Lockdown Date.
3
Edit a Draft Payment
- Navigate to LRM > Finance > Payments.
- Search for the relevant draft payment.
- Choose either of the following options:
- Click the Edit icon under Action on the Payments list page, or
- Click the Receipt Number to open the Payment Details page, then select Action > Edit Payment.
- The Edit Payment drawer will open.
- Update the payment details as required.
- Choose how you want to save the payment:
- Post and Email to post the payment and send a payment confirmation.
- Post to post the payment without sending an email.
Note: The Payment Date must be after the Accounting Lockdown Date.

Next step: Allocate the Payment
Payments added independently from the Payments page can be allocated to one or more eligible Invoices for the same Debtor.
You can choose how much of the Payment to allocate to each Invoice and leave any remaining amount unutilised for allocation later.