The Invoices page in Wisenet allows you to view and manage all invoices that have been created in Wisenet through Stripe or Pay-Gate payment pathway.
Once you familiarise yourself with how to search and view invoices, see how you can use the Invoice list for reporting and reconciliation in the Manage Invoice section below.
PLEASE NOTE! You can view individual invoices per Learner from the Learner > Finance page. The steps and instructions in this learn article are written to help you if you wish to see a list of all invoices. From the Invoices page, you can still click on the Learner name to navigate to the individual Learner > Finance page.
On the Invoices table a Debtor is either a Learner or a Workplace.
1
Search for an Invoice
- Navigate to LRM > Finances
- On the Left Navigation Bar, click on Invoices
A list of all your invoices appear on the Invoices page. Depending on how many invoices are listed on the page, for example if you have less than 20 invoices, it may be quicker to scroll through the list on the page to find the relevant invoice.
Otherwise, follow the guidelines below on how to search for an invoice.
The Search Bar
Use the Search Bar to search by:
- Debtor
- Invoice Number
- Reference
The Sort By function
Use the Sorting arrows next to a column header to sort by that column.
Filters
Add one or more Filters to filter the list of Invoices:
- Click + Add Filter
- From the list provided, select as many fields you want to filter by:
- Amount Credited
- Amount Discount
- Amount Owing
- Amount Paid
- Amount Tax
- Amount Total
- Course Code
- Course Description
- Course Offer Code
- Course Offer Description
- Debtor Internal Reference
- Debtor Name
- Due Date
- Invoice Number
- Invoice Reference
- Invoice Status
- Issue Date
- Subtotal
- Click Done when ready
- Optional: Click on the filter icon to save a filtered view.
2
View Invoices
View more details from your search results:
- Click on the Debtor to open the Learner or Workplace profile page
- Click on the Invoice Number to open the Invoice Details page
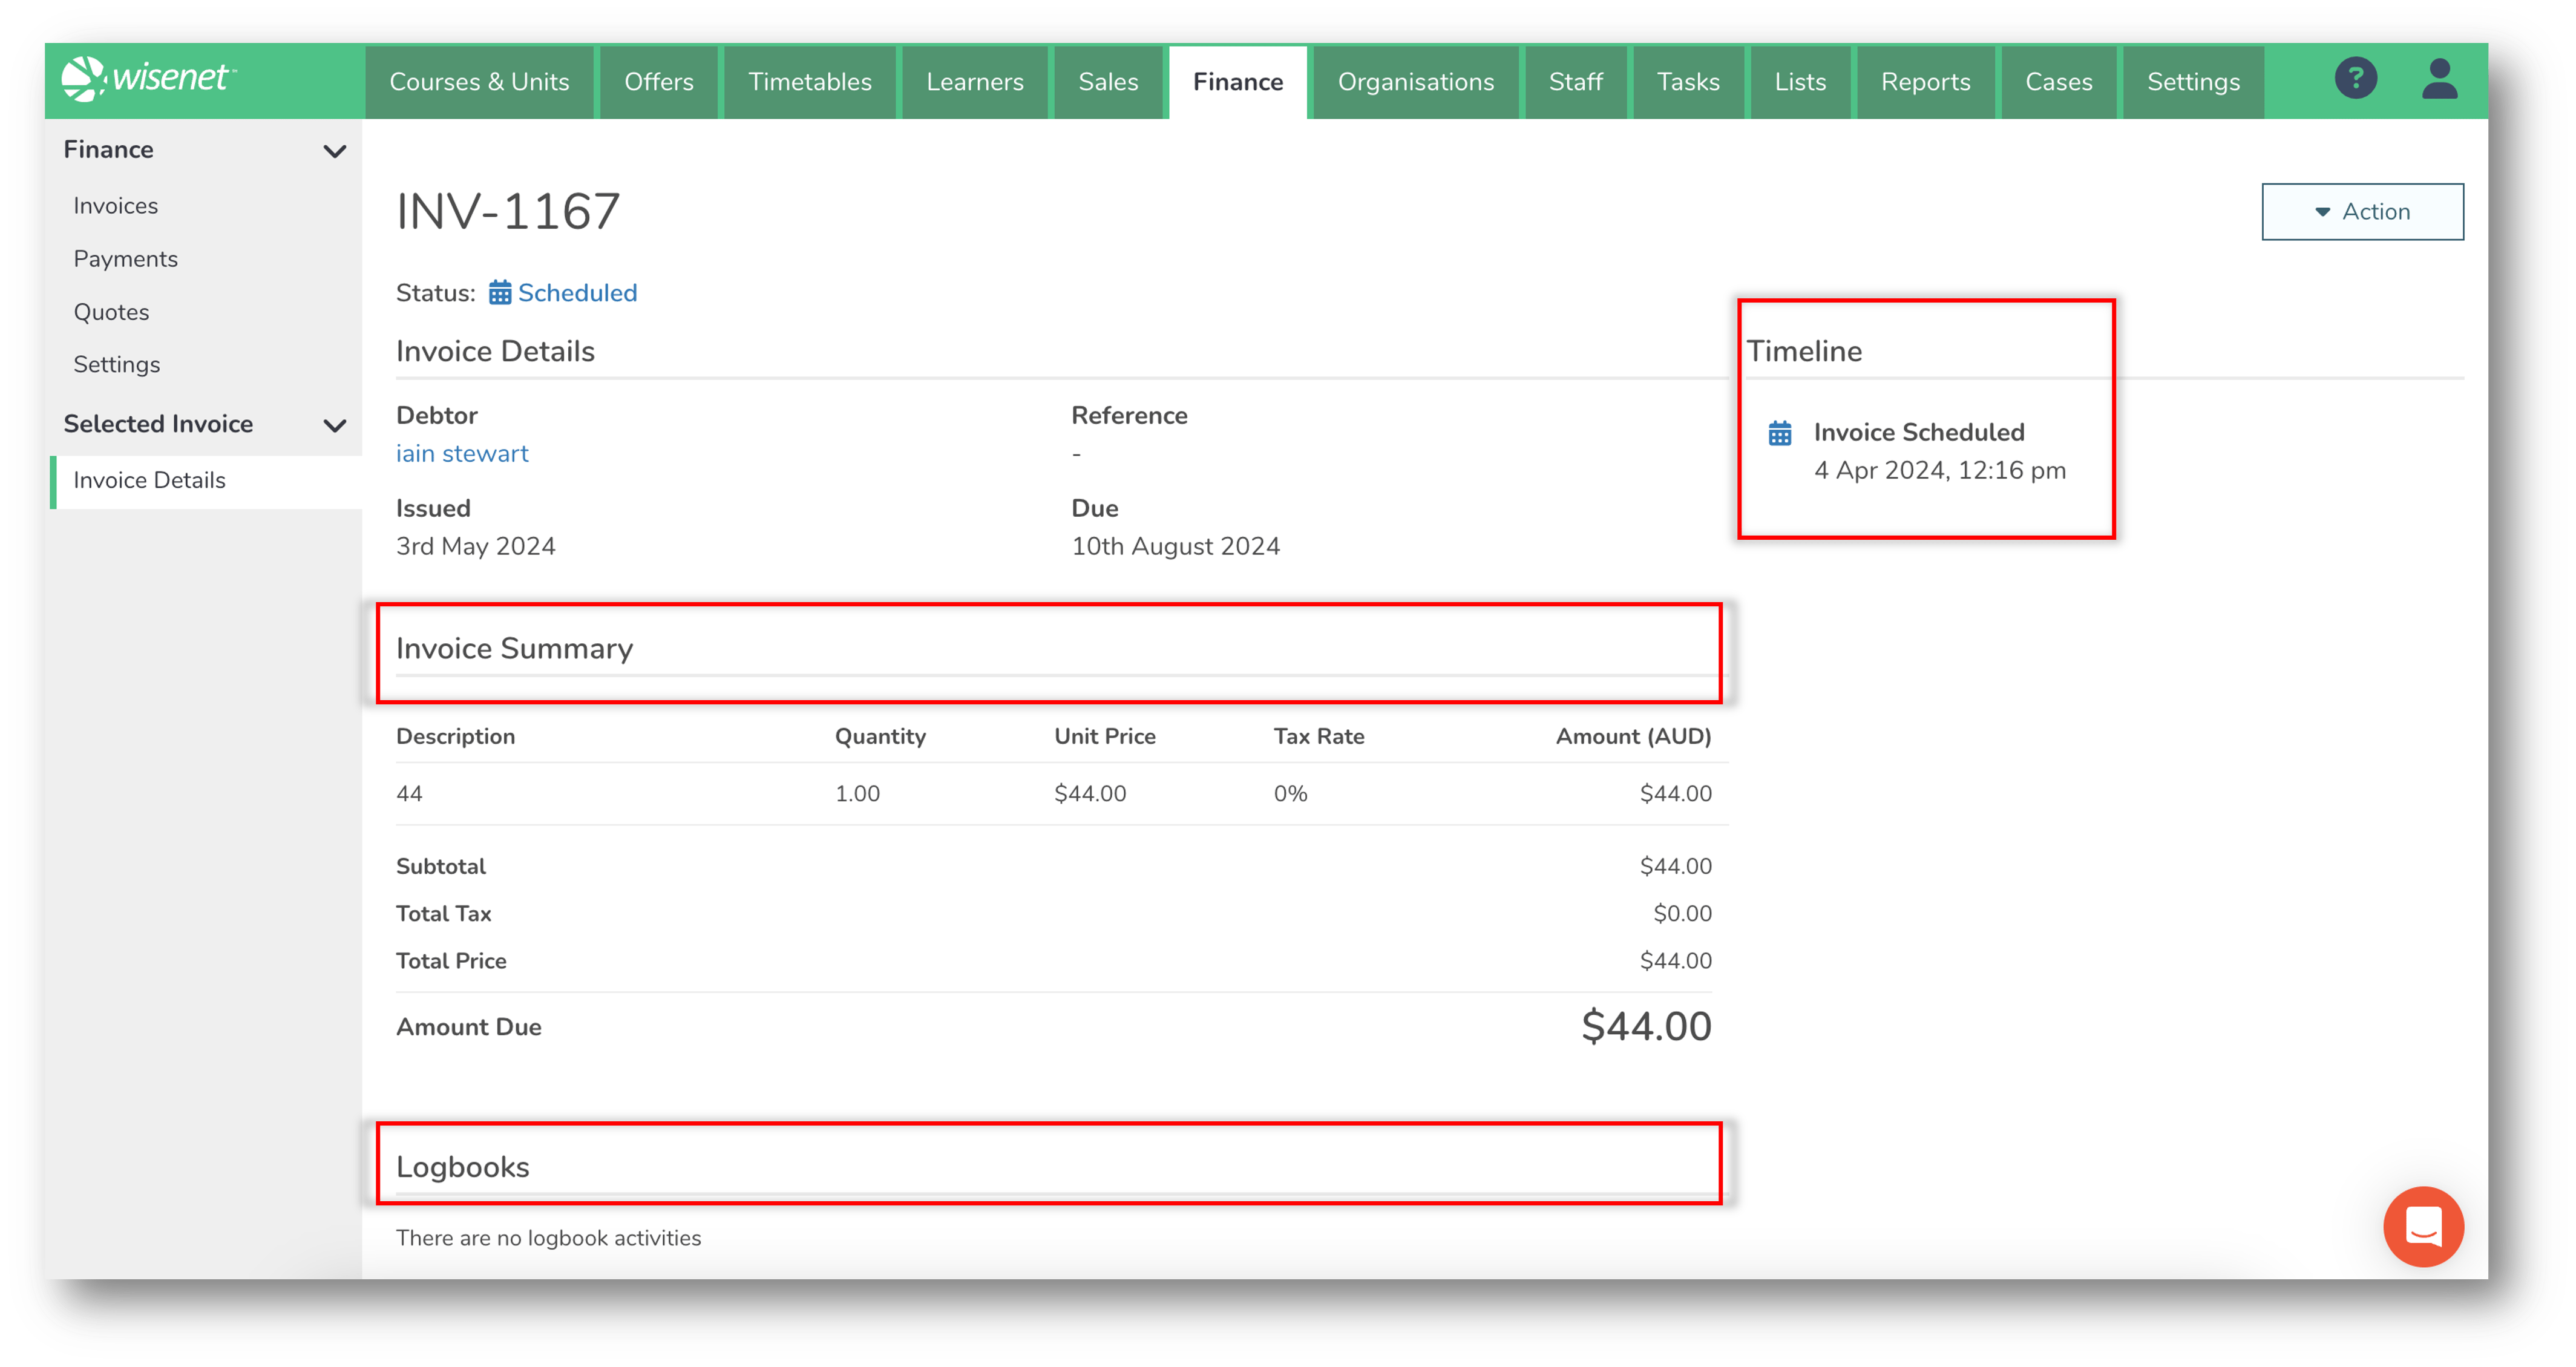
- Additional to quick details that are also visible on the Invoice table, on the Invoice Details page you will see:
- An Invoice Summary section showing the billing items
- A Logbooks section showing all logbook activities linked to the relevant invoice, i.e. Email sent, File Notes, Documents, etc
- A Timeline section showing date and time for when the invoice was:
- Scheduled
- Issued
- Paid
- Additional to quick details that are also visible on the Invoice table, on the Invoice Details page you will see:
3
Manage Invoices
Beyond the ability to open and view an invoice from the Invoices page, you can also manage invoices by using the following functionalities:
- Reconcile Invoice
- Resend Invoice
Reconcile Invoice
By using the filtered list function on the Invoices table, you can filter a list of Issued invoices to see amount paid and amount owing to help with comparing invoices from financial records.
Invoice reconciliation will guarantee accuracy and consistency in your financial reporting.
Resend Invoice
On the Invoices table, once you have searched and found the invoice you want to resend, simply click on the Resend icon in the Action column.
An email will be sent with the Invoice link for the recipient to view on the Invoice App.


