Finance Settings are required as a one-time step before you can start creating and managing any finance related features. For example, before you can start creating Quotes, this is where you define your organisation’s Quote Terms, as well as the email template that will be automatically applied to a quote when issued.
1
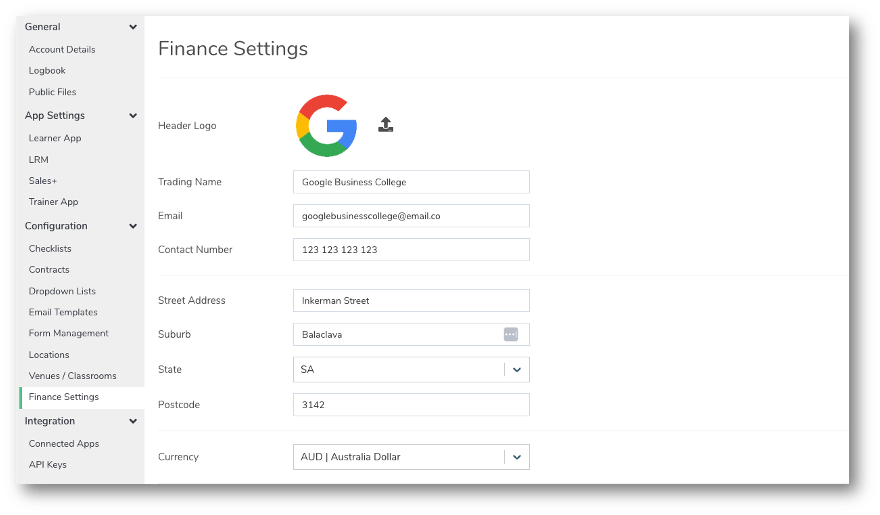
- Navigate to LRM > Settings
- In the Configuration Box, click on Finance Settings
2
Finance Settings
If you haven’t already done so, set the following Finance Settings which will reflect on your online quote page and PDF.
- Upload your logo
- Add your Trading Name
- Add all the required contact details, i.e. Contact Number and Address
- Select a Currency
- IMPORTANT NOTE! The currency set at the point of time will reflect on your issued quotes.
3
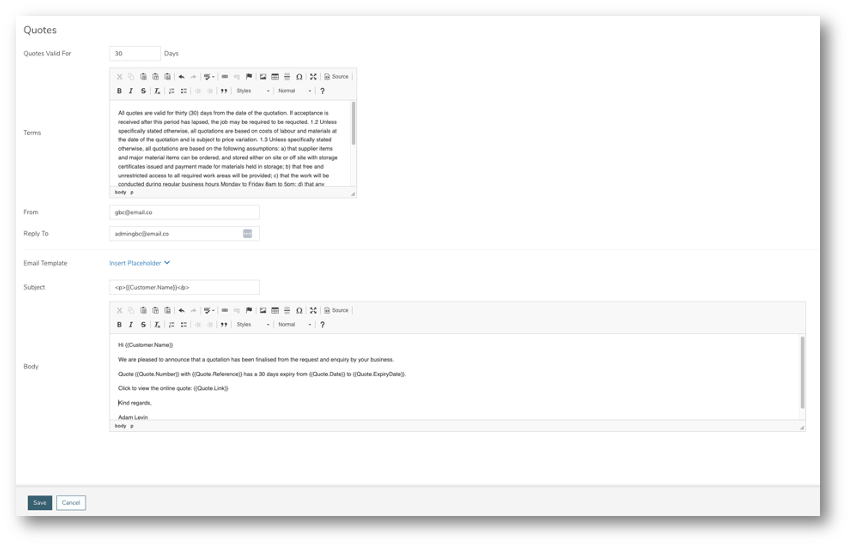
Quotes Settings
- Set the number of ‘Valid Days’
- Once the Number of Valid Days is set, when creating a new quote, the form will automatically calculate the ‘Quote Expiry Date’, defaulted to the number set here. However, please note that this default value can be overriden during quote creation.
- Use the text box to enter Terms that will apply to Quotes
- Terms are set against a quote at time of issue. Therefore, updating Terms in Settings will not affect already Issued/Accepted quotes.
- Enter the email address you want to send quotes from
- This is the email address that the recipient/customer will see in their inbox.
- Enter the email address you want the ‘Reply To’ to be
- It could be the same as the ‘From’ email address if you wish to
- Build your Email Template using the ‘Insert Placeholder’ functionality
- When a quote is issued and sent, the recipient/customer will receive an email with the quote link to view online


