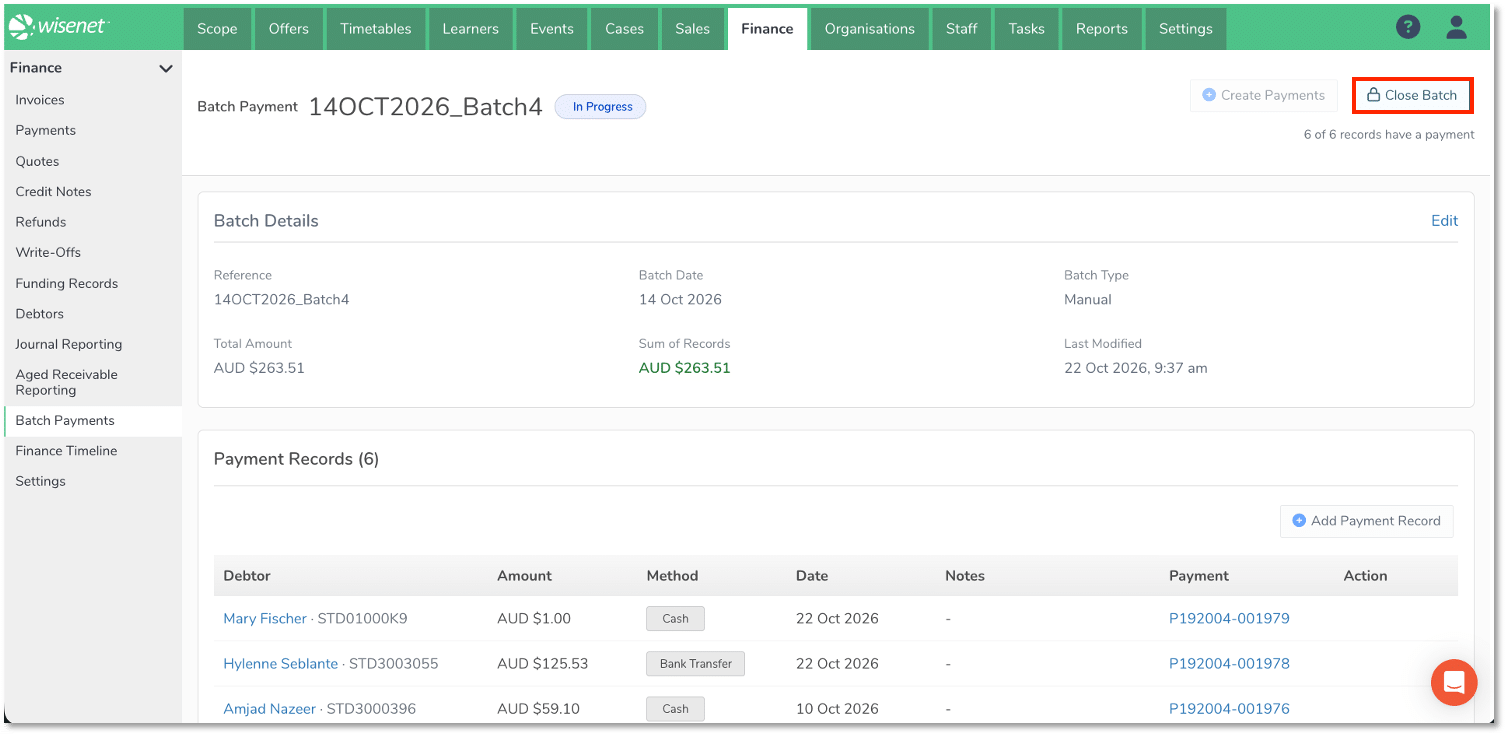
Use a manual batch to group payment records that you want to process together. A batch payment record is not a Finance Payment when you first add it. Wisenet creates a Finance Payment only when you create payments from the batch records.
This article covers manual batches. StudyLink payments follow a separate process; see How to view and manage StudyLink payments.
1
Create a batch
- Navigate to LRM > Finance
- From the left navigation menu, select Batch Payments
- Click Create Batch
- Enter a unique Reference and a Batch Date
- Enter a Total Amount. You can also enter or update it while the batch is In Progress.
- Click Create Batch
A batch created is set to Manual type and In Progress status. You cannot change its type. The batch date can be any date, and you can create more than one batch on the same day.
While the batch is In Progress, you can update its reference, batch date, and total amount. Creating the batch is recorded in the global timeline.

2
Add payment records to a batch
You can add payment records to a batch while it is In Progress and its type is Manual.
- From the Batch Details page
- Click Add Payment Record
- Select the appropriate Debtor
- Enter the Payment Amount, Payment Method, Payment Date and Notes
- Click Add to Batch
Note: A payment date can be any date; it is not checked against the accounting lockdown period when you add the record. You can edit the amount, payment method, payment date, and notes while the record is in the batch. You cannot edit the debtor on a manual batch payment record.
You can add multiple records for the same debtor. You can delete a batch payment record while it is in the batch and has not been used to create a payment.
Batch payment records in an In Progress batch are not Finance Payments, so they do not appear elsewhere in Wisenet, such as the Payments list.

3
Create Finance Payments from batch records
Before creating payments, check that each record you want to process has a debtor, payment amount, payment method, and payment date. You can create payments from some or all of the records in a batch and leave other records unlinked for later.
- From the Batch Payment Details Page
- Click Create Payments
- Review the debtor details
- Click Create Payments
- Choose Go to Payments list page to allocate payments to allocate them now, or
- Choose Continue to create the payments and allocate them later from the Payments list.
Allocate each payment to the appropriate invoice using the standard payment allocation process. A StudyLink payment can be allocated across eligible invoices for the same debtor.
Note: When you create a payment from a batch record, Wisenet creates a Finance Payment using the record’s debtor, amount, payment method, and date. The payment is set to Posted, and its Finance Payment Method is Manual.
If a record’s payment date is on or before the accounting lockdown date, Wisenet sets the Finance Payment date to the day after the lockdown date.

4
Close a batch
You can close a batch when all of the following are true:
- The batch contains at least one payment record.
- Every payment record has a debtor.
- A Finance Payment has been created for every payment record.
- The batch total equals the sum of all payment records in the batch.
Check the batch total before closing. Update it while the batch is In Progress if needed, then close the batch.
- From the Batch Payment Details Page
- Click Close Batch
- Choose Yes in the confirmation message to close the batch.
A closed batch has the status Closed. You cannot reopen it, edit it, or add more payment records. You can still view its batch and payment record details. Closing the batch is recorded in the global timeline.