Once you have set up your Quotes finance settings and adding Quote items in Dropdown Lists, you can start creating new quotes. Follow the steps below to create a new Quote in Wisenet.
1
Before you being
If you have not already done so, make sure you have set up the followings before you proceed with creating a new quote:
2
Create New
- Navigate to LRM > Sales
- On the Left Navigation Bar, click on Quotes
- On the right hand corner of the Quotes page, click on the Action Menu
- Click New Quote
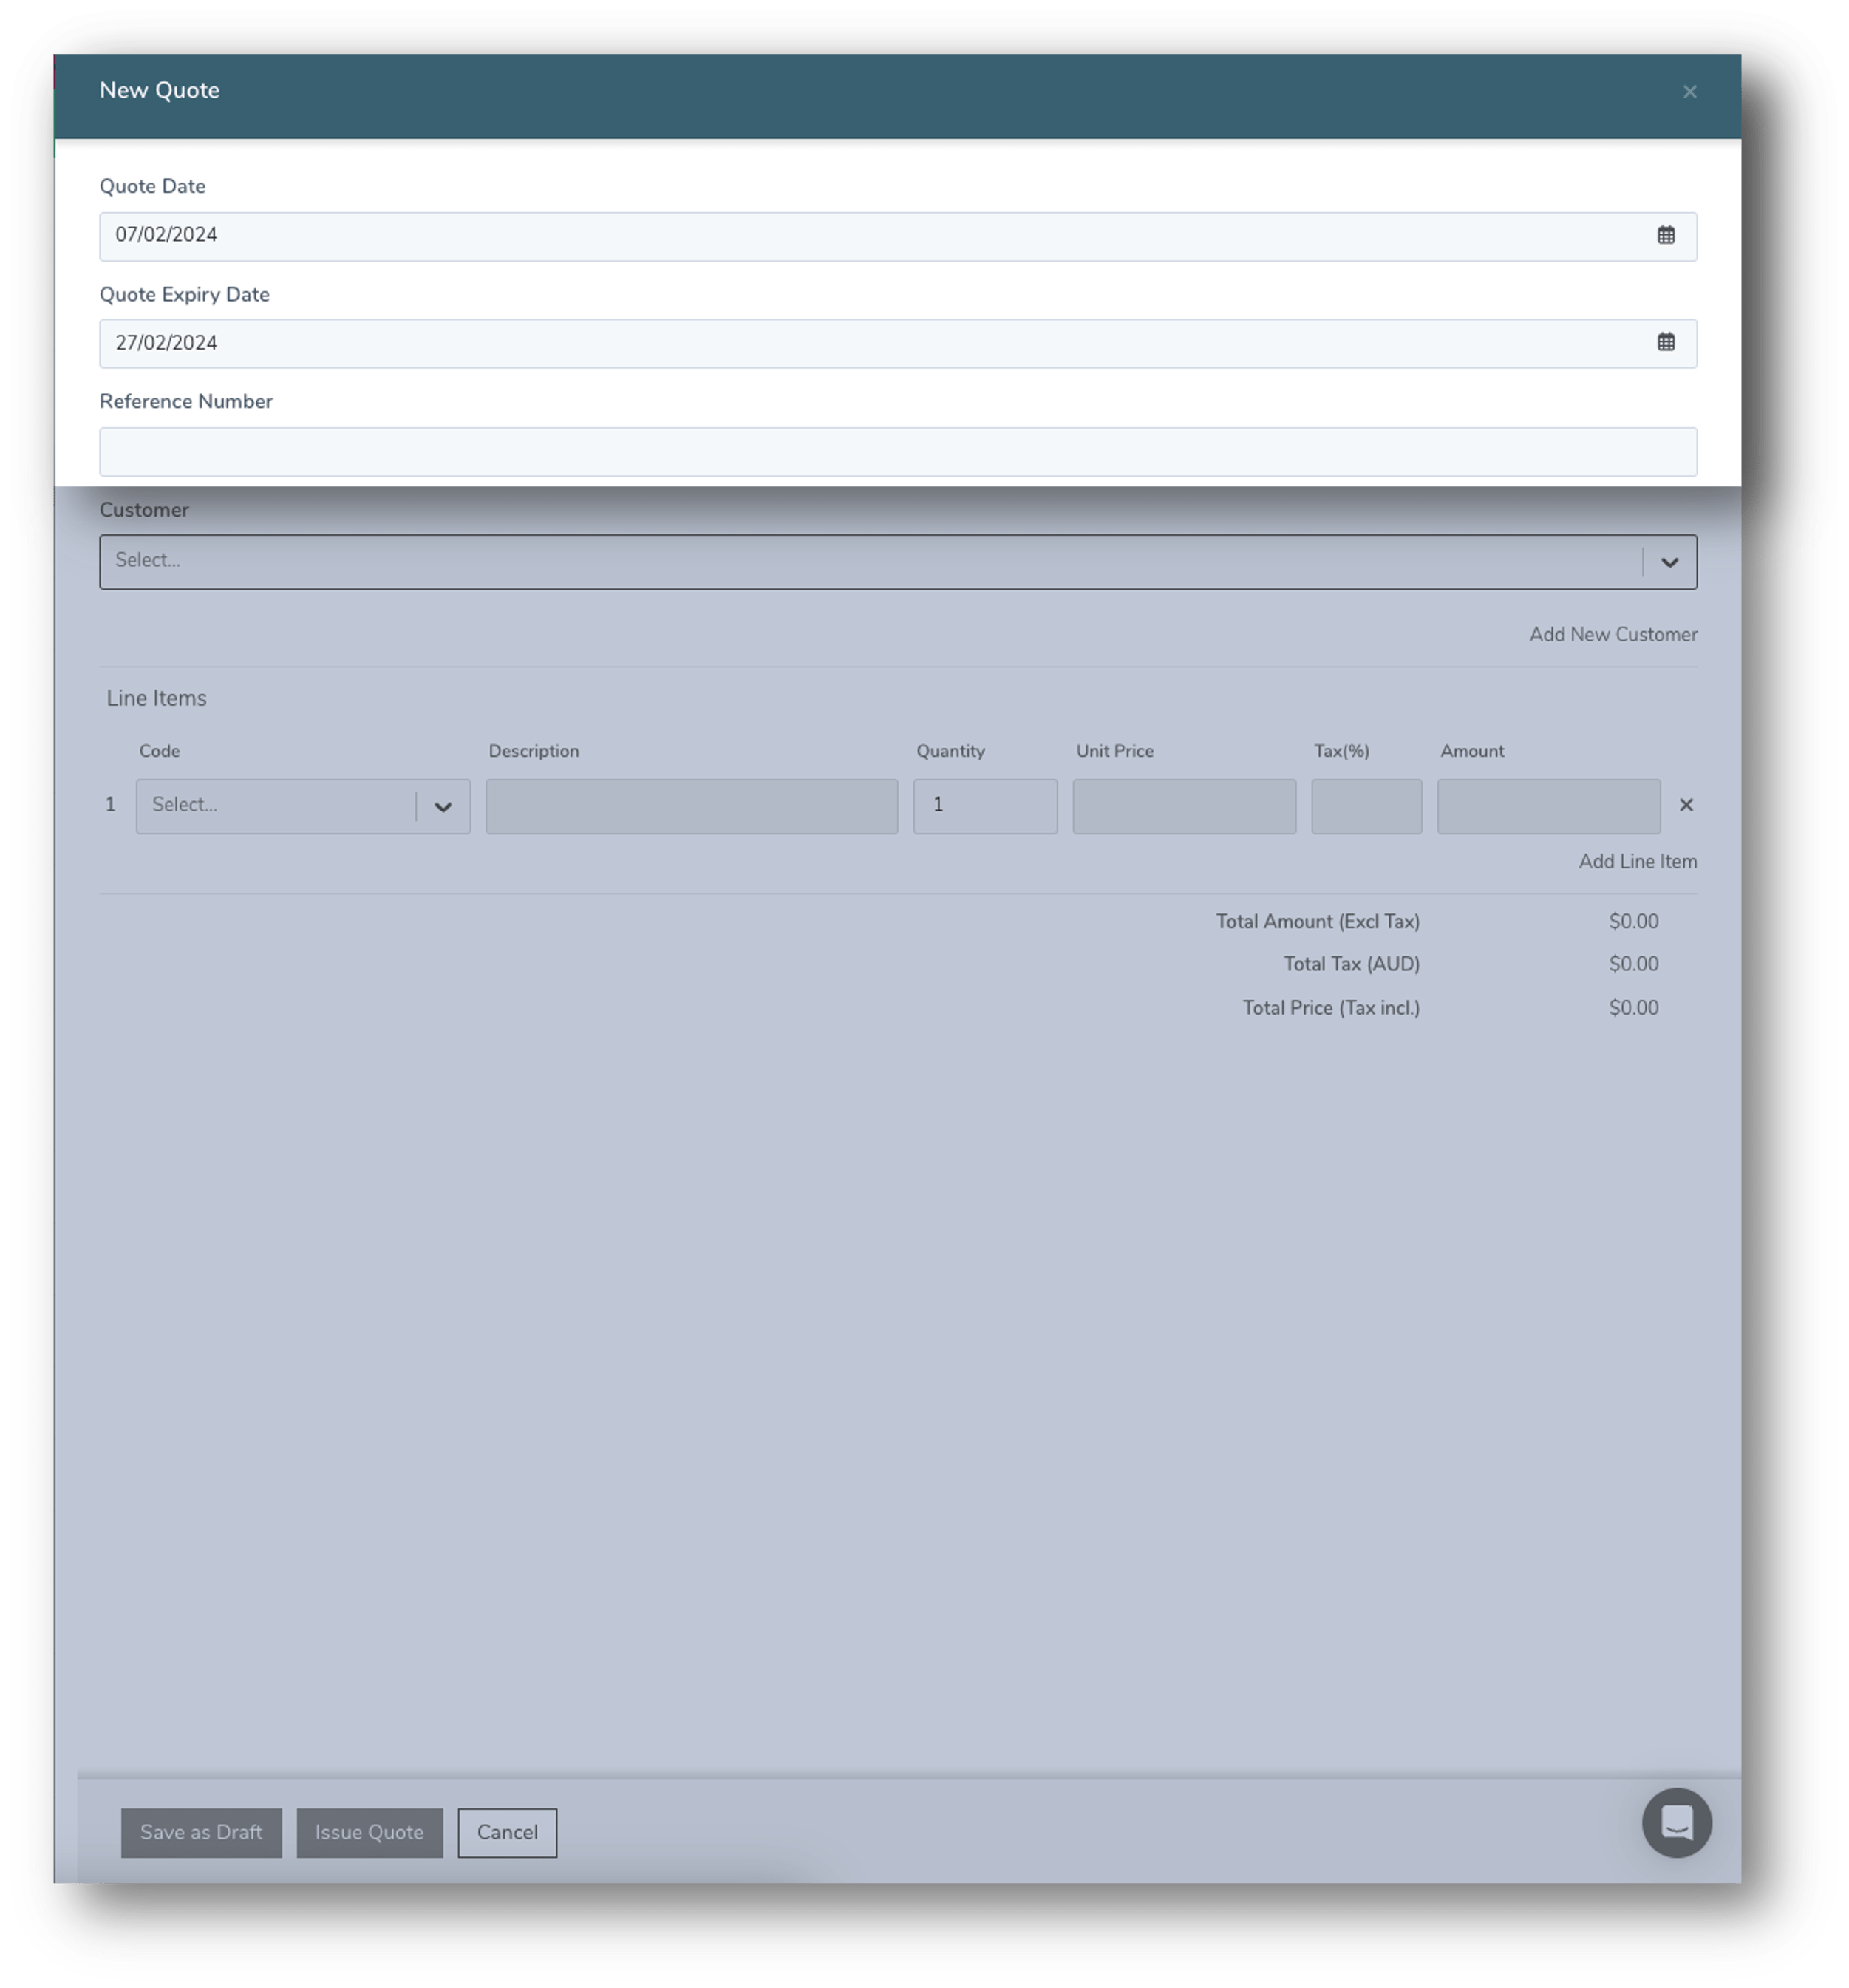
- A “New Quote” form will slide out from the left of the screen
5. The Quote Date field will auto-populate the date you are creating the quote. This date will be shown as the “Issue Date” on the online Quote
- The Quote Date can be changed to a future date if required, however if you are issuing/sending the quote today, please remember that the Quote Expiry date will be calculated from the Quote Date and not on the date that the quote was sent.
6. The Quote Expiry Date field is auto-populated. It is auto-calculated from the “Quote Valid Days” field you initially set up in the Quotes Settings page.
- The Quote Expiry Date can be changed to a custom date if required.
7. Enter a Reference Number
- This will appear on the online quote for both the customer and you to see
3
Add Customer
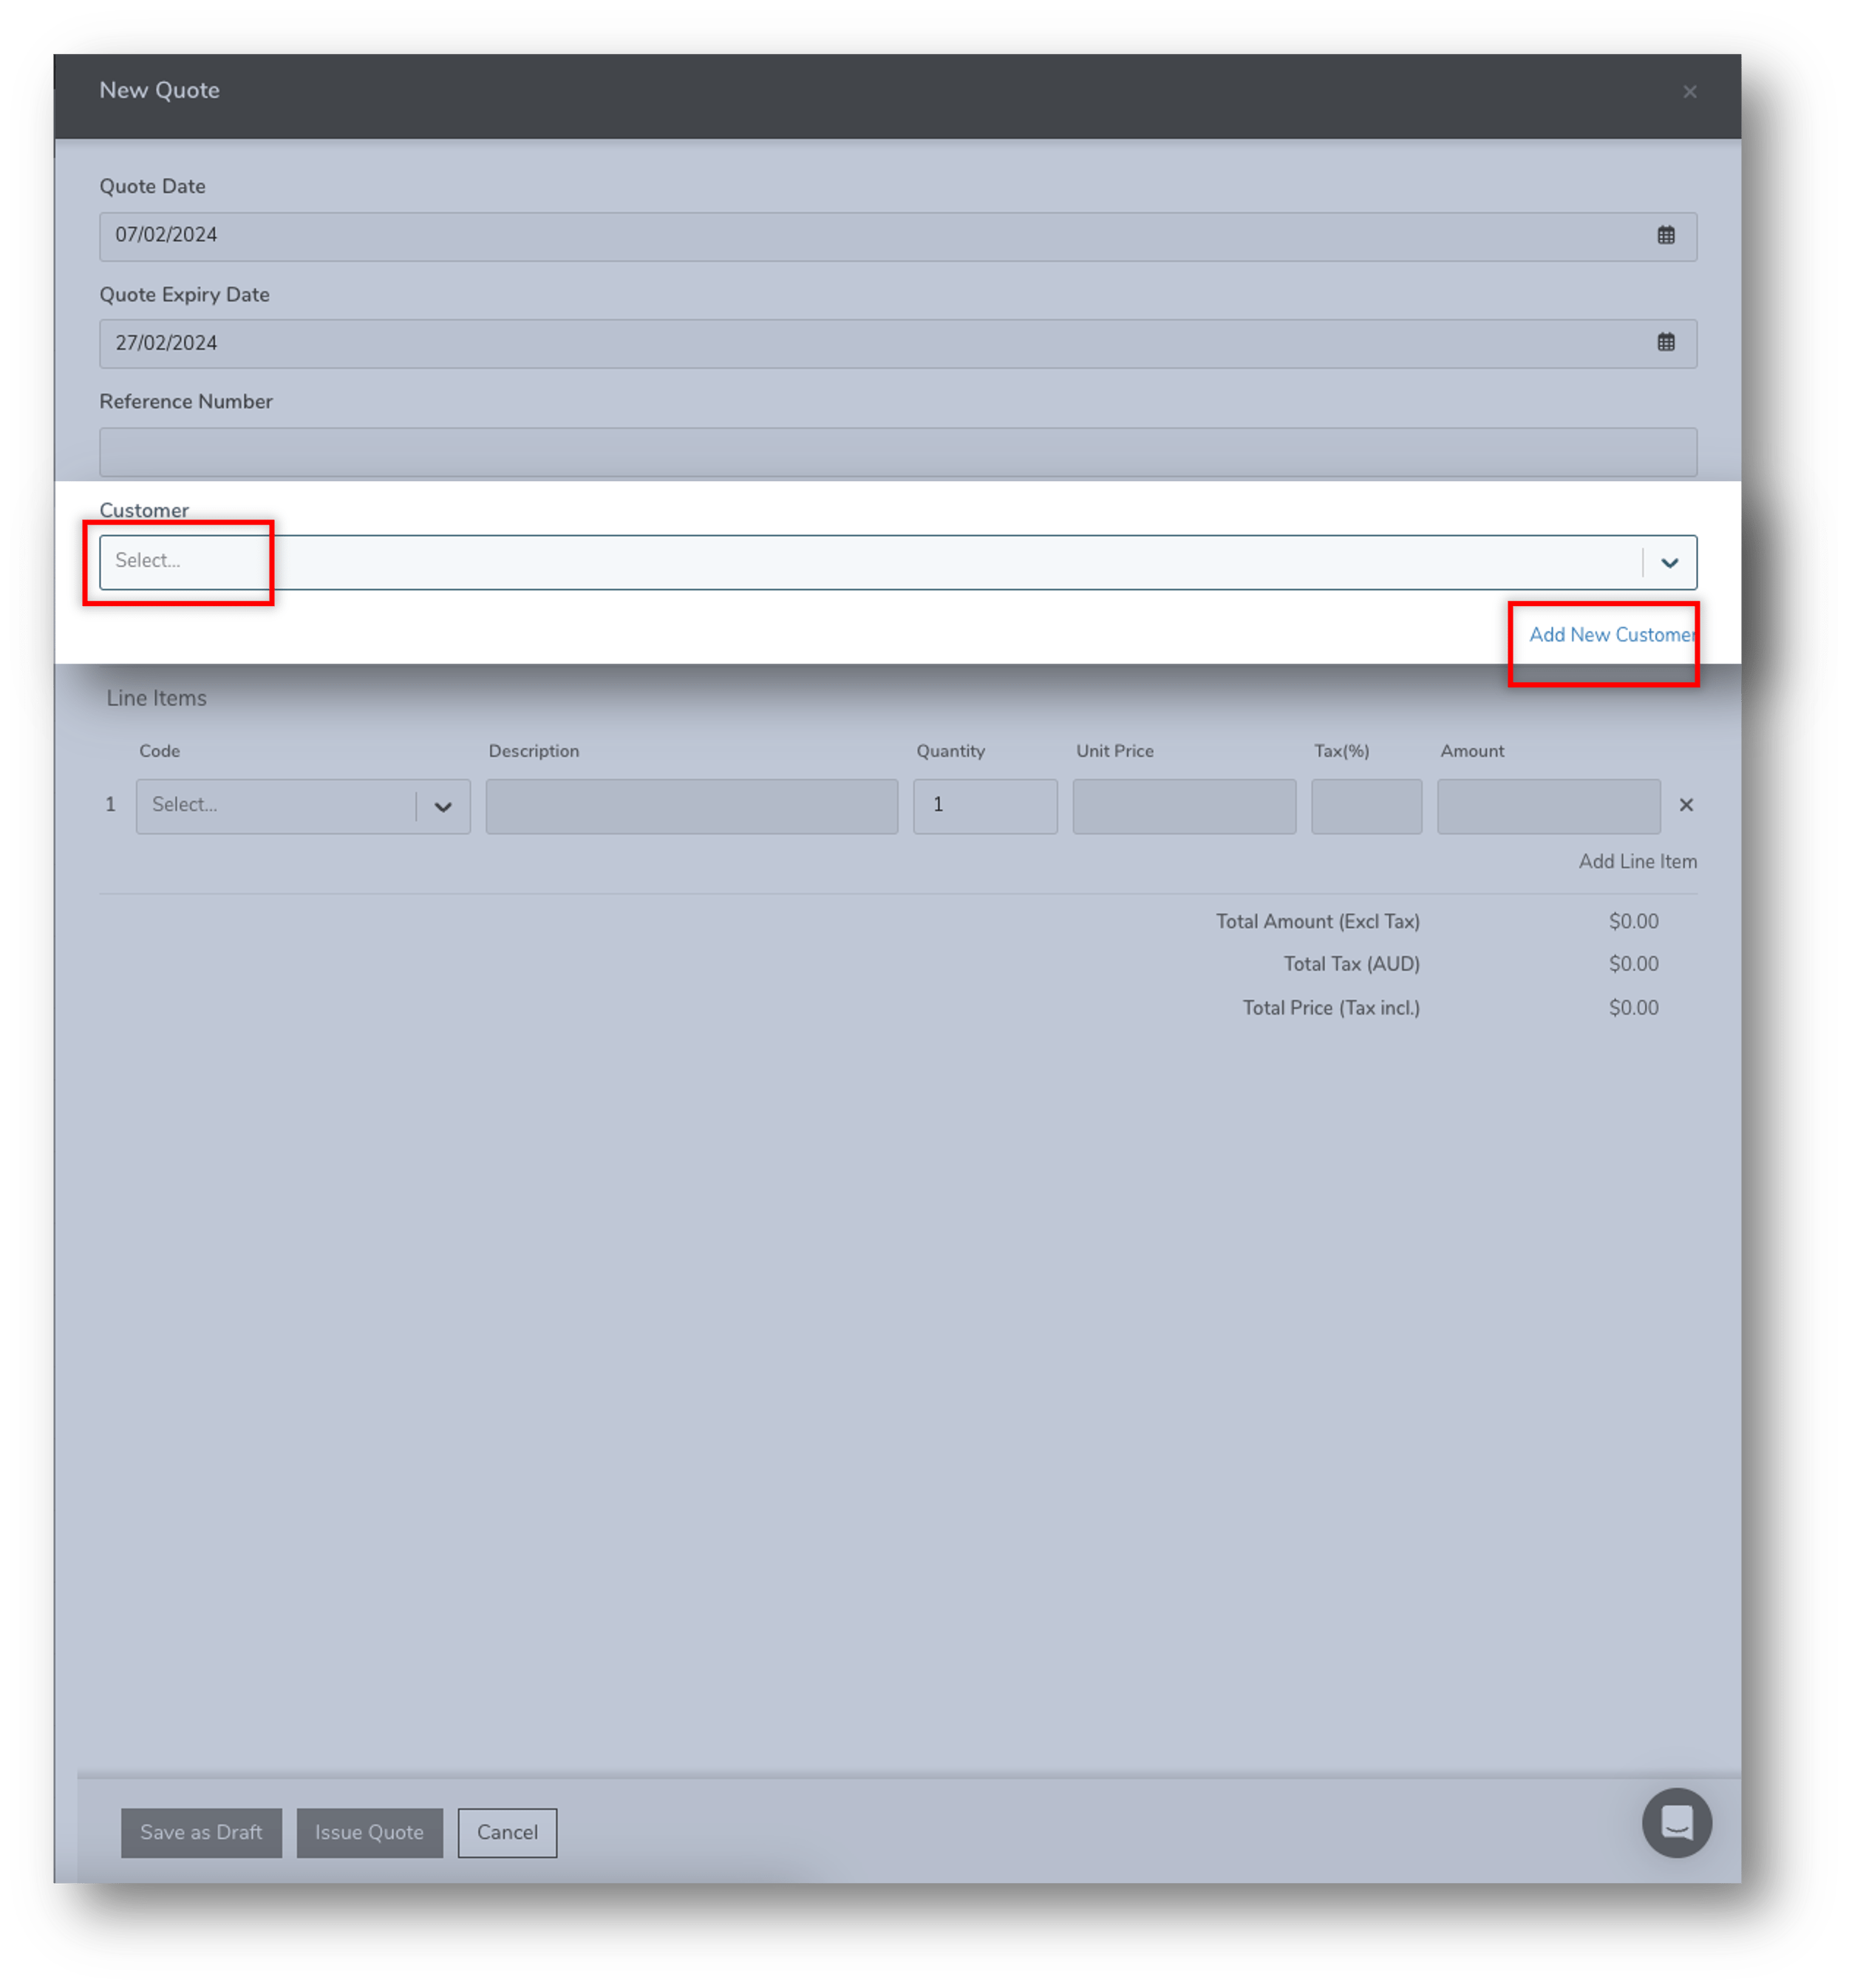
- Either, select from a list of existing customers by clicking on the Customer dropdown field
- Or, click Add New Customer
- Select a Customer Type
- A Customer can be an individual or a business
- A different set of fields will appear for each customer type, add details as required
- Click Save once you have created a new customer
- The newly created customer will now appear in the Customer field
- Select a Customer Type
4
Add Line Item(s)
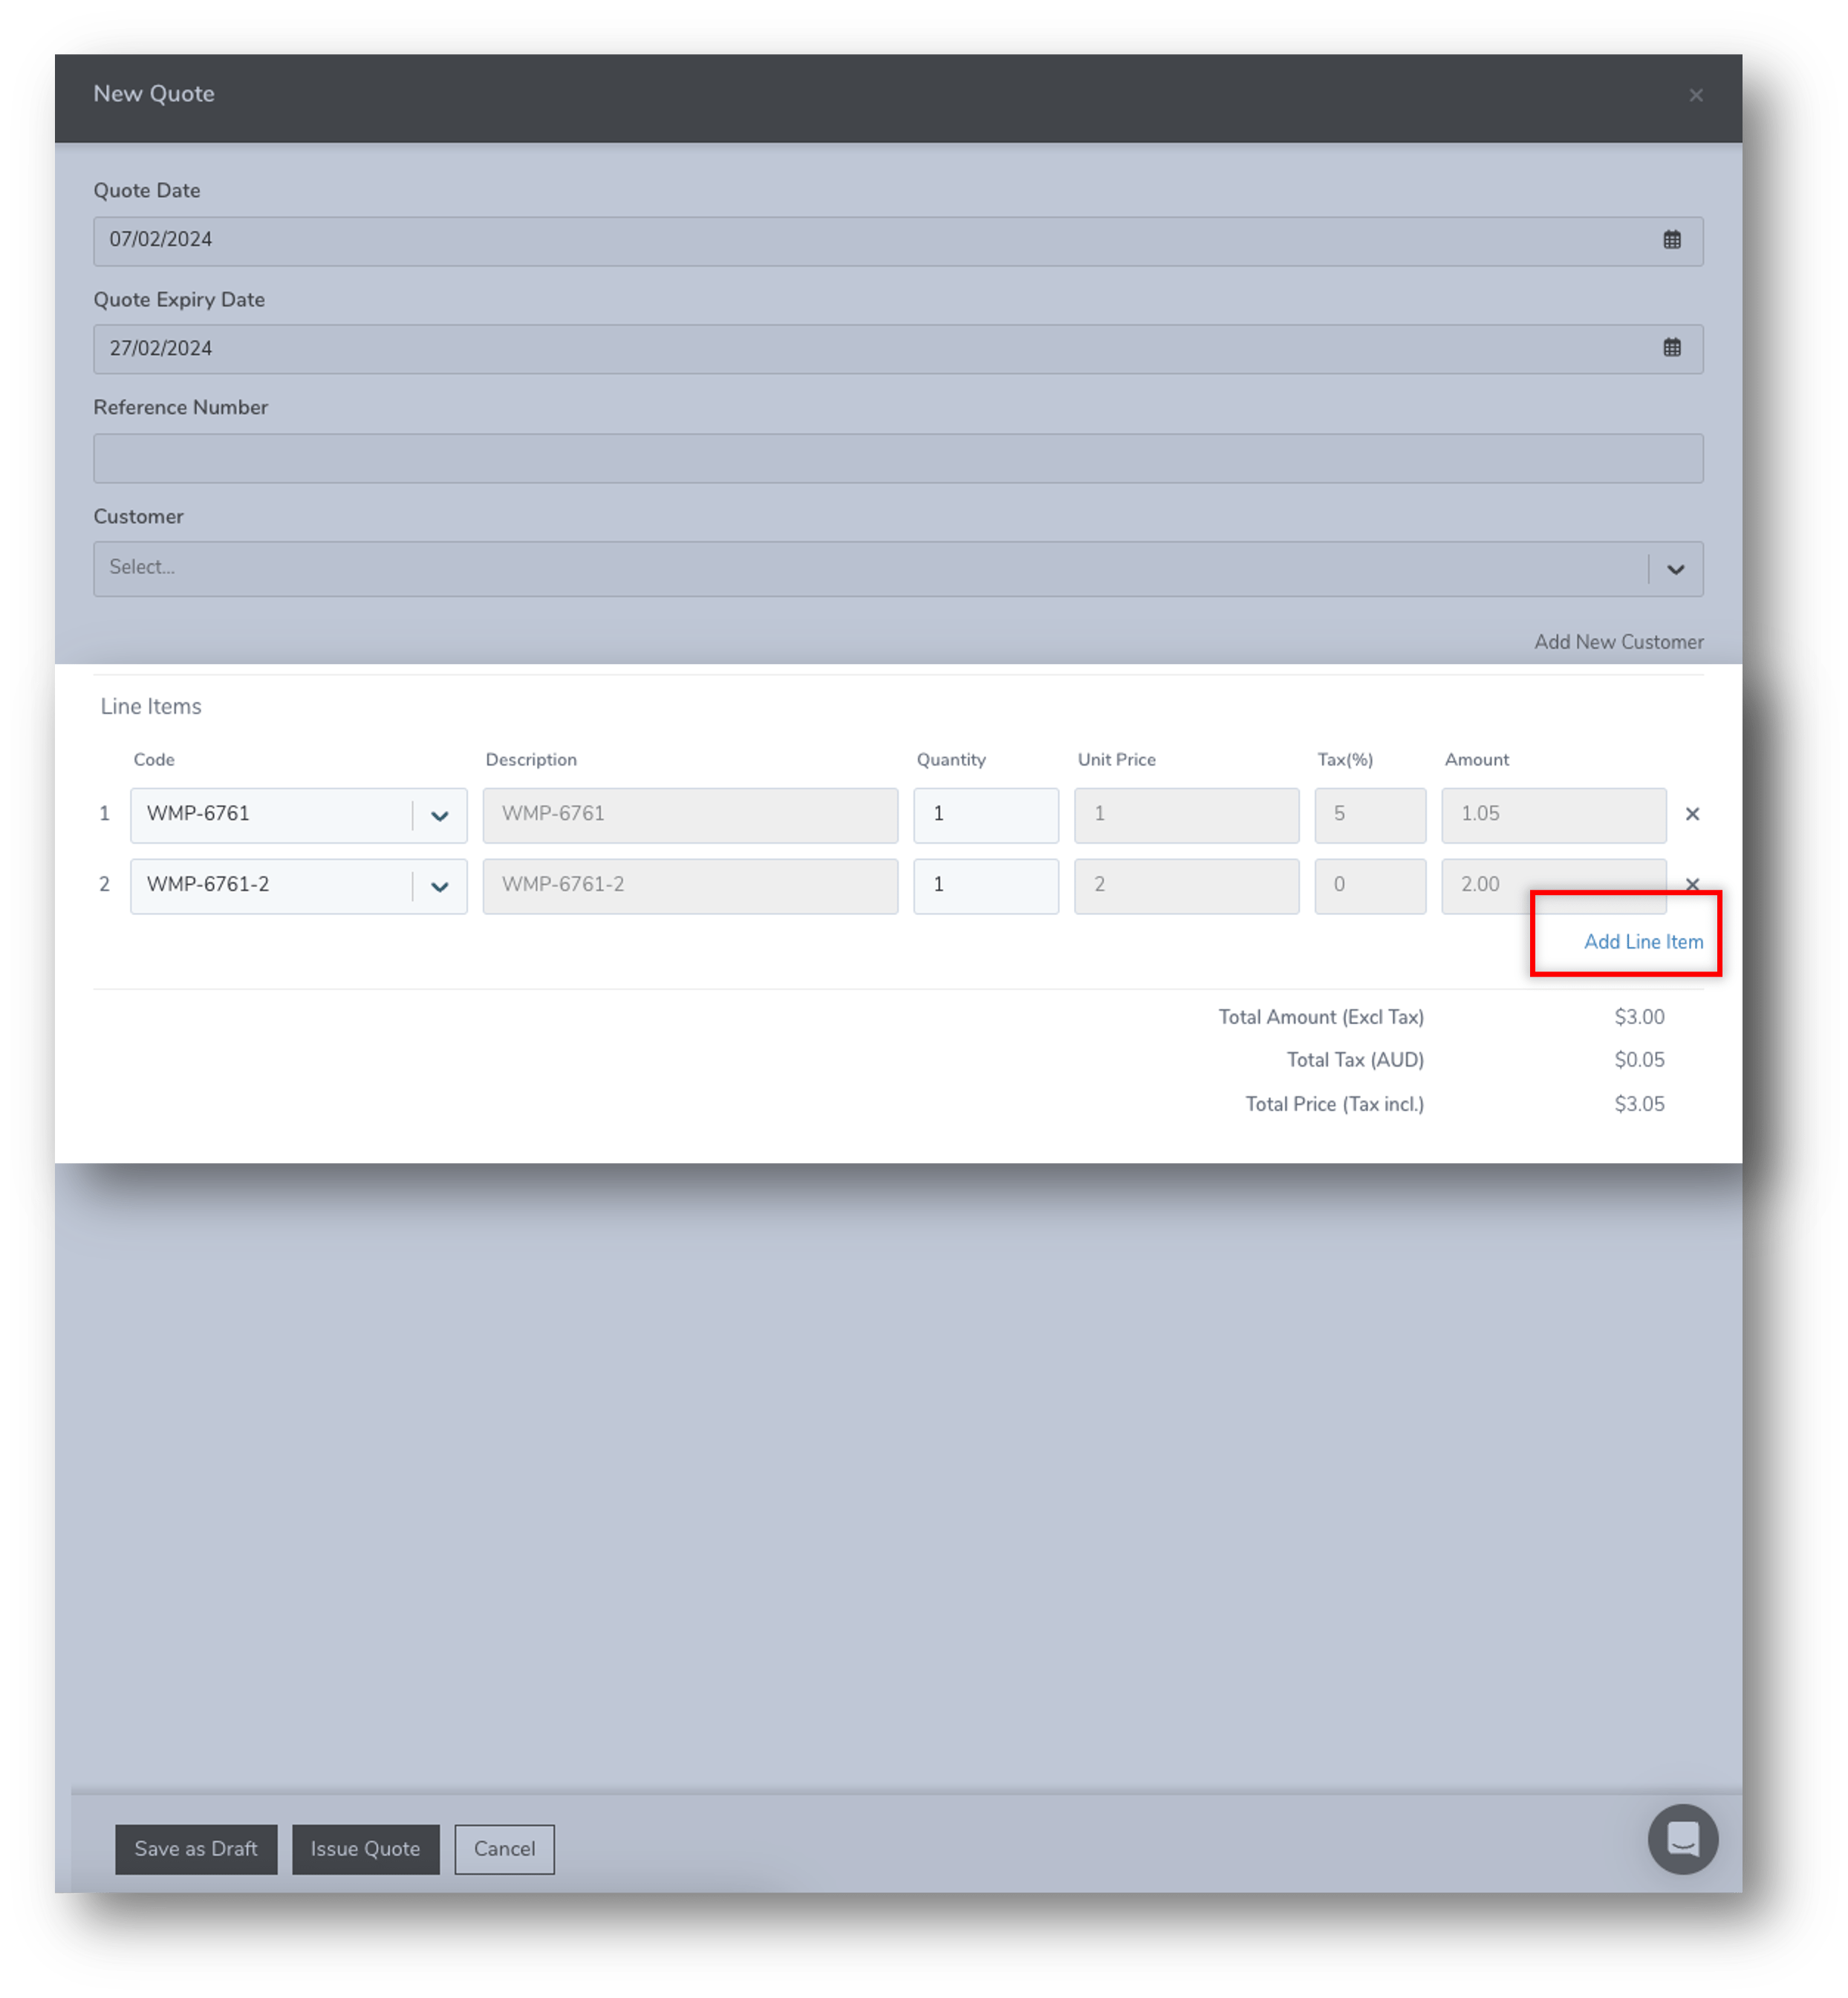
- Click Add Line Item
- Select your line items from the Code dropdown.
- NOTE: If the Code dropdown is empty, it means that you have not set up Quote Items in the Dropdown List yet.
- The Total Amount, Total Tax and Total Price will be auto-calculated and displayed on the form for you to review
- If you need to remove an item, simply click on the X next to the relevant item you want to remove from the list
- PLEASE NOTE: You cannot edit a line item from the form
5
Save or Issue
- EITHER, choose Save as Draft if the newly created quote needs further editing before finalising
- Saving as draft means:
- The quote can be edited anytime as required
- It can be deleted if no longer required
- Saving as draft means:
- OR, choose Issue Quote if the new quote is finalised and ready to be sent to the customer
- A pop-up message box will appear to notify you that by proceeding you are about to send the quote to the customer
- Click Send or Cancel
- Clicking Send:
- updates the quote status to “Issued” on the Quotes page
- sends the quote link as an instant email to the customer
- Get an insight into how customers view and interacts with Online Quotes via the Invoice App
- Clicking Send:


