You can now connect to Elearning applications like Canvas to establish a two-way integration to sync Elearning Courses, Elearning Enrolments and Grade. All Elearning management is configured from within the Wisenet app.
Setting up your Elearning Integration should be a one time process. To reach the milestone of streamlined automation, some complex setup is required. Follow the steps below comprehensively. If you do not see the option to connect to Canvas on the LRM > Settings > Connected Apps page then log a support request.
Steps to setup Canvas API
C1
Canvas Developer Key
Go to Admin > Select the relevant Account > Developer Keys
- On the top right corner, Click + Developer Key
- Select + API Key
Enter the following compulsory Key Settings:
- Key Name – i.e. Wisenet Authentication Key
- Owner Email – This email address will receive important updates related to this integration key. You might want to use the main Elearning Administrator’s email address.
- Redirect URIs – You MUST enter the URI as follow: https://lrm.wisenet.co/organisation/connected_apps/canvas/oauth
- Redirect URI (Legacy) – You MUST enter the URI as follow: https://lrm.wisenet.co/organisation/connected_apps/canvas/oauth
- Leave the Enforce Scopes toggle button OFF
- Click Save
- You will now see the API Key details in the Developer Keys Account tab
- The 18 digits number under the Details column is your Key Id – copy/record the Key Id
- Under the Details column, Click Show Key to see your Secret Key – copy/record the Secret Key
- Under the State column, Click the ON button to activate the account key
Steps to connect Canvas in Wisenet:
W1
- Ensure you are the Portal Admin and Owner in Wisenet
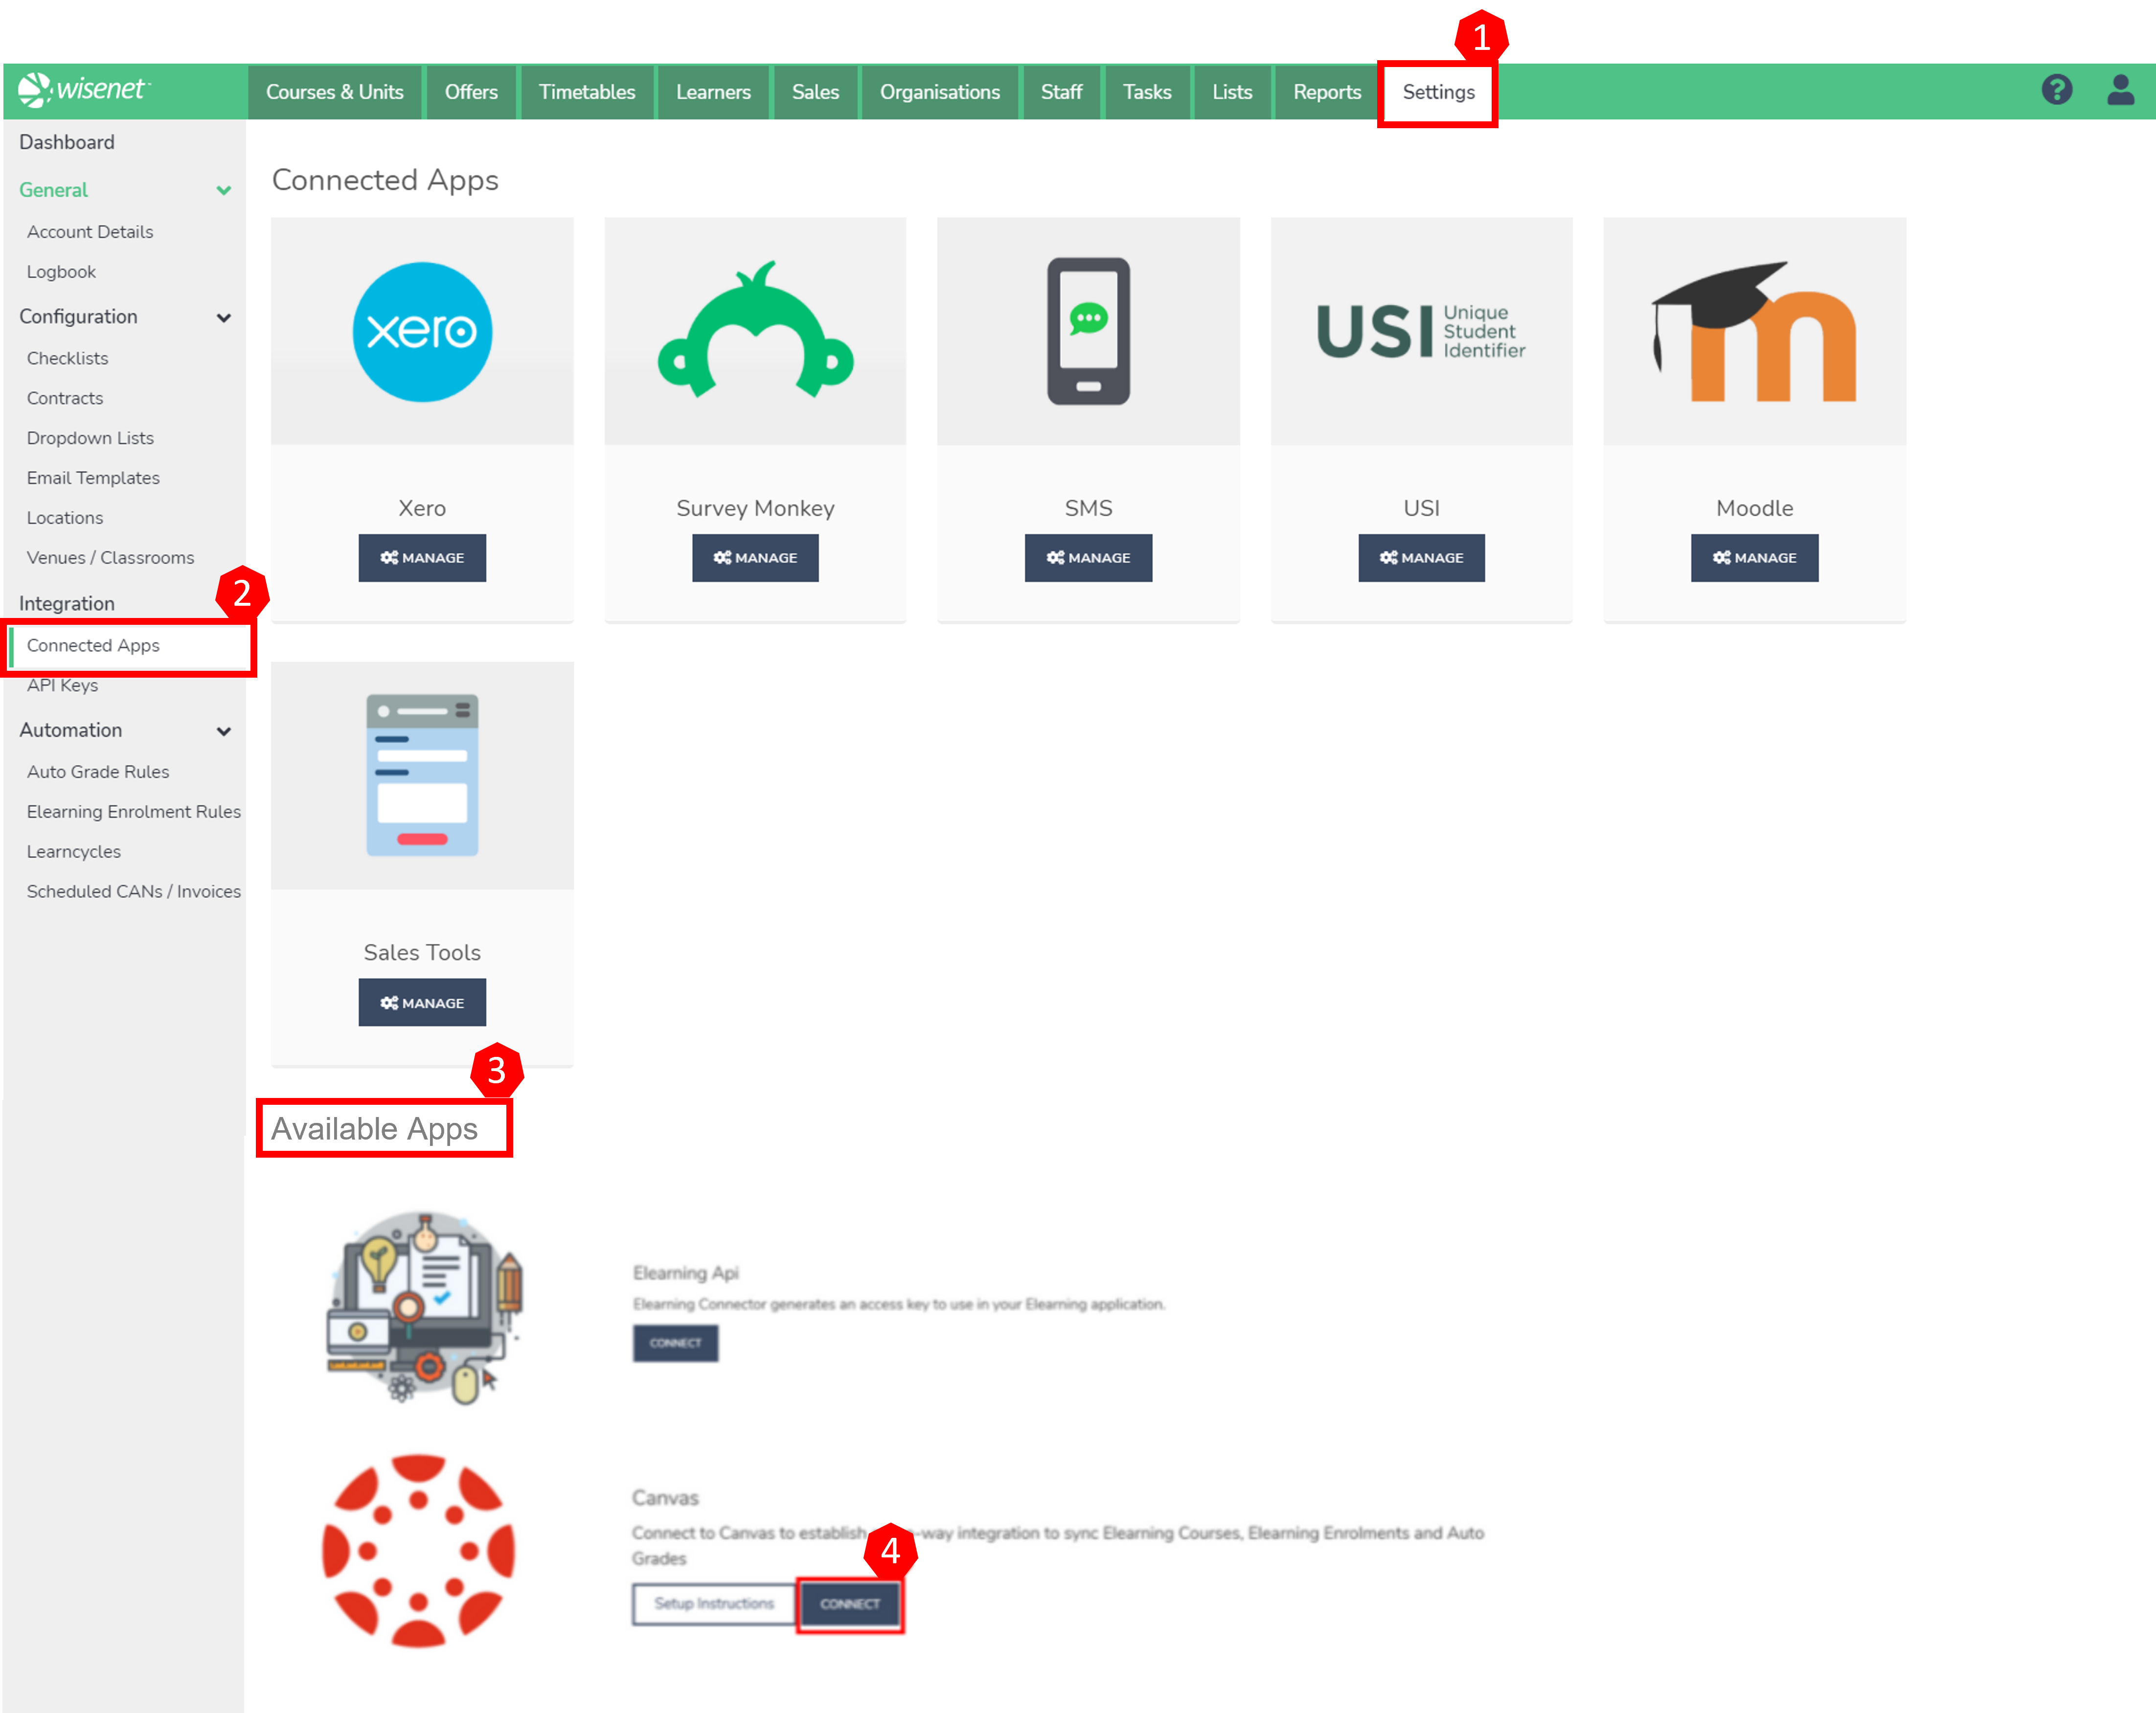
- Navigate to Wisenet LRM > Settings
- In the Integration box, Click Connected Apps
- You will see a list of all your connected Apps as well as available Apps. Under Available Apps, next to the Canvas Application select Connect to begin the process.
W3
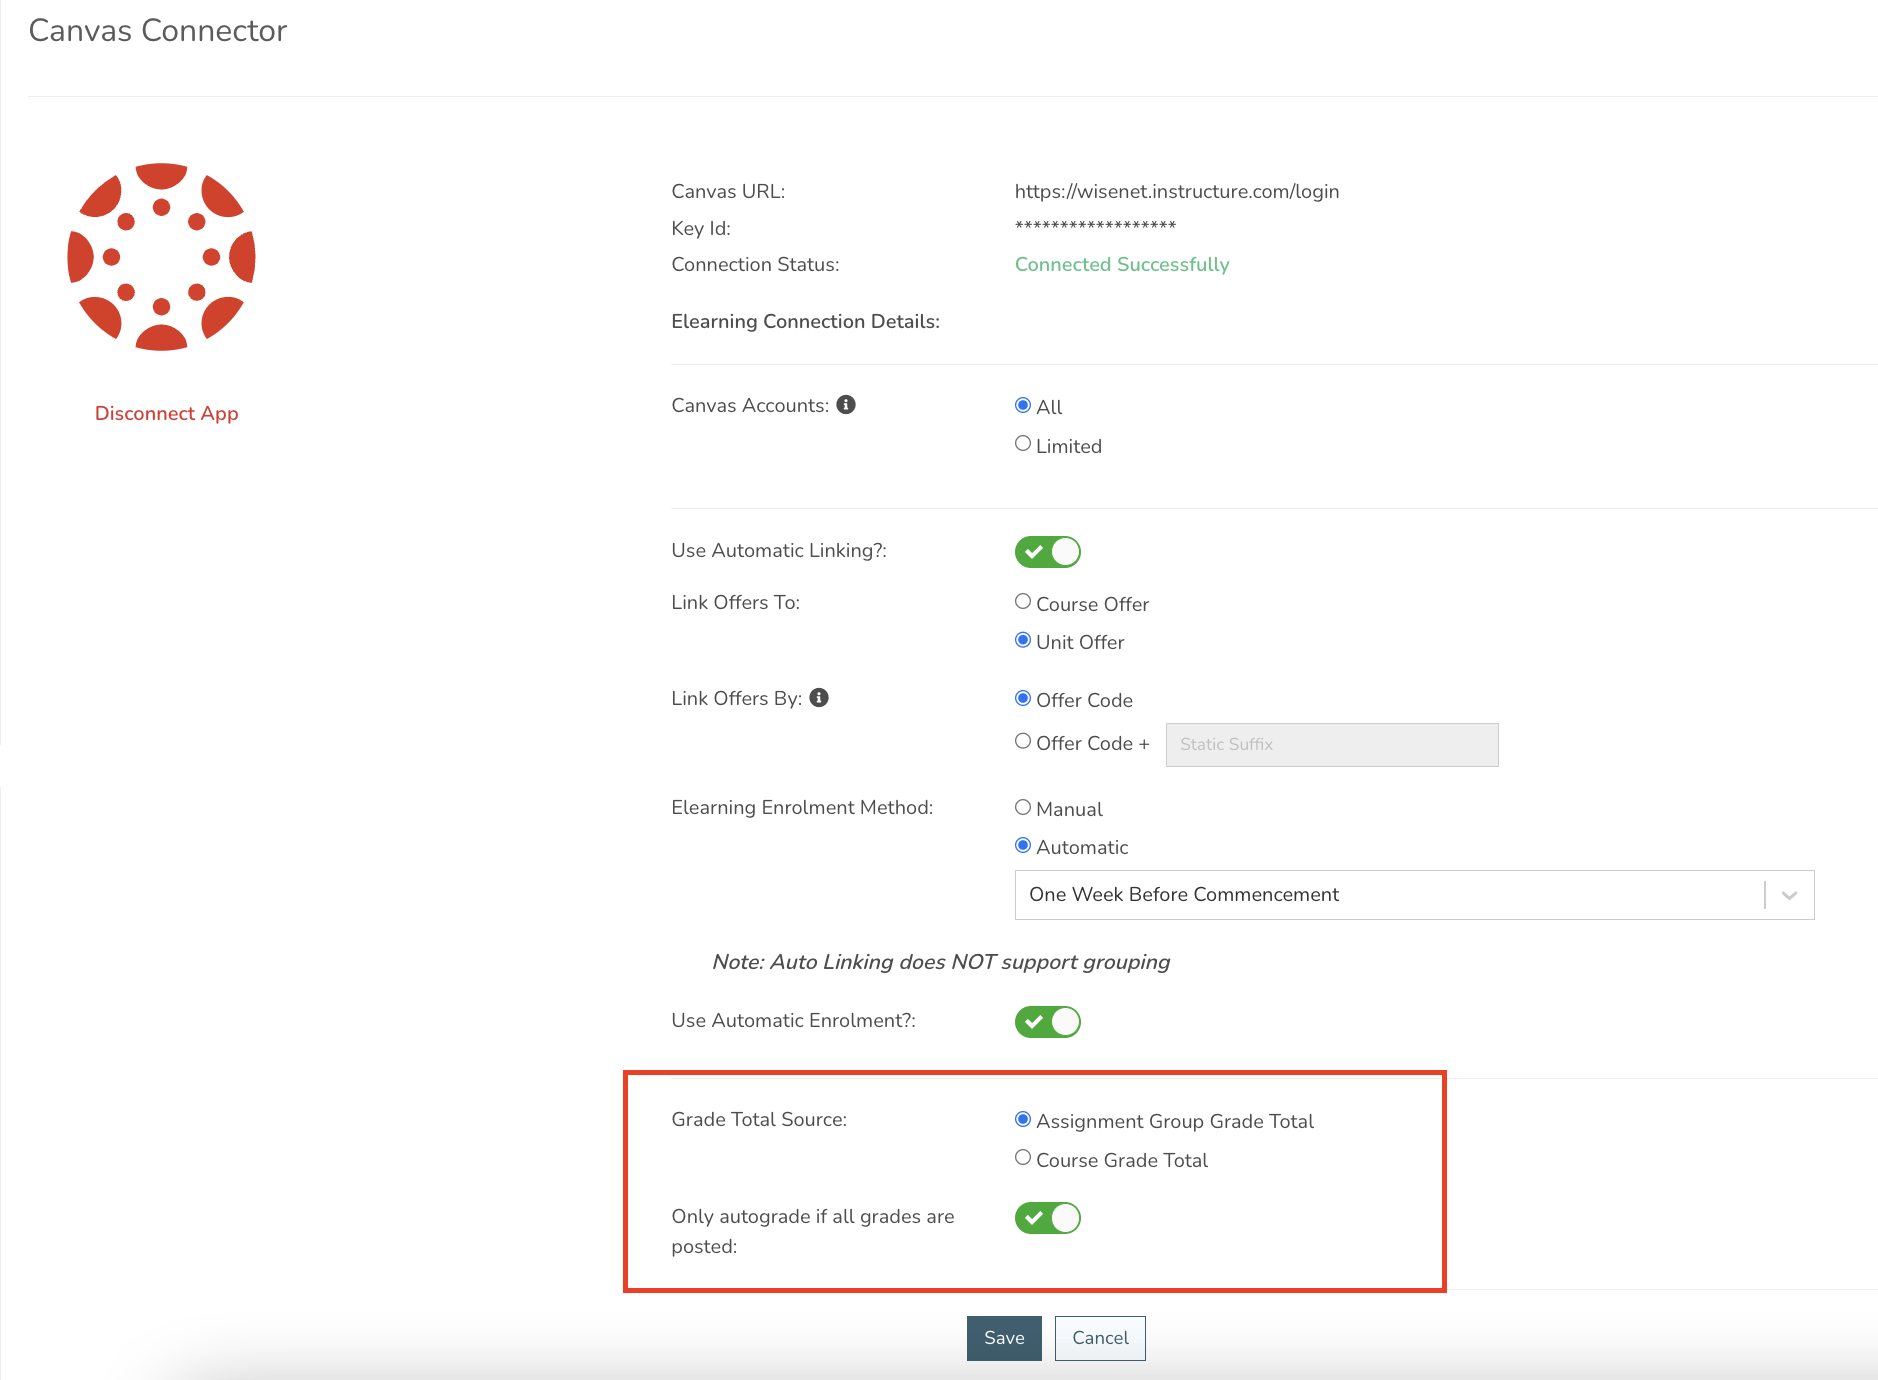
- Under the Canvas Connector Details, you will need to configure the details based on the Developer Key created in Canvas
- Canvas URL: This is your Canvas Website URL
- Key Id: This is the 13 digits key id you generated in Step C1 above
- Secret Key: This is the secret key numbers you generated in Step C1 above
- Tick the acknowledgement button
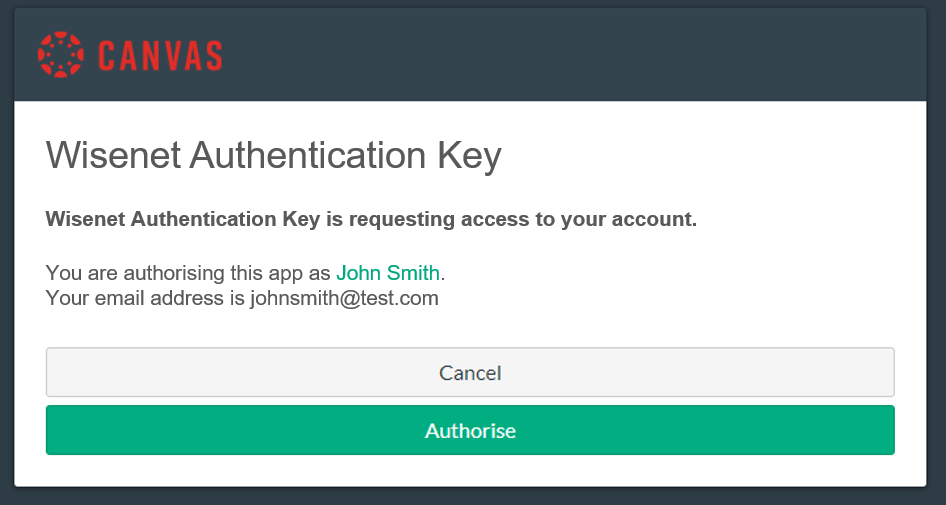
- Click Connect
W4
Check Connection Status
If the Connection Status is:
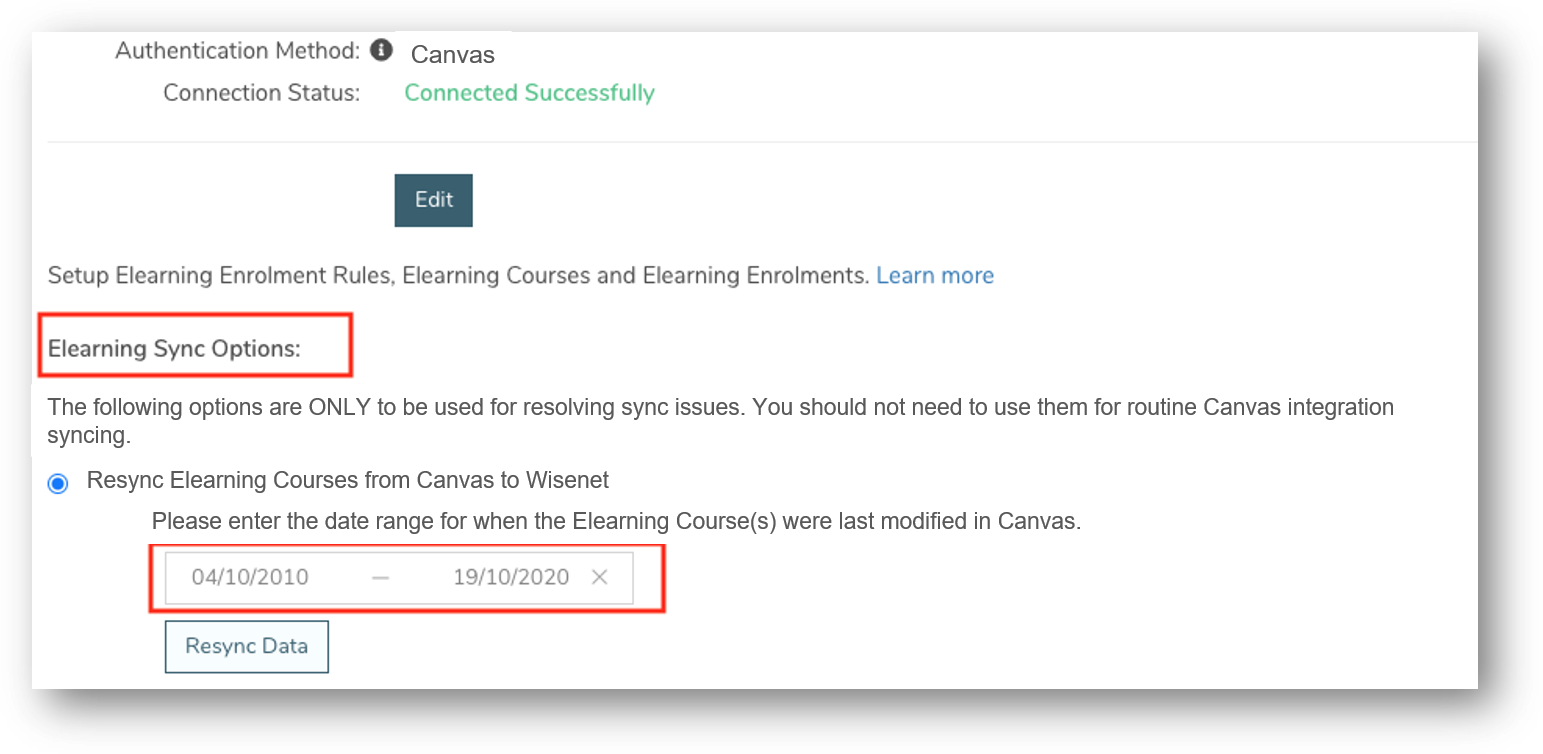
- Connected Successfully then you are ready to go. You should now Resync Elearning Courses if required.
- Failed to Connect then review the steps above to ensure nothing was missed. If still an issue the please contact Wisenet Support.
W5
Initial Course Sync
It is important to complete an initial Course Sync once the connection is successful. This will sync all of the Courses from Canvas to Wisenet.
- Find the section Elearning Sync Options at the bottom of the page (This will only appear if the connection is successful)
- Choose the option Resync Elearning Courses from Canvas to Wisenet
- Enter a date range that captures all Course change dates
- This can be a very wide range that is well before you started using Canvas eg. 01/01/2010 to Now
- Once ready select Resync Data
- This initiates the sync. Courses typically are synced within a few minutes.
- You can see the sync’d courses by going to Course Offer > Elearning and attempting to add an Elearning Course
Steps to enable Canvas WebHooks for Course Syncs
Once you have set up your Canvas Connected App, you are required to download and install Canvas WebHooks. This plugin allows Canvas events to raise WebHooks to a nominated URL. Therefore allowing for real-time Course information to sync between Canvas and Wisenet LRM.
C3
Check if WebHooks plugin is already installed
- Log into your Canvas site and navigate to Accounts > Data Services
- If under the Name column there is a Data Streaming Option called Wisenet Course Sync, then click on the Edit icon to edit details if required
- If not, then follow the next step below
C4
Add and Configure New Data Stream for the Course WebHook
- On the top right corner, Click on the + Add button
- Complete the following fields:
- Name/Title: Wisenet Course Sync
- Delivery Method: HTTPS
- URL: https://elearning-synccourse-api.wisenet.co
- Sign Payload: Tick
- Message Type: Canvas
- Application Type: Data Streaming
- Type Course in the Search Events bar
- Select Course for Subscriptions, User Generated and System Generated
- Click Save & Exit
ONLY APPLICABLE IF USING AUTO GRADE: Steps to enable Canvas WebHooks for Grade Syncs
Please Note: Canvas Auto Grade option is available for Premium Edition only. Contact us if you would like to upgrade to this edition.
Once you have set up your Canvas Connected App, you are required to download and install Canvas WebHooks. This plugin allows Canvas events to raise WebHooks to a nominated URL. Therefore allowing for real-time Grades to sync between Canvas and Wisenet LRM.
C5
Check if WebHooks plugin is already installed
- Log into your Canvas site and navigate to Accounts > Data Services
- If under the Name column there is a Data Streaming Option called Wisenet Grade Sync, then click on the Edit icon to edit details if required
- If not, then follow the next step below
C6
Add and Configure New Data Stream for Grade WebHook
- On the top right corner, Click on the + Add button
- Complete the following fields:
- Name/Title: Wisenet Grade Sync
- Delivery Method: HTTPS
- URL: https://autograde-gradetranslation-api.wisenet.co
- Sign Payload: Tick
- Message Type: Canvas
- Application Type: Data Streaming
- Type Grade in the Search Events bar
- Only Grade Change event is required to be set
- Click Save & Exit
Steps to choose how you want to sync and report your Grade Outcome
In Wisenet Connected App, choosing one of the following 2 options will depend on how you are planning to set up your Canvas Courses.
If you are setting up:
- Wisenet Course Offers as your Canvas Courses, then it is advisable to choose your Grade Total Source to be Assignment Group Grade Total
- Wisenet Unit Offers as your Canvas Courses, then you may choose your Grade Total Source to be either Assignment Group Grade Total OR Course Grade Total, all depending on how you want to report Unit Enrolment Outcomes
IMPORTANT NOTE: You can change your option at any time. However, changing the Grade Total Source will NOT update grades that have already been synced to Wisenet.
W6
Choose a Grade Total Source
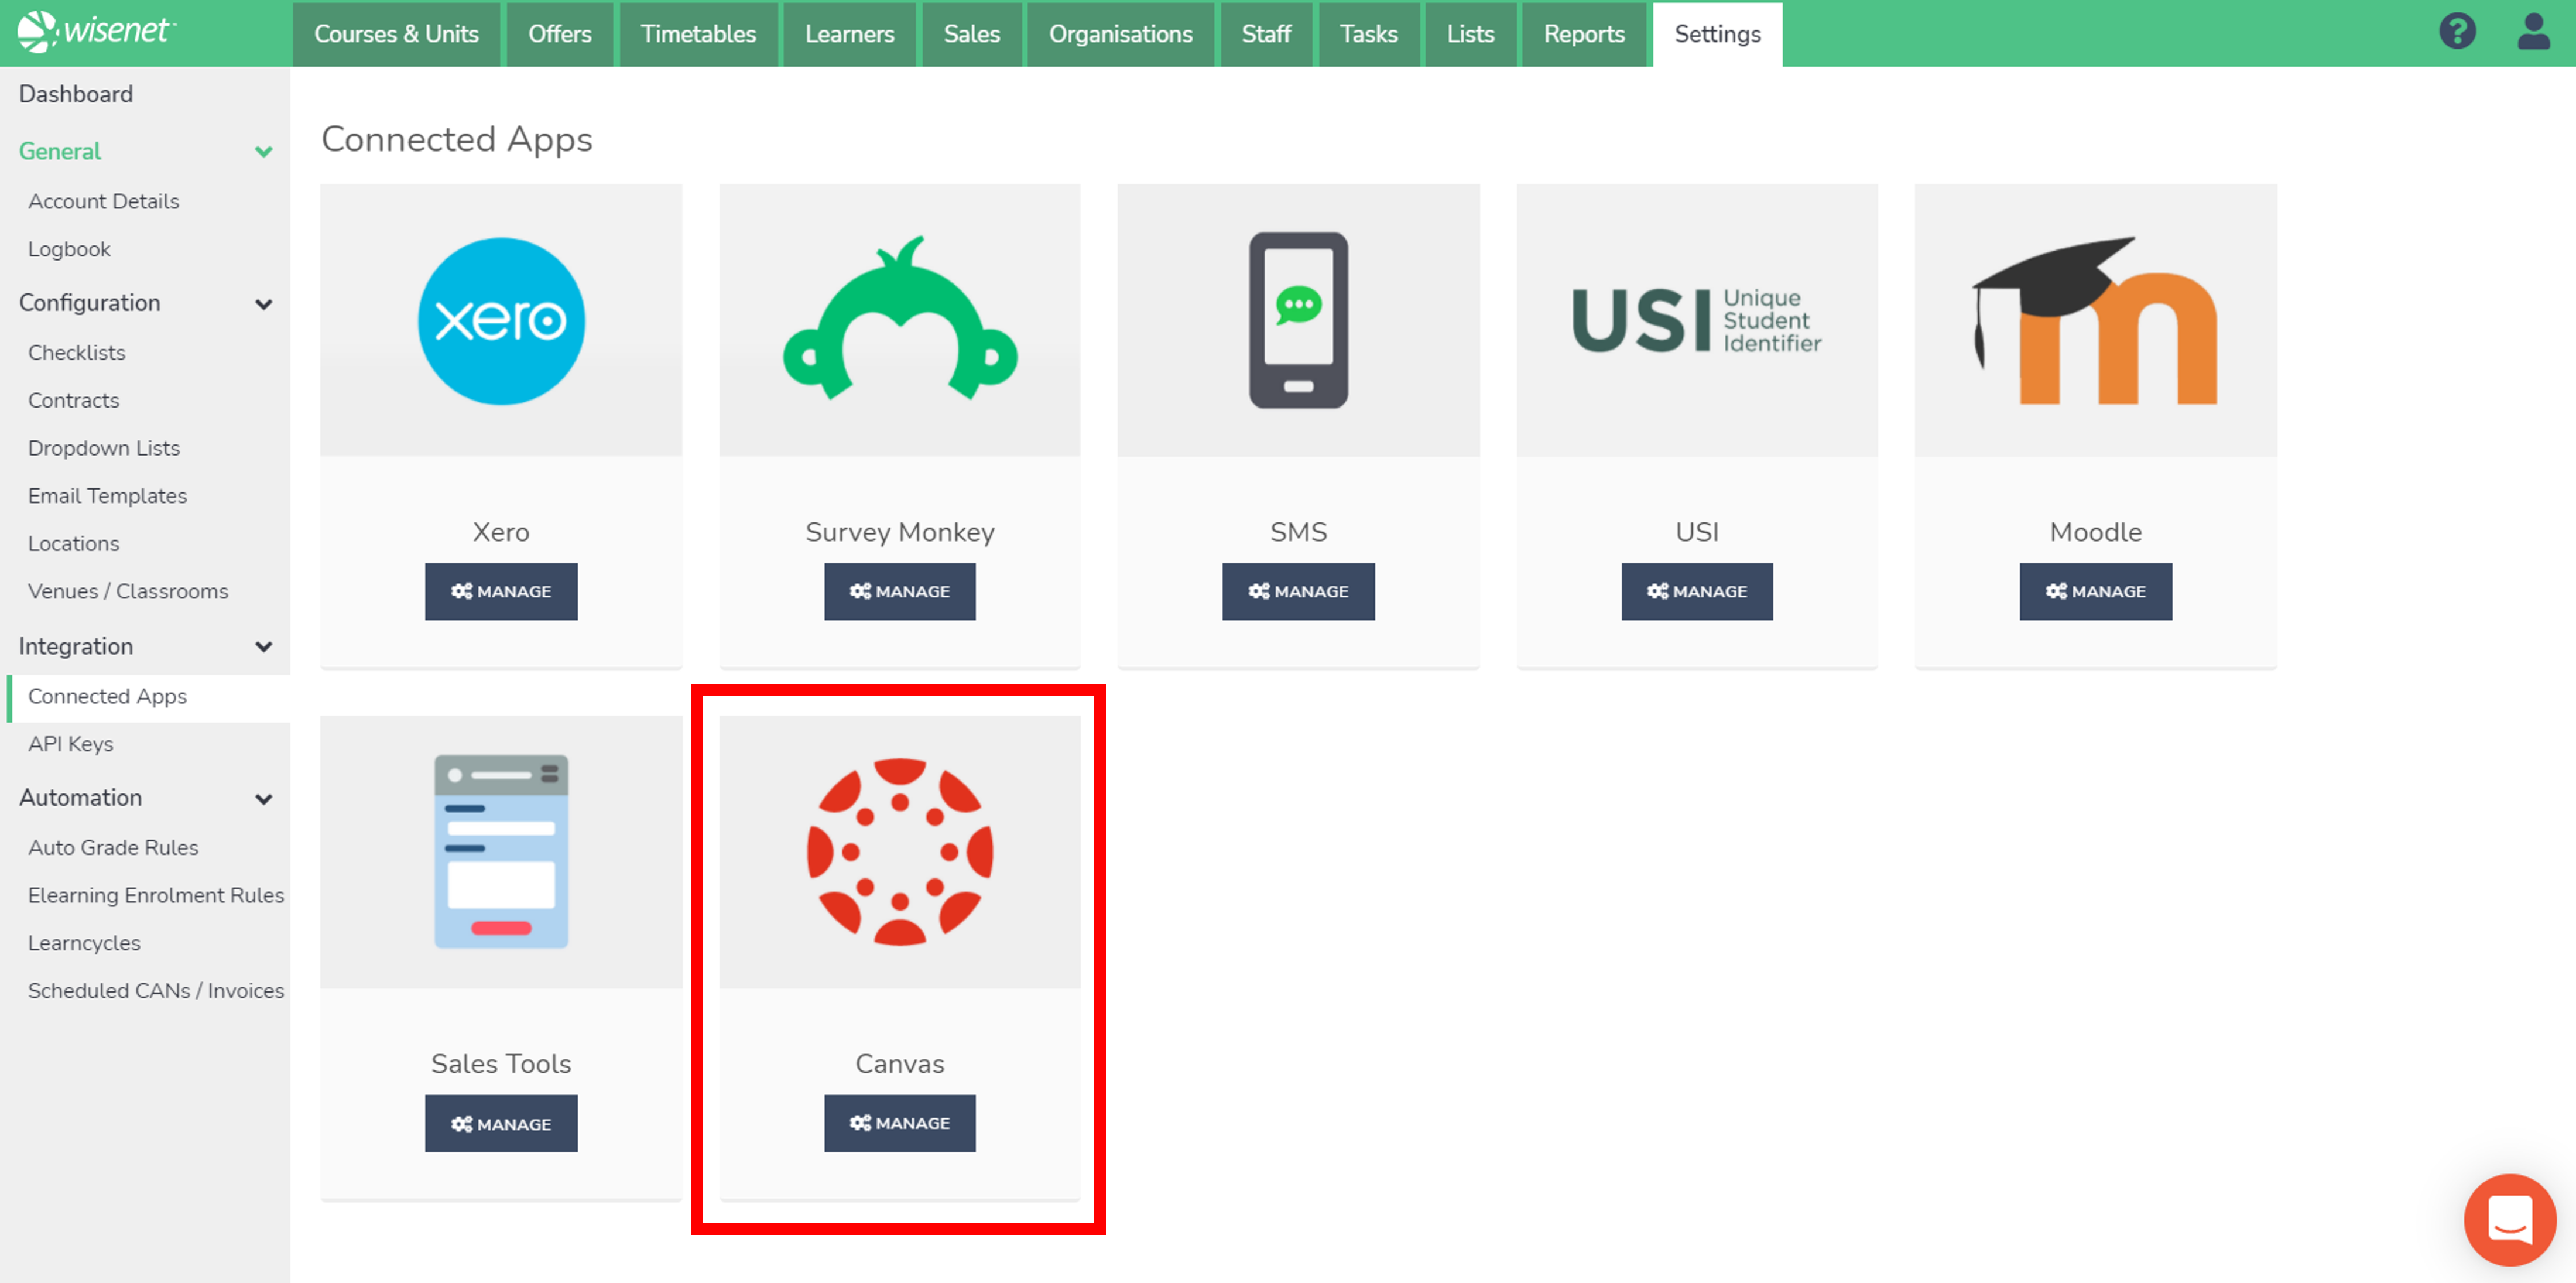
- Navigate to LRM > Settings > Connected Apps > Canvas
- Choose a Grade Total Source:
- Assignment Group Grade Total, OR
- Course Grade Total
- Optional: Choose to autograde only if all grades are posted. Switch the toggle to YES if you wish to skip syncing grades that are not posted in Canvas.
- Click Save
