Use templates to standardise your communications and save time. Email Message Templates work really well with:
- Learners for keeping in touch with your Learners
- Learncycle for automating learner lifecycle management
- uReport for individually distributing documents to a group of learners
- Surveys for getting learner feedback
- The Learner App for creating and managing Learner App access
- Credentials for emailing Certificates to Learners (Note: Only available on Premium Edition and by default this feature is turned OFF. If required, Portal Admin is to turn email ON)
- Sales Contacts for quickly responding to Sales Contacts at different stages
1
Navigate to Settings > Configuration > Email Templates
2
Create an Email Template
Wisenet provides generic templates that can be Modified, Enabled and Disabled. On the right Edition you can also add custom templates.
- Click Add Template
- Set up your template and Save
3
Edit an Email Template (if required)
- Navigate to Settings > Configuration > Email Templates
- From the list of available templates, click on the Edit Icon for the template you wish to modify
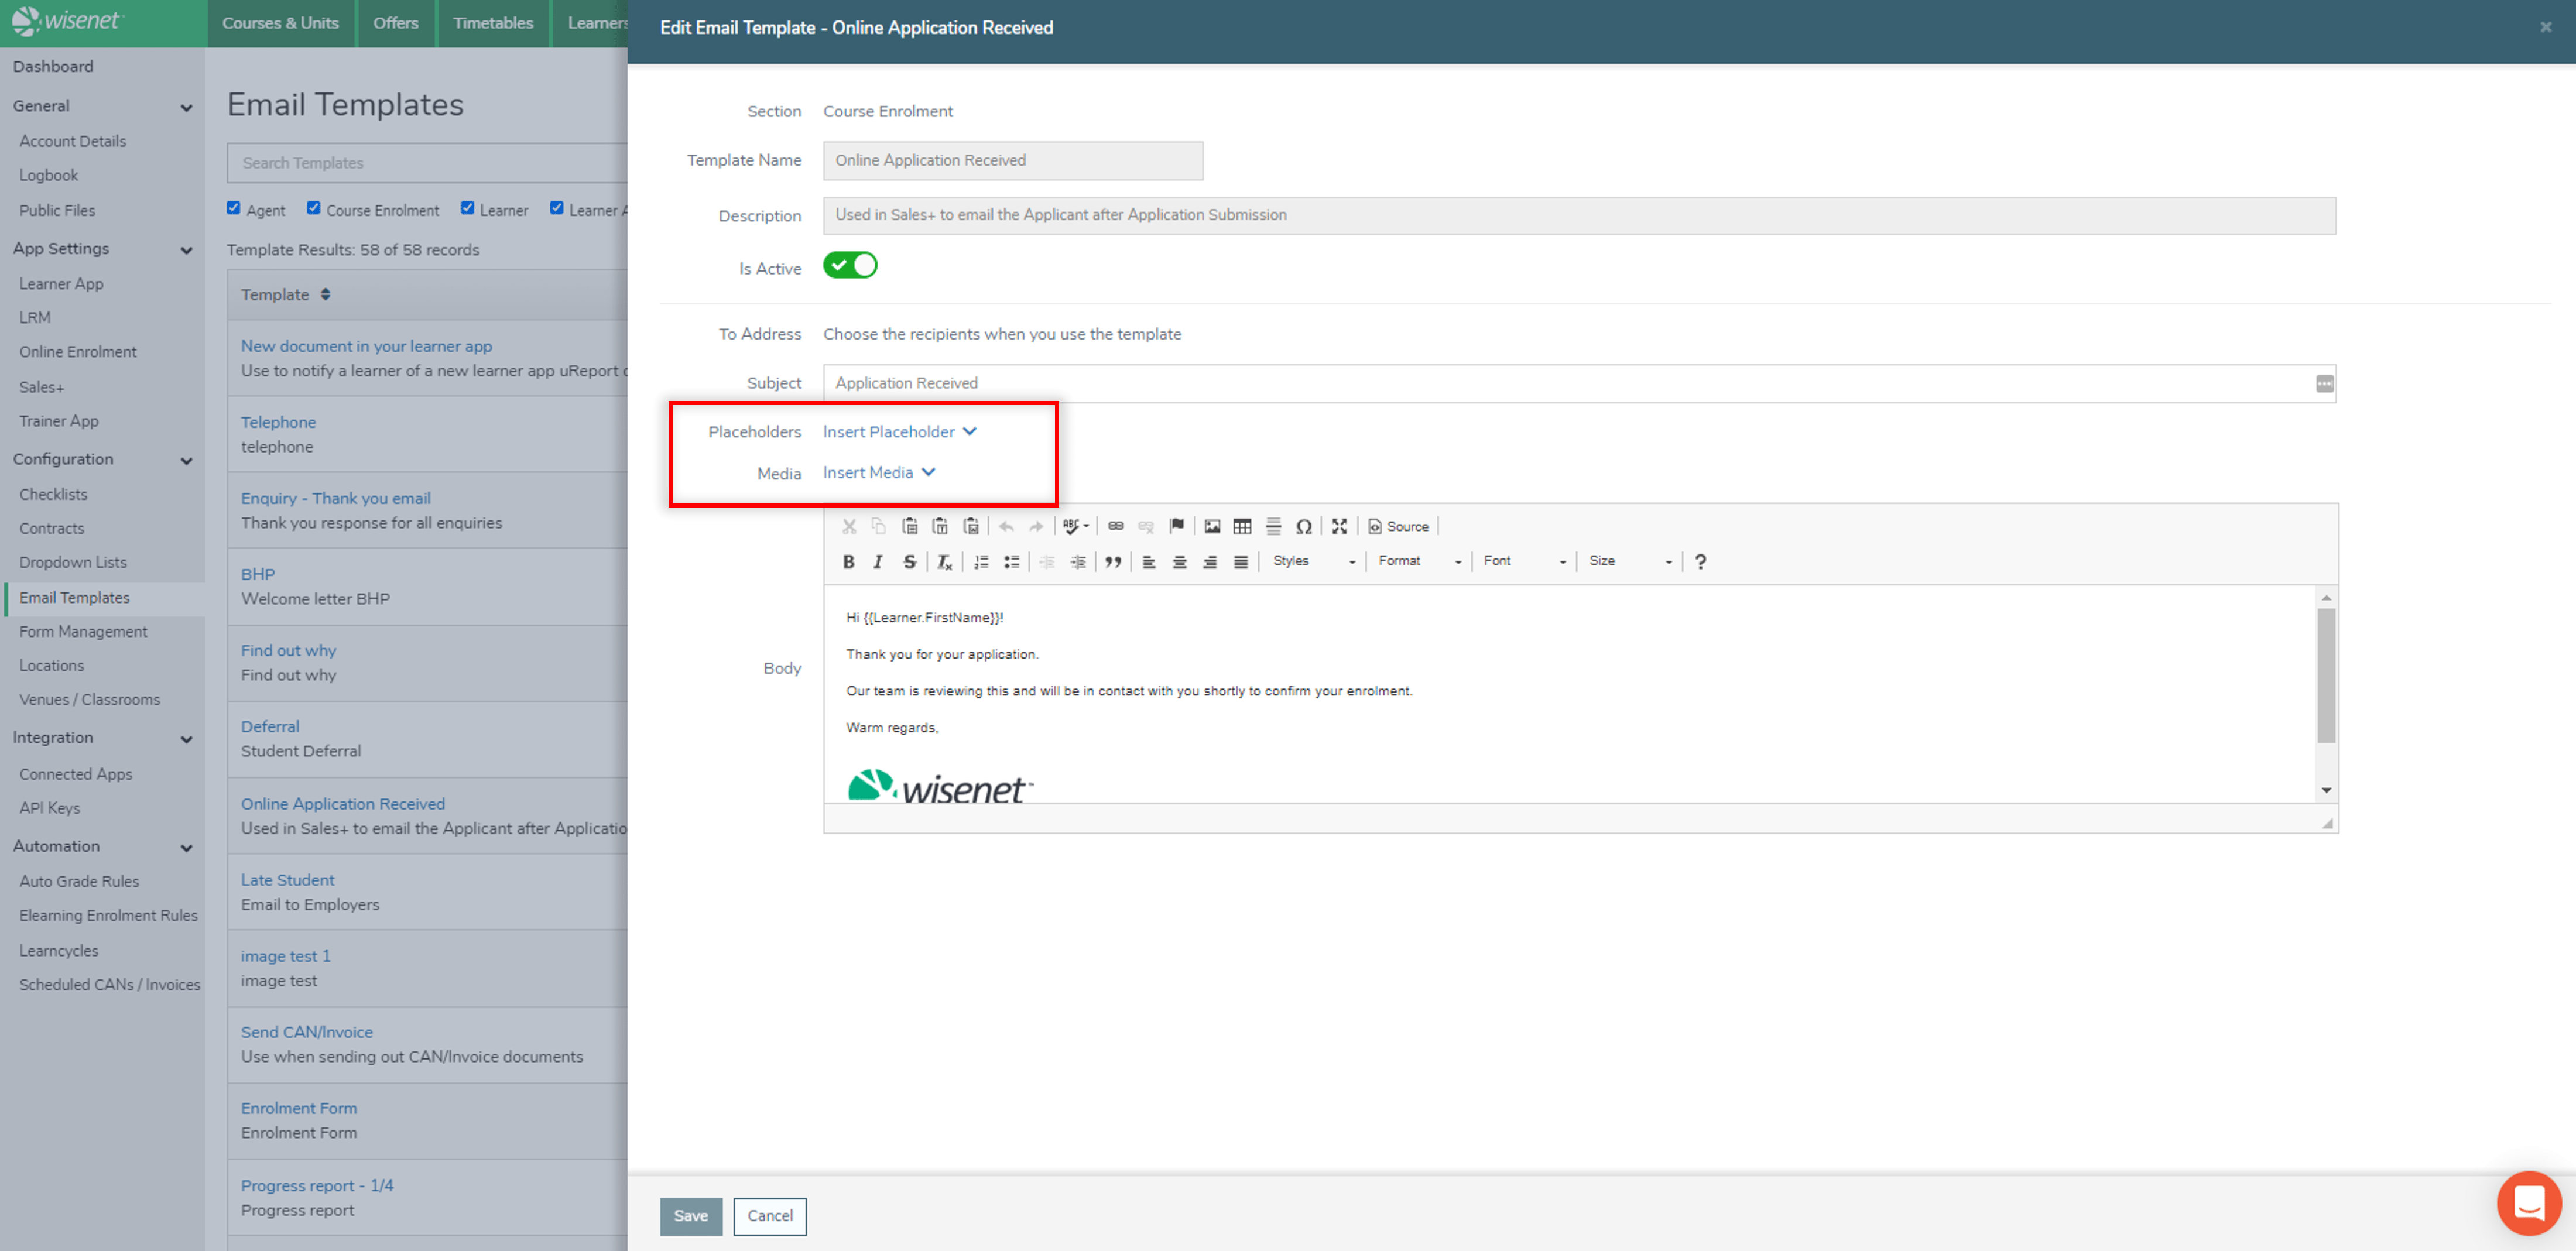
- The template will now open in edit mode. There are two parts of the template:
Edit the top half of the screen. You can:
- Turn on the Is Active switch
- Edit the Temlpate Name and Description
Edit the Email Subject and Body in the bottom half of the screen:
- Choose recipients
- From the Placeholder dropdown, view the relevant placeholder and type the code where you wish it to appear in your email (Press CTRL+V)
- Note: the placeholder can be added/copied in both the Body as well as the Subject line when configuring it in an email template
- From the Insert Media dropdown, search/select the file you want to upload
- All files need to be uploaded to Public Files in Settings before you can use the Insert Media option
- Edit your email as required and click Update
Add an Image to your Template (optional)
- Go to the Email Template and Edit
- Use the Insert Media option to insert an image
- All files need to be uploaded to Public Files in Settings before you can use the Insert Media option
Add an Unsubscribe link (optional)
1 . In the rich text toolbar, click the HTML source code button
2 . Paste in the following text at the bottom of the page. Substitute your own email address for the example one.

Note: To return to the normal edit mode, click the html source code button again.

