Introducing Surveys
Wisenet has an integration with SurveyMonkey that allows:
- sending a survey to a selected list of Learners from within Wisenet
- showing survey statistics (collectors, urls and response)
Benefits of using Surveys in Wisenet:
- Obtain timely feedback from Learners and Staff for continual improvement
- Customise surveys with your own branding (themes and logos)
- Easy reporting and sharing of analysed survey results
How it works
While SurveyMonkey offers a free edition, this edition does not allow integration with other applications and is also limited to the number of questions and responses per survey.
The minimum edition that is required is the Standard Plan.
The SurveyMonkey Plans and Pricing page will help you understand the available options and how to subscribe.
Set Up
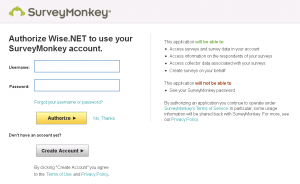
Connect your SurveyMonkey Account to Wisenet
Only one SurveyMonkey account can be connected to a Wisenet account at any one time. You need Portal Admin access and LRM Owner access to connect SurveyMonkey to Wisenet.
If you already have a SurveyMonkey account you can use the same account to Set Up the integration in Wisenet.
Create a Survey in SurveyMonkey
SurveyMonkey makes it easy to create a survey from scratch or from a template. Just follow the steps provided from the SurveyMonkey Help Centre to get started.
OR
Use Wisenet’s Quality Indicator Surveys (Previously known as AQTF Quality Indicator Surveys)
1
Add the Learner and Employer Survey Templates to your SurveyMonkey account
- Log in to LRM > Reports
- On the Left Navigation Bar, Click on Surveys
- On the Top Right Corner, Click Add Quality Indicator Surveys
- Click Add Learner Engagement Survey and/or Add Employer Satisfaction Survey
- This step will add the Survey Template to your connected SurveyMonkey account and will create an initial collector. If you want to add more collectors, go to STEP 2 below
- IMPORTANT NOTE: Please ensure to only do this once as it will create duplicate surveys otherwise.
2
Set up Collectors
- Log in to SurveyMonkey
- Choose Collect Responses against the appropriate Learner/Employer Questionnaire survey
- Click on New Collector and set up your collectors. Click here for more information (Images are for illustration purposes only)
- Then, follow the steps on how to send the survey emails from within Wisenet
Send and Track Responses
You can send a link to a survey collector group directly from within Wisenet. This can be completed individually or in bulk from a Course Offer.
1
Select Survey and Collector
- Navigate to LRM > Course Offers
- On the Left Navigation Bar of the relevant Course Offer Page, Click on Enrolments
- Tick the Tickbox in the first column to select the Learner(s) you want to send the Survey to
- At the bottom of the list, in the Action Dropdown Menu, Select Send Survey Messages
- Select a Survey from the Dropdown list of surveys you have previously created in SurveyMonkey
- Select a Collector from the Dropdown list of Collectors you have previously created in SurveyMonkey
2
Compose Message and Send Survey
- Either:
- Use the existing template that you pre-selected, OR
- Customise the Subject and Body section to compose a message, i.e. you may like to add a web link to a Moodle course
- To get the web link for a survey:
- Navigate to LRM > Reports
- Click on Surveys
- A list of your SurveyMonkey data will be shown, Click +Load collectors next to the relevant Survey
- Copy and Paste whichever link you want into your customised message
- To get the web link for a survey:
- Click Send – You will get a confirmation that the Survey has been sent and saved in the enrolment logbook(s)
- Click OK
3
Track and View Survey Responses for Analysis
- Navigate to LRM > Reports
- Click on Surveys
- A list of your SurveyMonkey data will be shown, Click Analyse Responses next to the relevant Survey
- The SurveyMonkey Page will open, Sign into your Account to view survey responses

