An Application Form allows applicants to apply online and have applications processed directly into Wisenet.
1
Navigate to LRM > Settings > Configuration> Form Management
2
Add Application Form
- Under the My Forms Tab, on the right-top corner, Click Add Form
- Select Application Form
- Enter a Form Name
- Select whether you want to Allow Save & Resume
- If On, Complete the Opportunity Defaults
- Stage when Save Progress
- Stage when Final Submission
- Pipeline
- If Off, Complete the Opportunity Defaults
- Stage when Final Submission
- Pipeline
- If On, Complete the Opportunity Defaults
- The status for Application Received Email will show whether it is Enabled or Disabled.
- If Enabled, an Email will be sent to the Learner who submits an Application
- To Enable/Disable/Update: Navigate to Settings > Email Templates > Application Received Email Template and manage accordingly
- Form Design – Choose whether you want to start building your Form using a:
- Blank Form (Default)
- Generic Template > Select Template
- Click Next
3
Manage Application Form
In this section, you are required to review and edit the Pages, Headers and Fields that will appear on your new Application Form.
Check out the Fields Glossary to get an idea of the fields you can use to build your Application Form.
Add
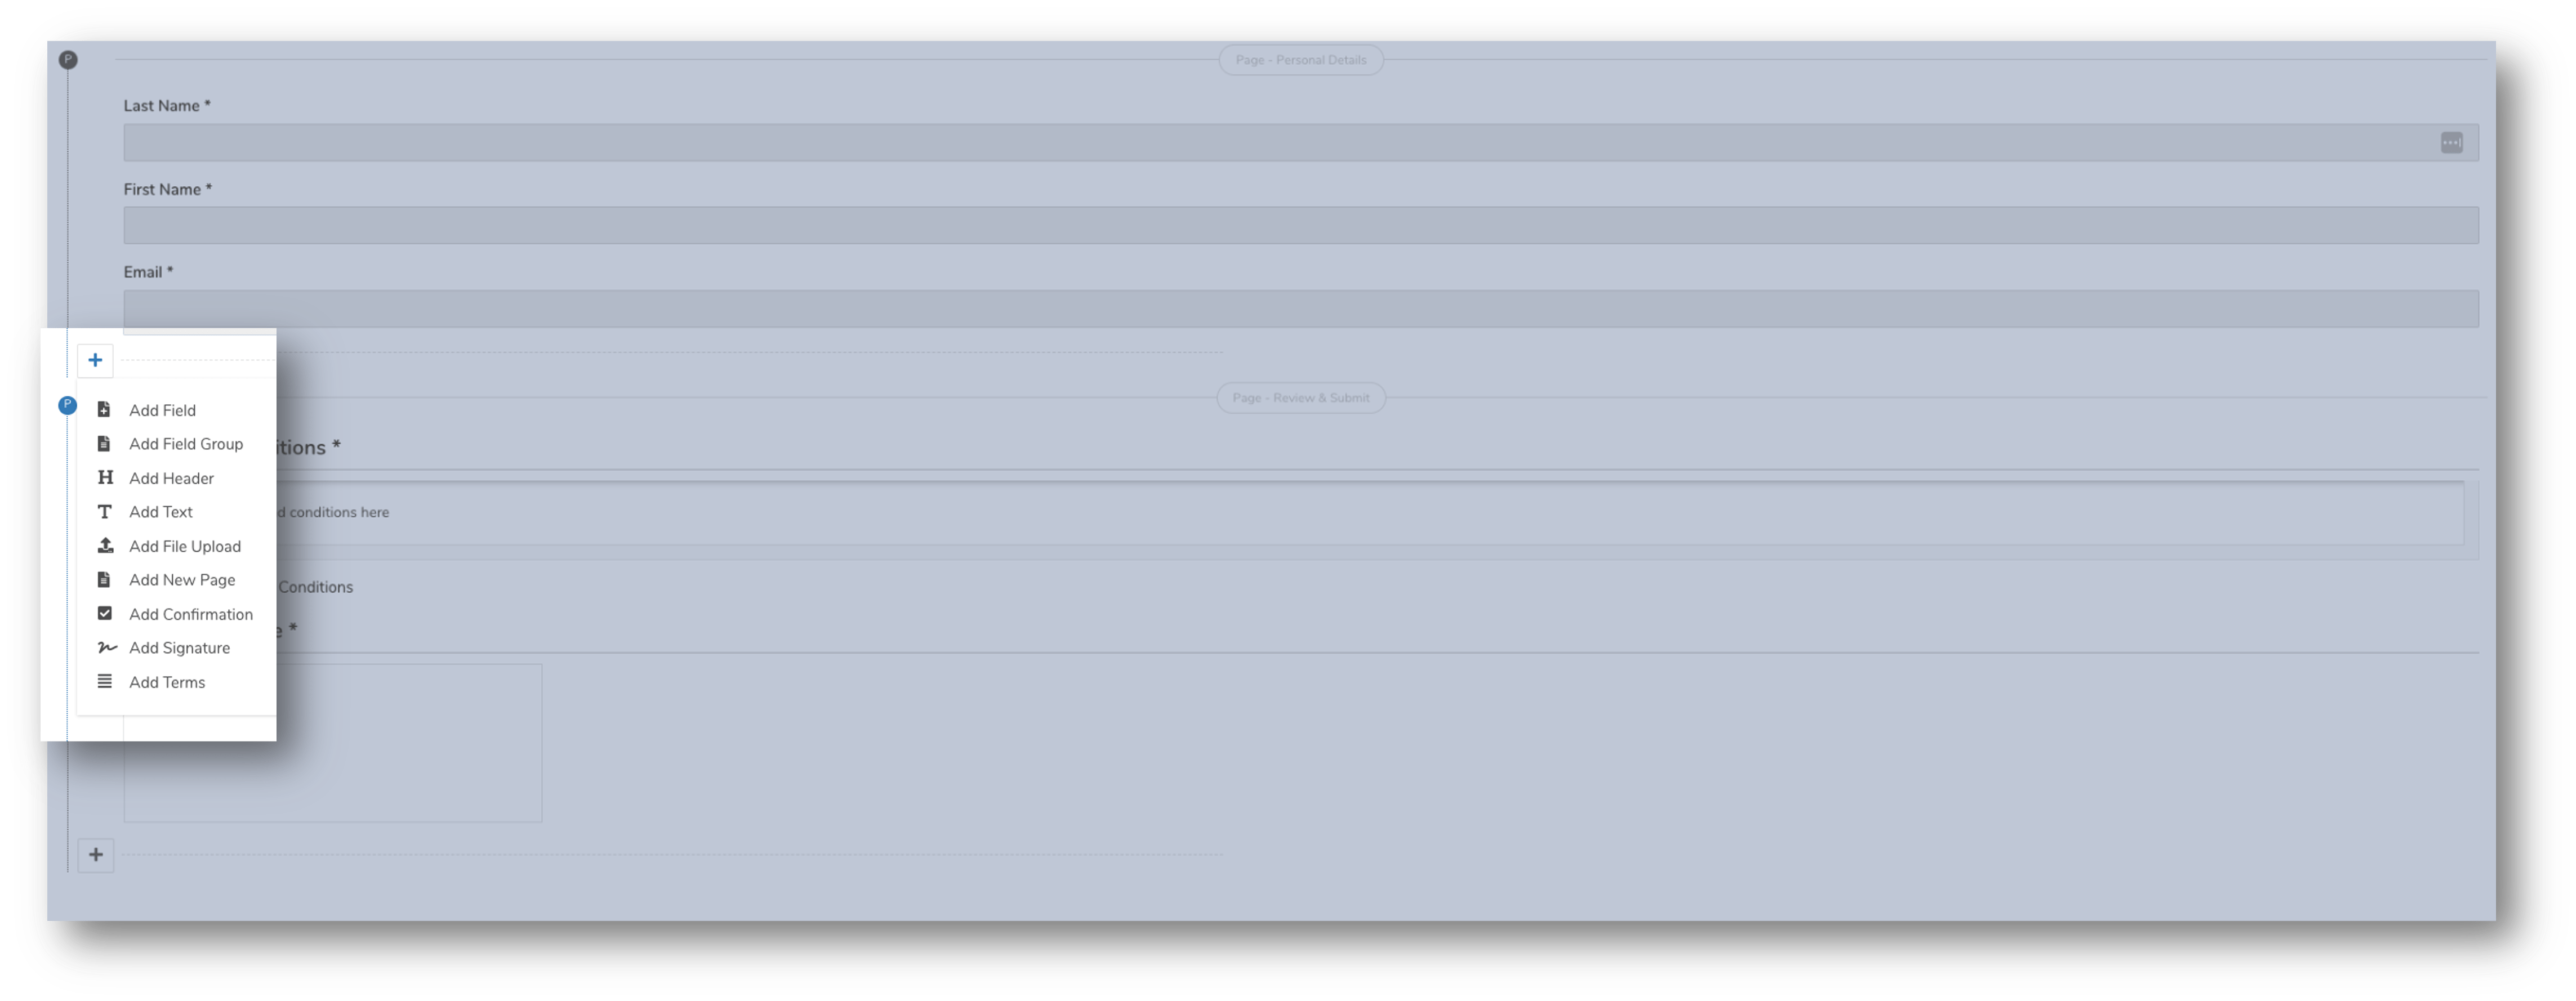
- Use the + icon to the left of an element to add any of the elements below:
- Field – Choose from the extensive list of Fields that is available. Fields are listed in alphabetical order and you can use the Search box to quickly search for a specific Field
- Field Group – Use Field Group to select a set of fields that are combined in a group. For example, Address Group. Using a Field Group makes form building quicker as you do not have to add each field individually.
- Header – Is used to better section Fields or elements on the Form
- Text – Can be used to add a block of text to provide more details, i.e. ‘Before you begin….’ OR ‘More Info…’ at the top of each page
- File Upload – A File Upload box on the Form will allow applicants to Upload or Drop a file to their application form. A maximum upload size of 6MB applies.
- New Page – An Application Form can have multiple pages to better categorise the Form. i.e. Page 1 can be for Personal Details, Page 2 can be for Demographics, etc.
- Confirmation – A Confirmation Box can be added to any other elements on a Form. Read more about Confirmation Box below.
- Signature – Allows the applicant to add a digital signature to the Form.
- Terms – Is used to add any terms and conditions that the applicant need to be aware of and abide to if they wish to proceed.
- Where and if required, enter a Name and/or Description for any newly added Fields, Headers, Text boxes, File Upload boxes and New Pages
Drag & Drop / Edit / Delete
- You can Drag and Drop Pages, Headers and Fields in your preferred order.
- Hover on the elements to see icons next to each to help you with the action that you want, i.e. Delete, Edit or Drag & Drop
Conditional Logic
Add conditions to a field when building Forms. Conditional Logic works on any field except for signatures, file uploads and confirmations.
LEARN MORE: How to Add Conditional Logic to a Form Field
Address Group
Each country using Sales+ Form has a set of address fields unique to the country’s requirement. To make it easy for our Sales+ customers we have created Address Group in Form Management so you can apply the correct address fields to your Application Forms. Additionally you can set an Address Group as a Primary Address Group to allow applicants to easily copy address fields on the Form.
LEARN MORE: How to Add Address Group to an Application Form
Confirmation
The Confirmation element is a Confirmation Box (also known as a Tick Box) with a text component, where you describe what the applicant is required to confirm.
It can be used for any fields that you require the applicant to tick to confirm that they have understood and are agreeing to proceed with. For example, before adding a signature, you might want the applicant to tick a confirmation box to say that they agree that all information provided on the application form is true and correct.

4
Saving your Application Form
There are 2 options of how you can save your newly created Application Form:
Option 1: Save
Choose option 1 if you want to stay on the current Contact Form screen so that you can come back to further edit the Form.
Option 2: Save and Close
Choose option 2 if you are certain that you have finalised all the information required for your Application Form. Clicking Save and Close will redirect you back to the My Forms Tab where you will now see your newly created Application Form on the list. From there you can choose to set your Application Form Active by using the Toggle.
5
Copy Option
Save time by using the Copy Form option available for existing Forms rather than adding a new Form if there is not much variances in between the Forms. Simply click on the ‘Copy’ icon next to the Form and edit the copy accordingly.


