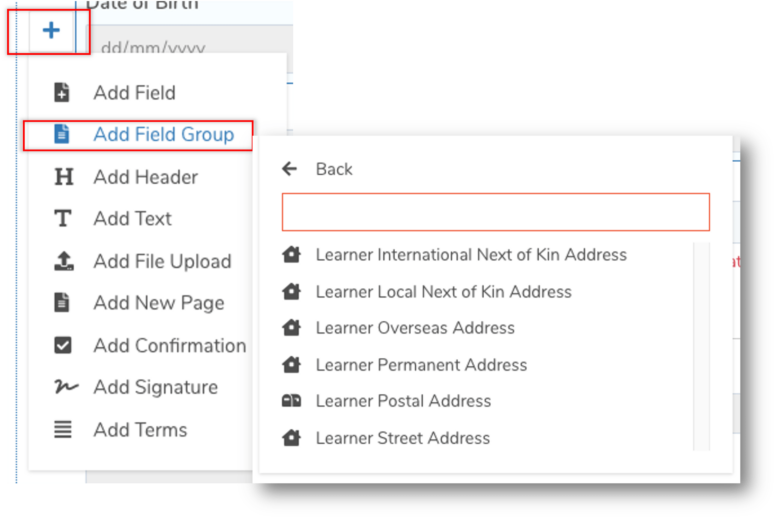
Below is a list of all Field Groups to refer to when building an Application Form in LRM.
About Address Group
Each country using Sales+ Form has a set of address fields that are unique to the country’s requirement. To make it easy for our Sales+ customers, we have created an Address Group feature in Form Management so you can apply the correct address fields to Application Forms.
In LRM>Settings>Form Management, when creating a new Application Form or, when updating an existing one, click Add Field Group and then select an Address Group from the available list.
Additionally, an Address Group can be set as a Primary Address Group to allow applicants to copy address fields on the Application Form.
LEARN MORE: Setting Up Primary Address Group
Refer to the table below to see the address fields that are grouped for each country.
| AU | NZ | SG | ZA |
| Building Name | Building Name | Building Name | Building Name |
| Unit Detail | Unit Detail | Unit Detail | Unit Detail |
| Street No. | Street No. | Street No. | Street No. |
| Street Name | Street Name | Street Name | Street Name |
| Suburb/Town/City | Suburb/Town/City | Suburb/Town/City | Suburb/Town/City |
| State | PO Box | PO Box | Province |
| PO Box | Postcode | Postcode | PO Box |
| Postcode | Country | Country | Postcode |
| Country | Country |
Setting Up a Primary Address Group
In Form Management, setting up an Address Group as Primary will provide applicants with the option to copy the same address fields to other address groups. This is beneficial if you have multiple address groups showing on your Application Form.
There are a number of important considerations to follow if you wish to use this feature correctly. The importance of them means a better user experience for applicants and the form being completed accurately.
- Navigate to LRM > Settings
- In the Configuration Box, click on Form Management
- EITHER Add a new Form OR Edit the relevant existing Form
- Hover on the + icon on the Form and select Add Field Group
- Remember the first Address Group you add should be the one that is set as Primary
- Once added, hover on the field and click on the Edit icon
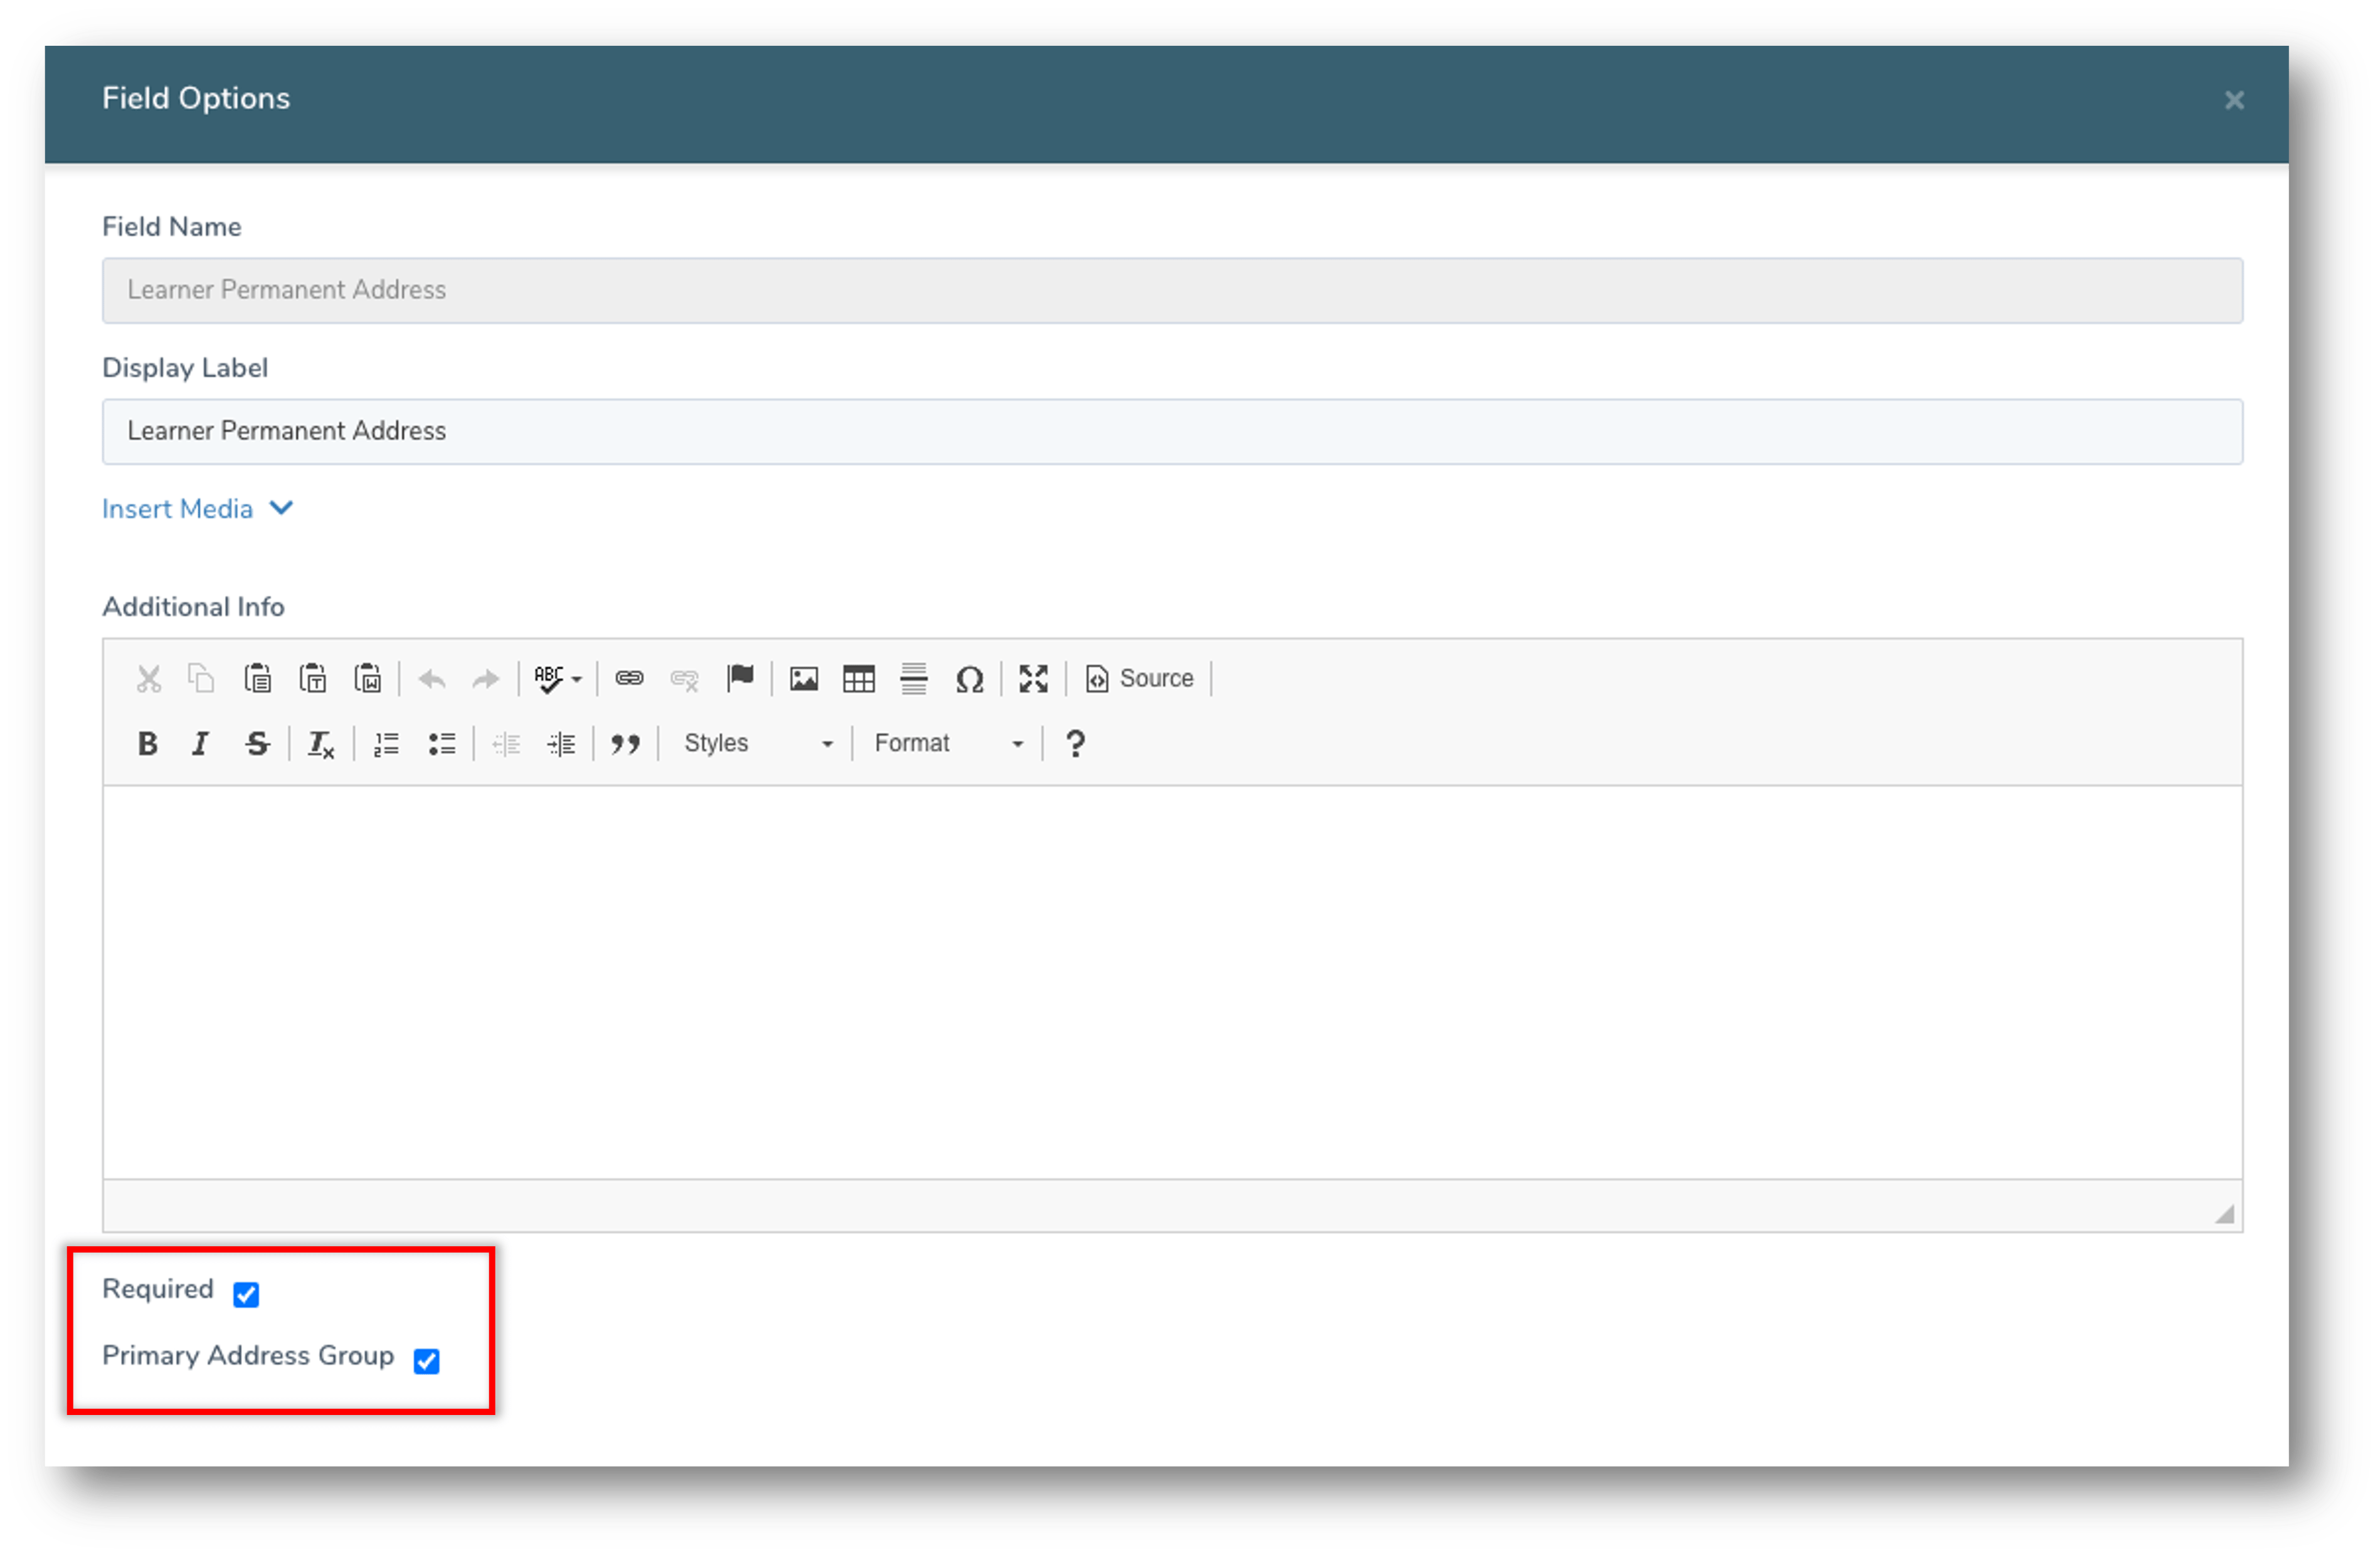
- On the ‘Field Options’ pull-out form, tick the Primary Address Group checkbox
- On the ‘Field Options’ pull-out form, tick the Required checkbox
- Optional: Update the Display Name and/or add Additional Info if needed
- Clicking out of the pull-out form will register the editing you did to that field
- You should now see the text ‘Primary Address Group’ in brackets next to that field
- Add the additional Address Group(s) as needed
- Once the Form is ready to be saved, click Save


