A Contact Form allows anyone to contact you online and have this submit as a Task or Opportunity against a Sales Contact.
Before you start, learn how Forms submission are processed.
1
Navigate to LRM > Settings > Configuration > Form Management
2
Form Management
Under the My Forms Tab you can:
- Add Forms
- Search Forms
- Active Forms only
- Inactive Forms only
- Both Active and Inactive
- Manage Forms
- Use Toggle to set to Active or Inactive
- Copy Forms

3
Add Form
- To add a New Contact Form, on the top right corner, Click Add Form
- Select Form Type: Contact
- Enter a Form Name:
- By default, ‘Contact Form’ is entered as a generic name. You can change it to enter the name you would like to call your contact form.

4
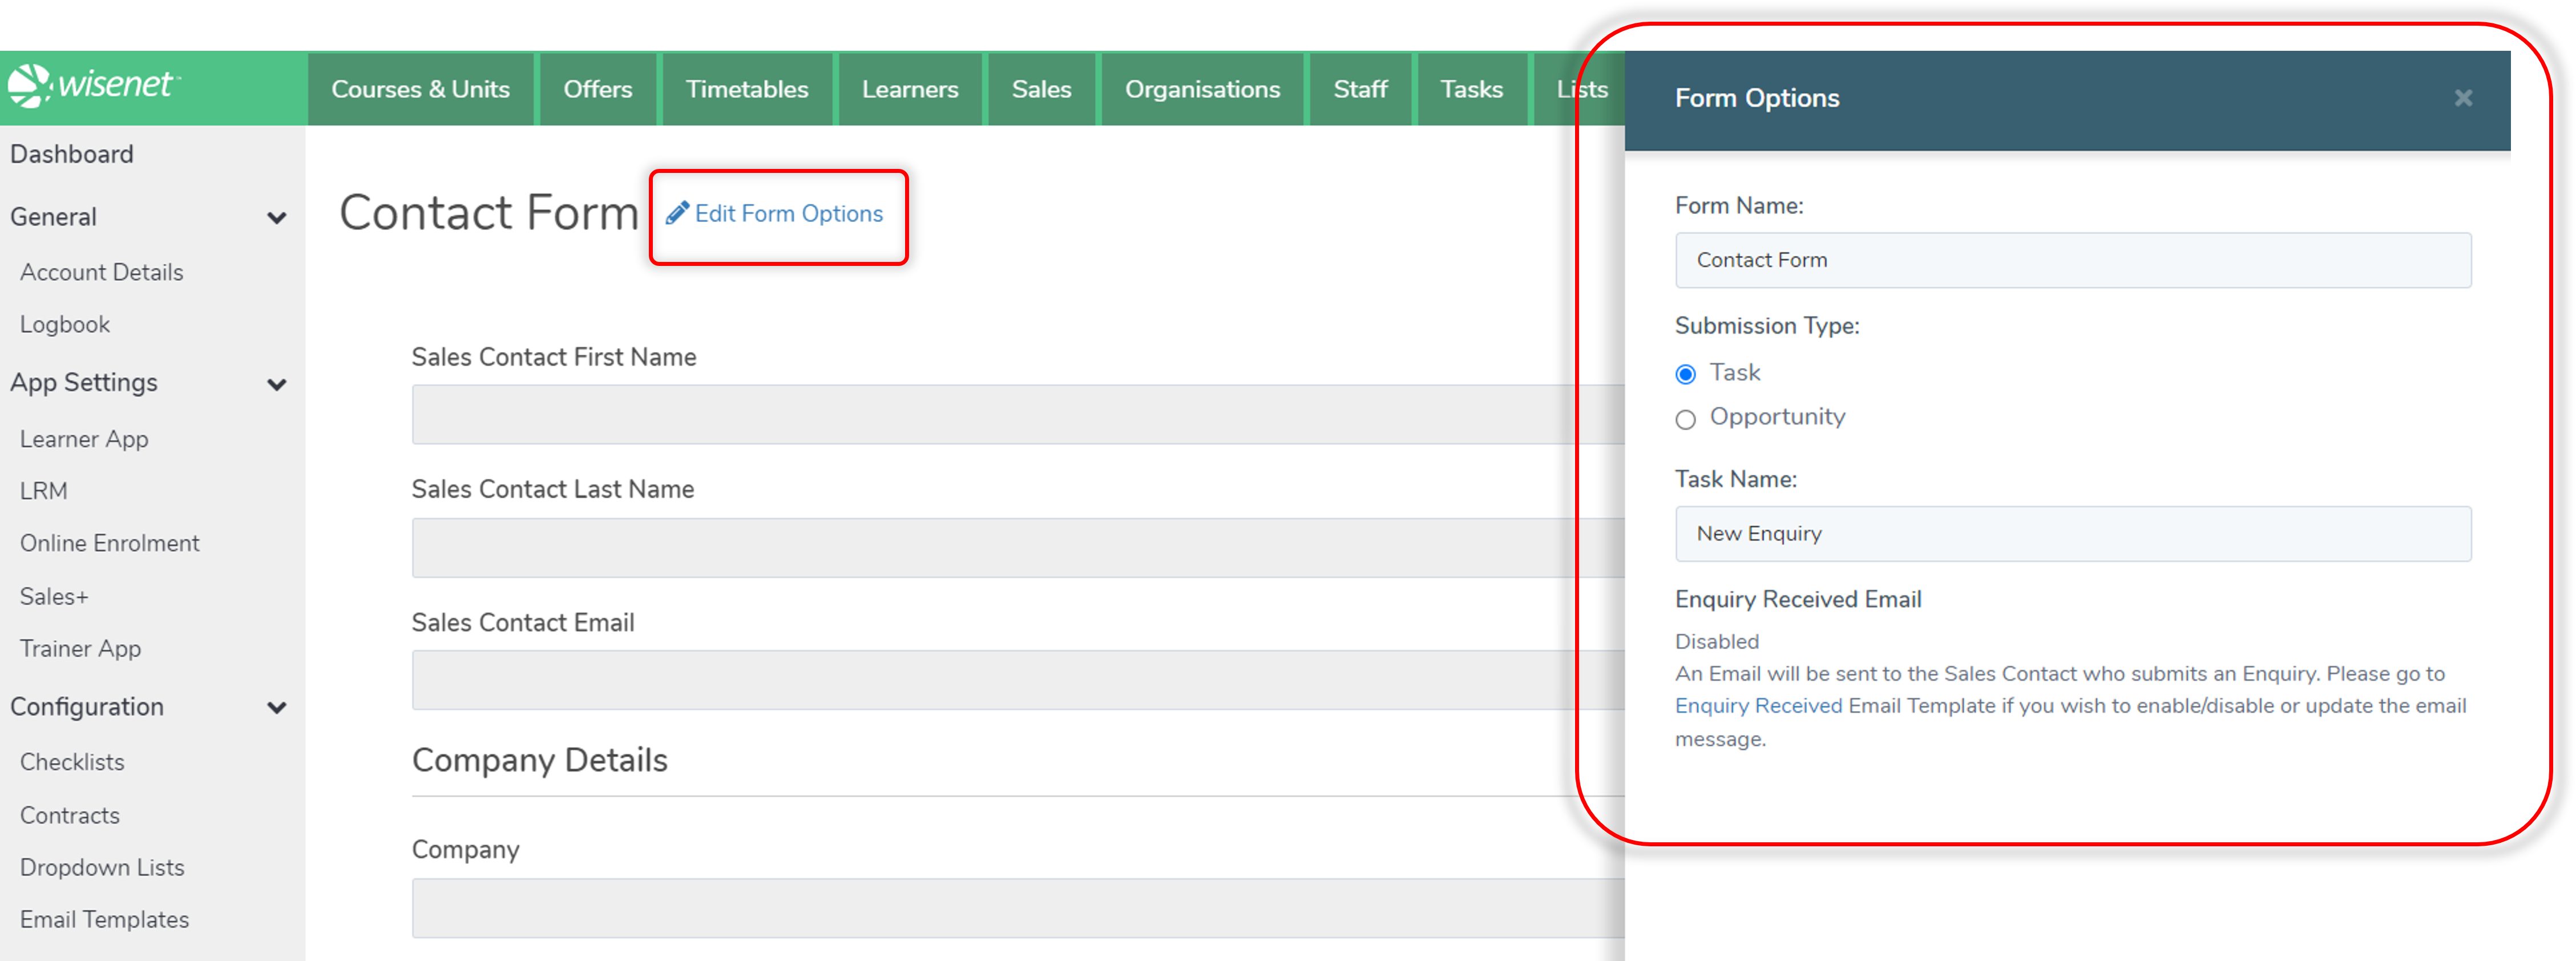
Form Options
Choose the Submission Type:
- Either, Task
- Enter the Task Name
- Manage Fields
- Add more fields to the form (if required)
- Drag & Drop Fields in your preferred position on the Contact Form
- Add more fields to the form (if required)
- Click Save OR Save and Close
- Or, Opportunity
- Enter an Opportunity Description
- Use the Dropdown boxes to update Pipeline, Stage and Owner

5
Manage Fields (if required)
Once you have created a Form, Click to select the Form you want to manage so that you can:
- Edit Form Options

- Edit existing Fields
- Hover on the field you want to edit
- Click on the Edit icon

- Add/Edit Conditional Logic
- Find out more here

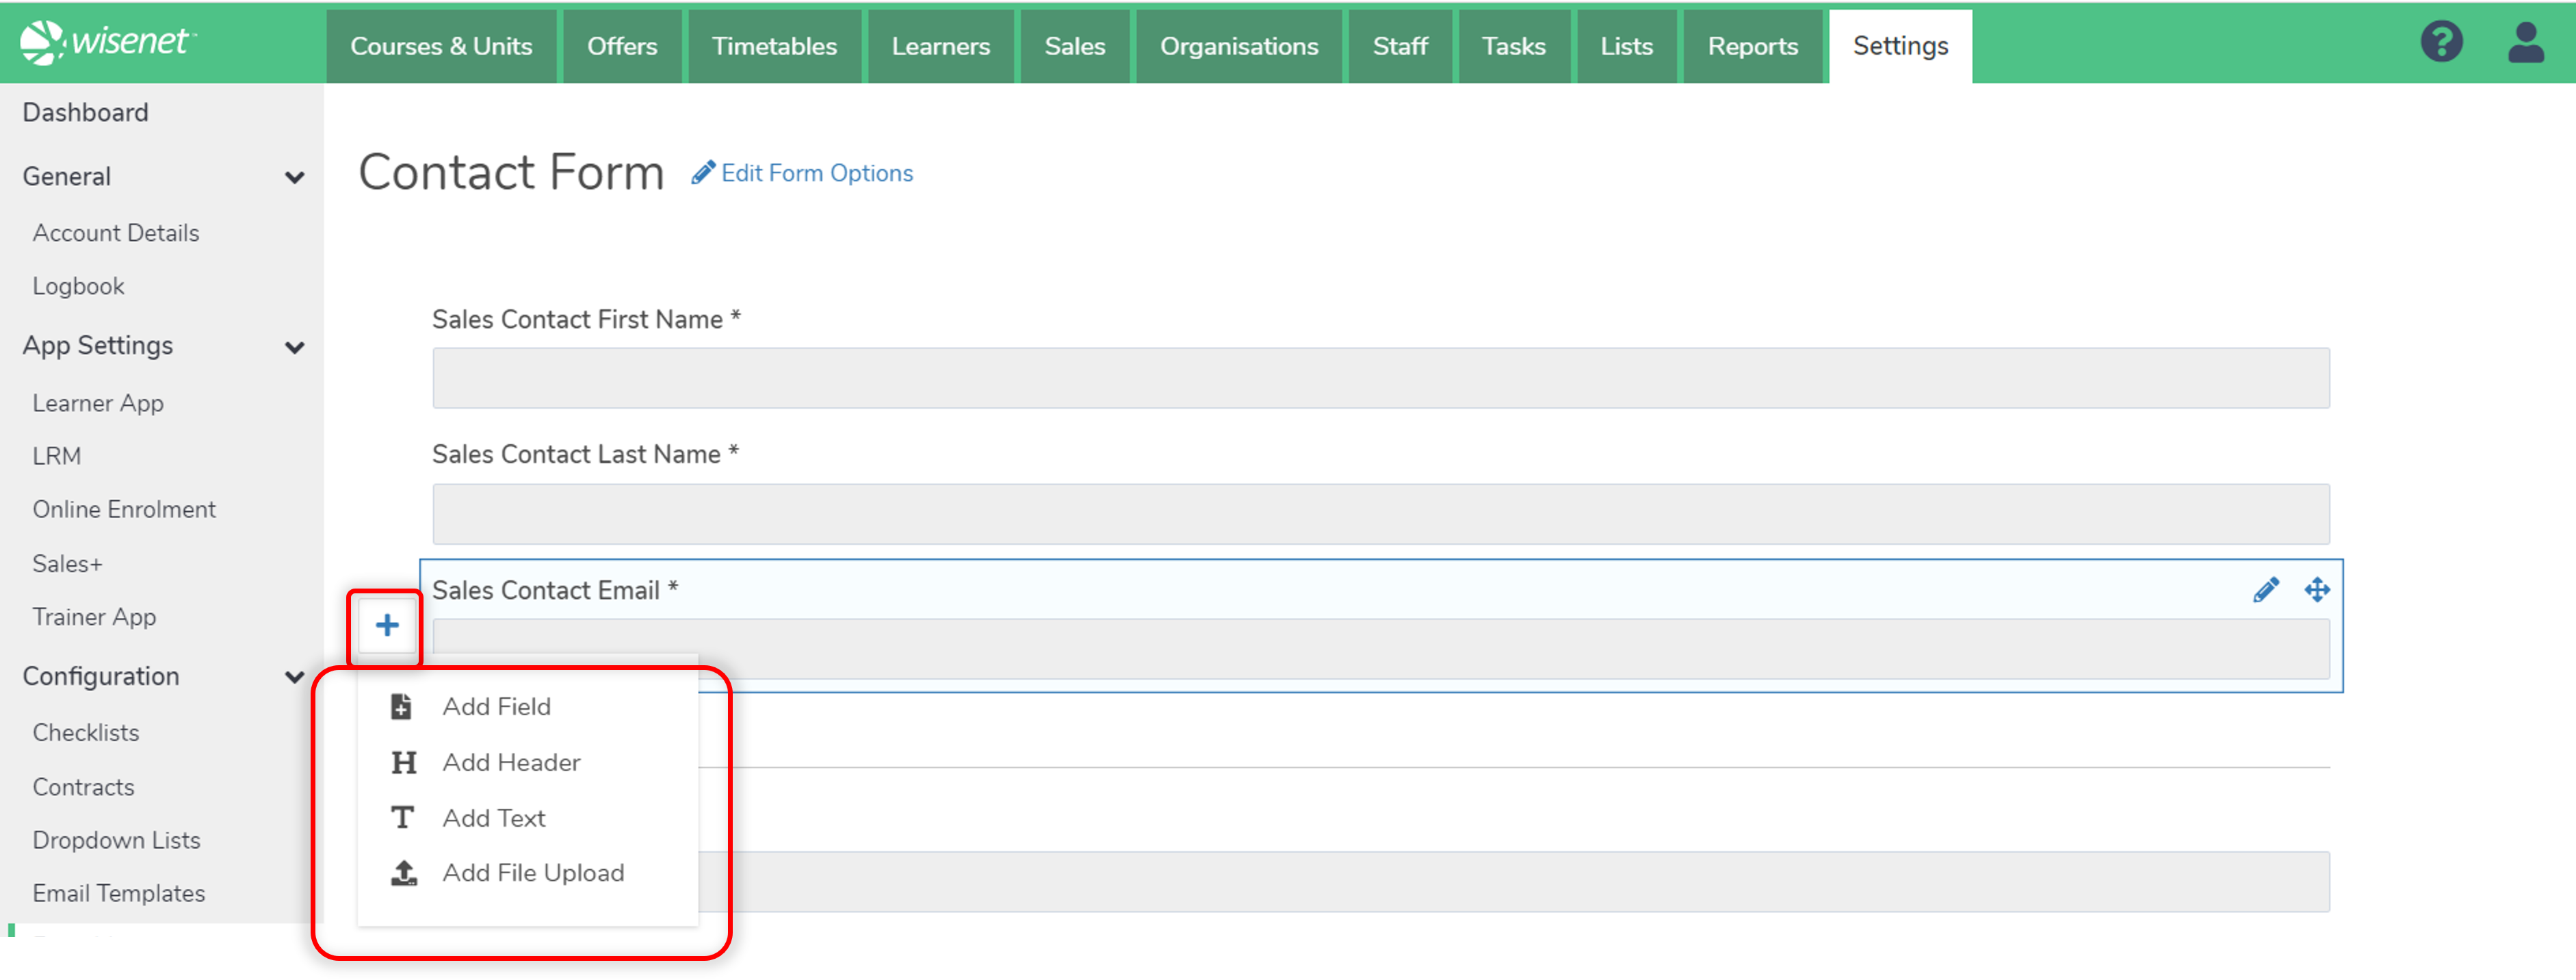
- Add
- more Fields to the Form
- a Header
- a Text section
- a File Upload section
- Hover on the Field where the new Field to be added will sit under
- Click on the Plus Icon and choose whether you want to add Field, Header, Text or File Upload

- Drag & Drop Fields to arrange them in your preferred order on the Form
- Hover on the relevant field
- Click and Hold the Drag & Drop icon
- Drop Field in it’s new position on the Form

6
Click Save OR Save and Close.
7
Copy Option
Save time by using the Copy Form option available for existing Forms rather than adding a new Form if there is not much variances in between the Forms. Simply click on the ‘Copy’ icon next to the Form and edit the copy accordingly.

Next Steps:
- (Optional) Configure Email Template – Configuring your Sales+ Email template will allow you to reference it when you are ready to send email confirmation to Sales Contacts. You can skip this and add later if desired.
- (Recommended) Test your Contact Form – We recommend testing your Contact Form. To do so, you will first need to have the Contact Form added to your Sales+ Site.
