To enable Billing and Payments, there are a number of steps that must first be completed by an Owner within Wisenet.
Once Billing and Payments are correctly set up and, a payment amount is set up as required within a Published Course Offer, Education Providers can start collecting payments from applicants applying online via Sales+.
1
Enable and Configure Billing and Payments
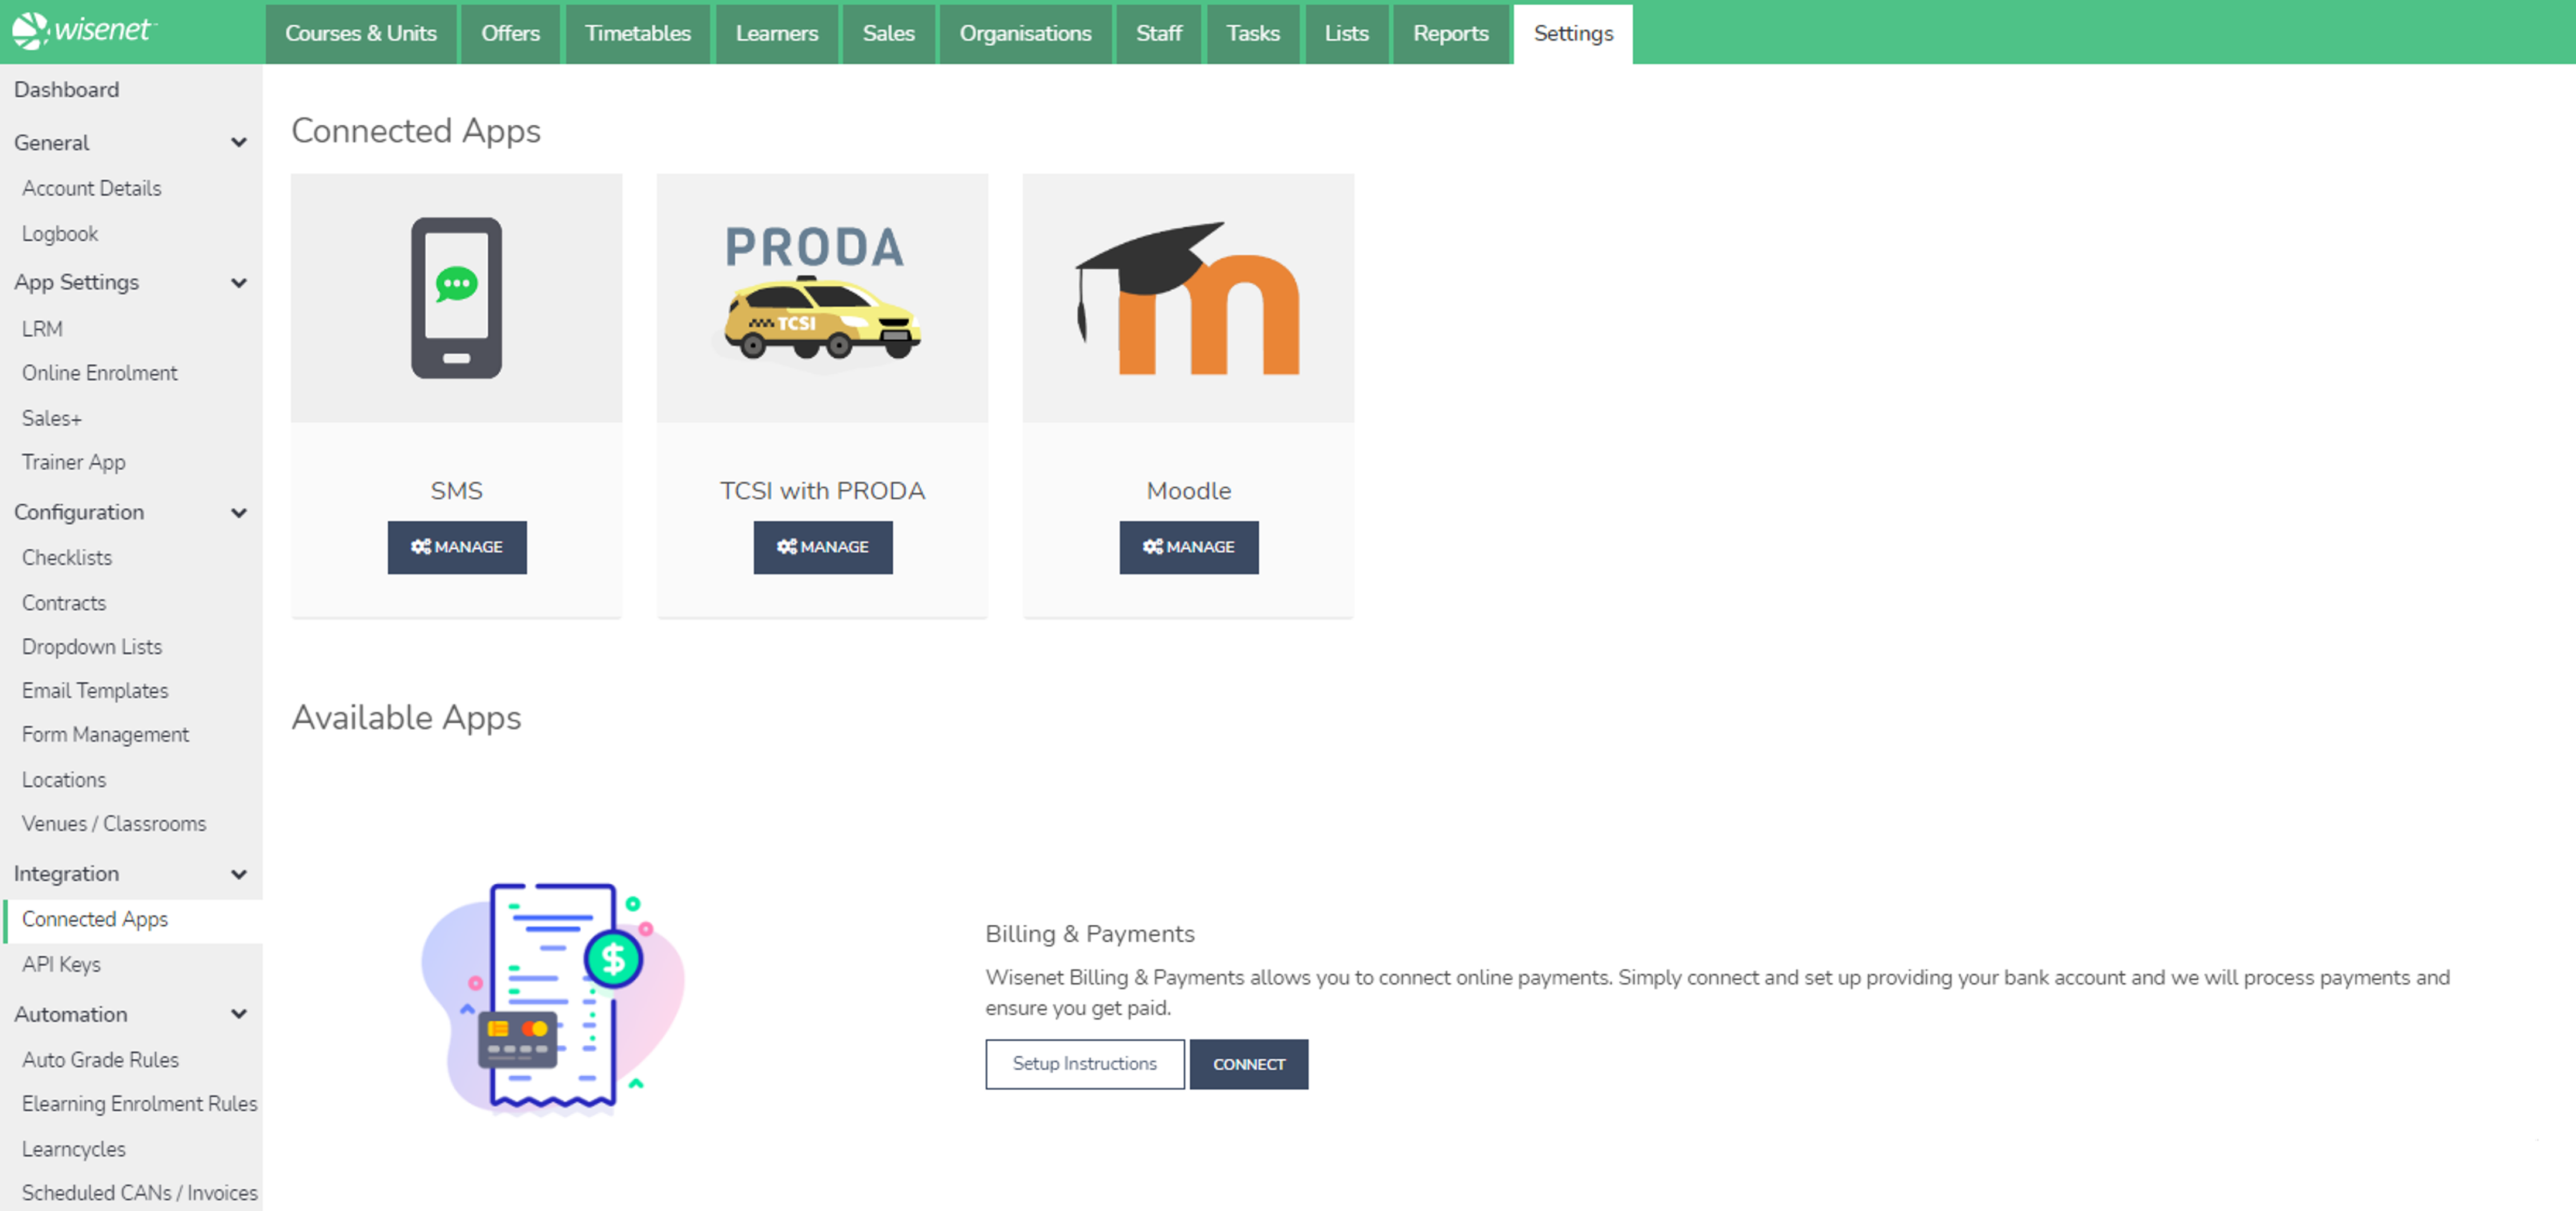
- Navigate to LRM > Settings > Integration > Connected Apps
- Under Available App > Billing and Payments, Click Connect
- Follow the prompts until the Status is Connected
- Update Account Details
- Add Bank Details
- This is where we will make payments to

2
Branding
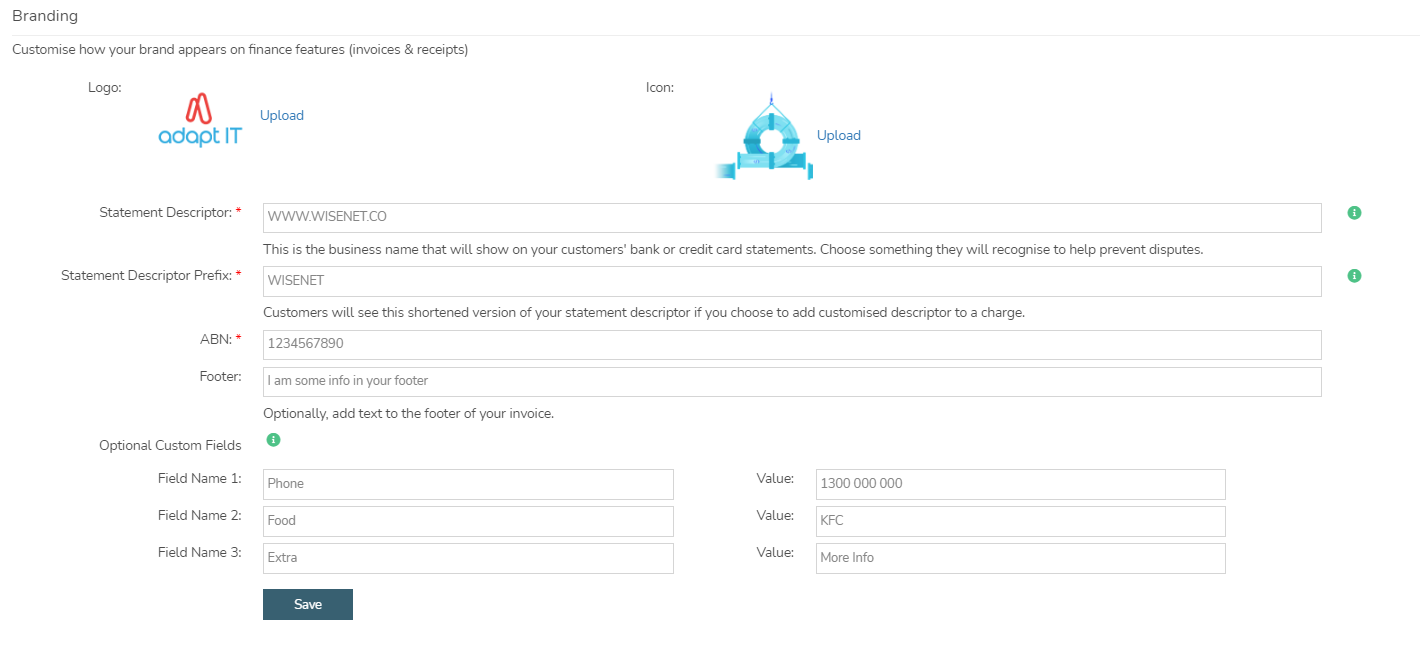
Customise how your brand appears on finance features such as invoices and receipts:
- Logo
- Upload your logo
- Icon
- Upload an icon sized version of your logo
- Statement Descriptor
- This is the business name that will show up on your customer’s bank or credit card statements
- IMPORTANT NOTE: Choose something a customer will recognise to help prevent disputes
- Statement Descriptor Prefix
- Customers will see this shortened version on their statement if a customised descriptor is used on a charge
- ABN / Tax Id
- Enter your Tax Id
- Australia – Asutralian Business Number (ABN)
- Other – TaxId
- Enter your Tax Id
- Footer
- (Optional) Add additional text to the footer of your invoice
- Custom Fields
- (Optional) Add any custom fields if required
3
Tax Rates
Tax rates are managed by Wisenet. Currently you are not able to edit these.
4
5
Enable Payments against a Published Course Offer
Follow the steps below if a payment amount is required for a Sales+ Published Course Offer.
- Navigate to LRM > Course Offers
- Select and Open the relevant Course Offer
- NOTE: The Course Offer needs to be Published to enable payments
- On the left navigation bar, Click Sales
- On the top right corner, Click Actions > Edit
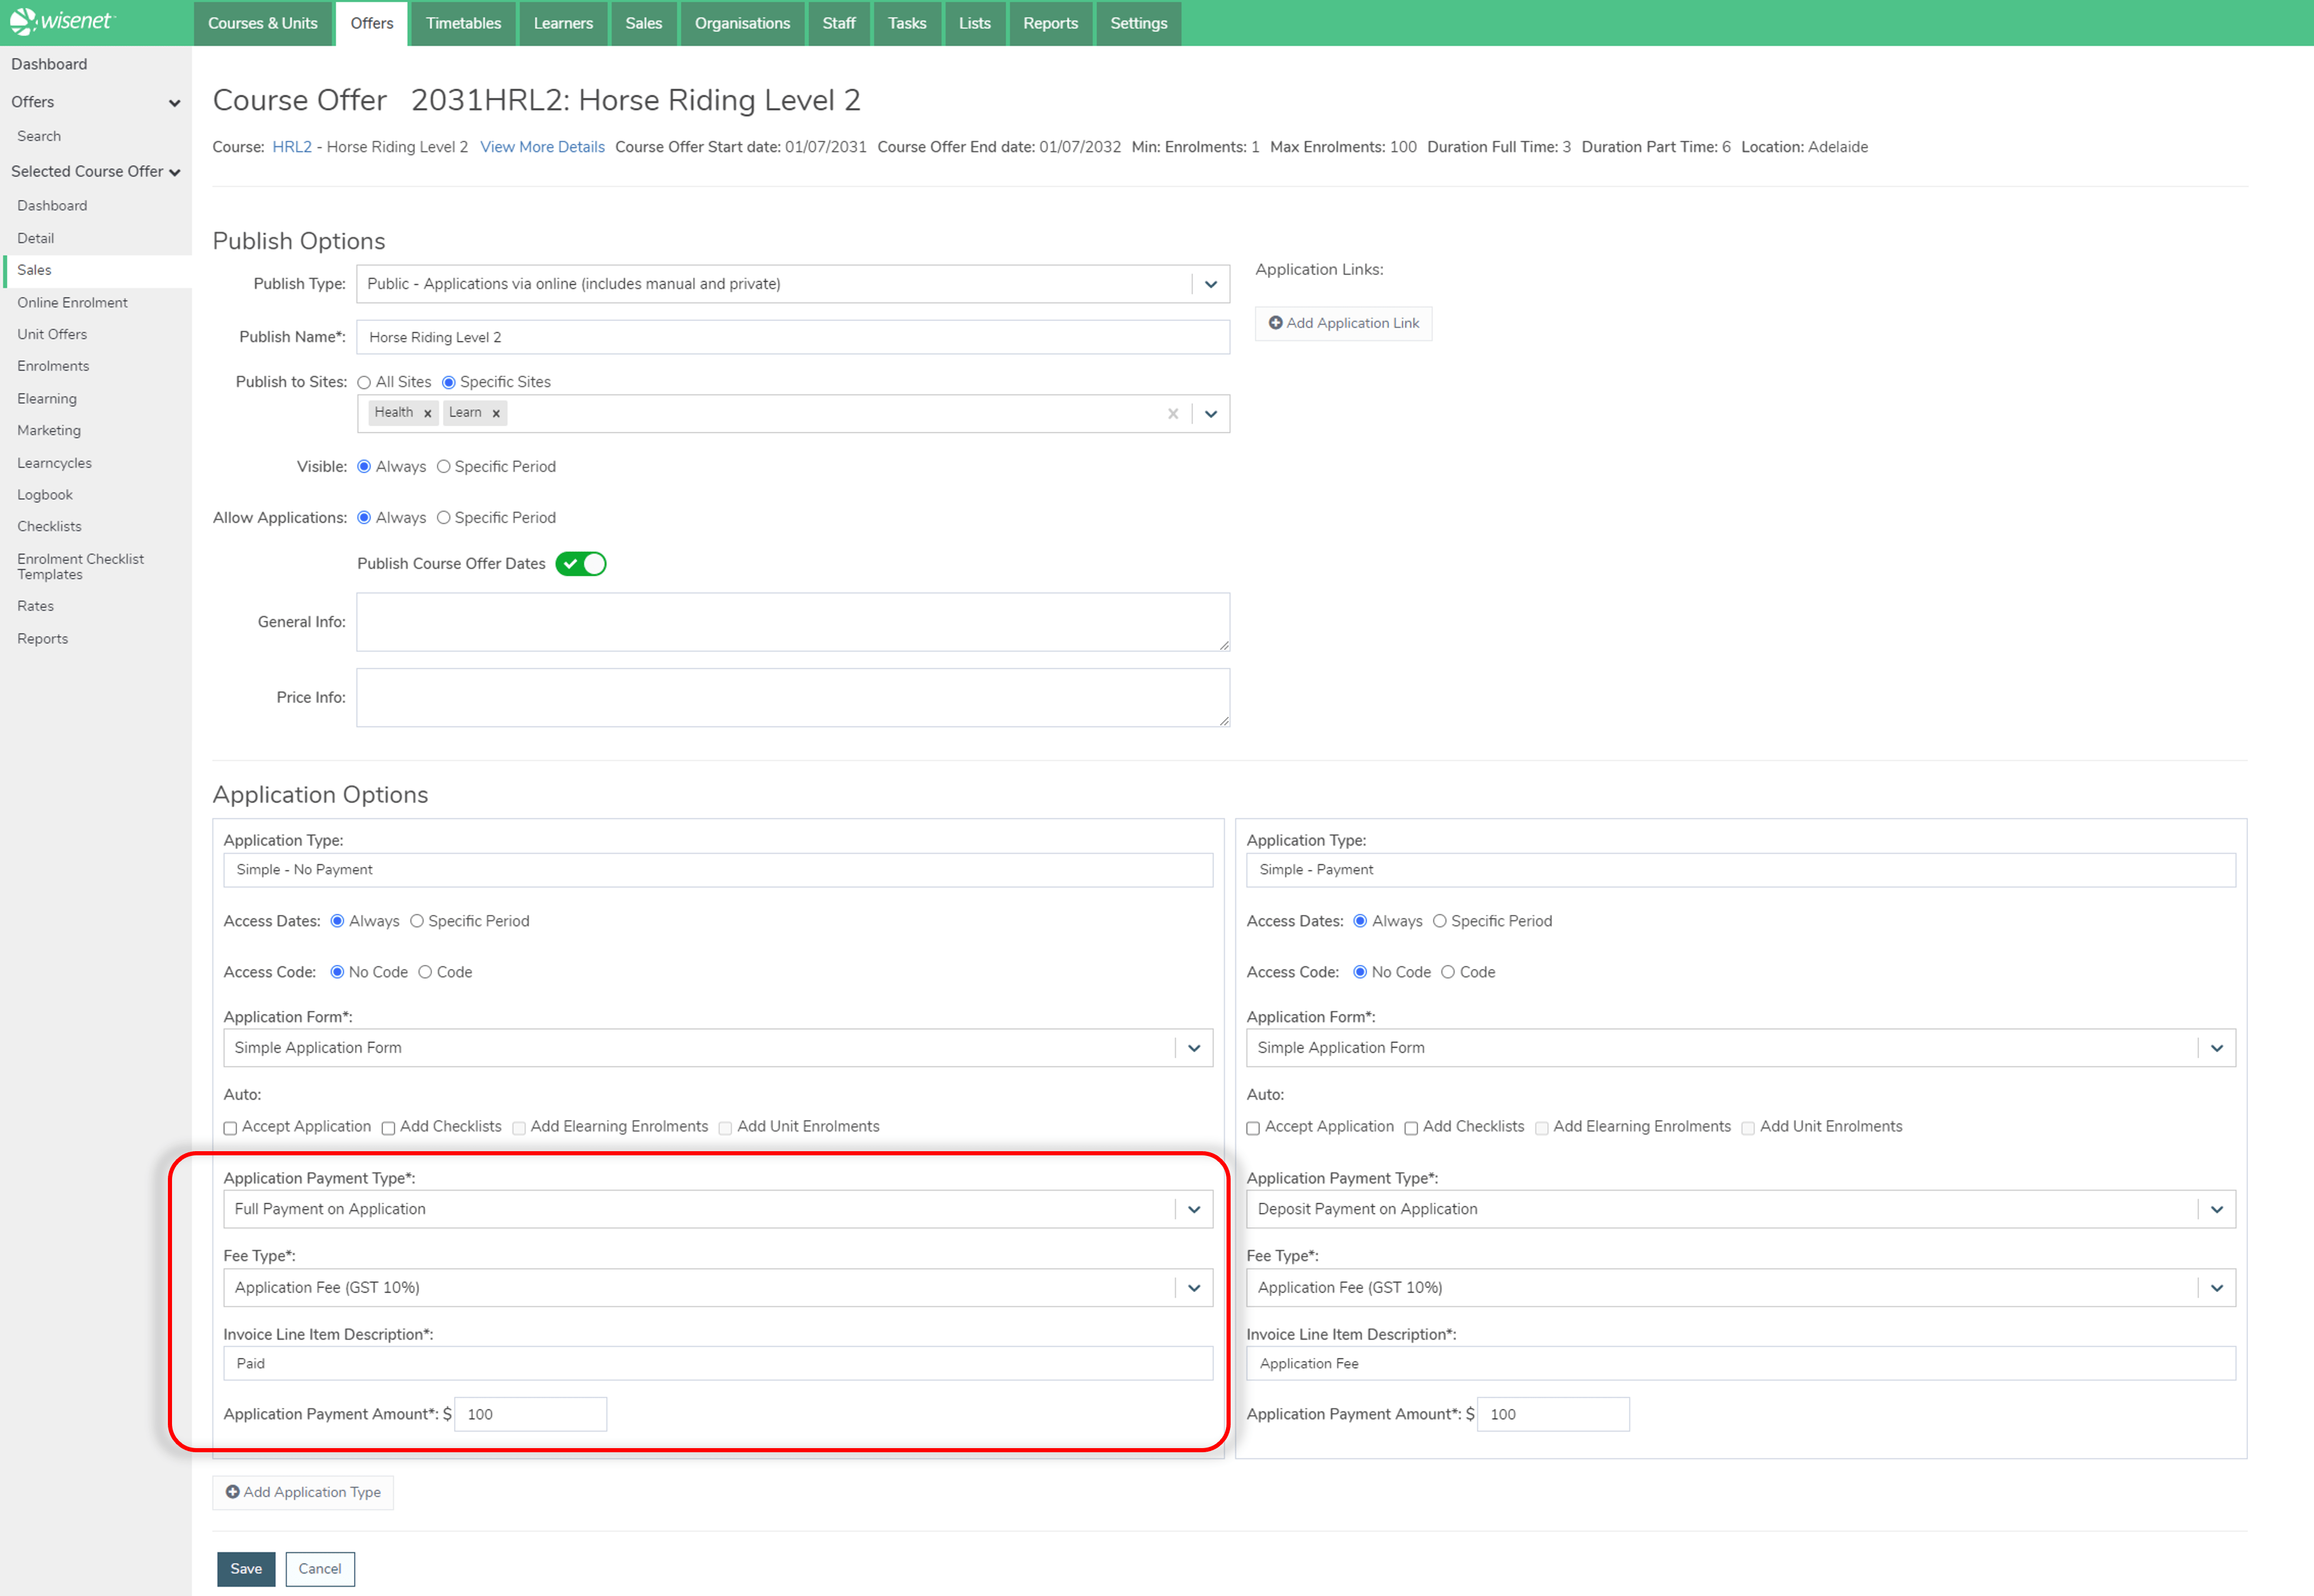
- Under Payment Type, Choose whether:
- No Payment on Application
- Deposit Payment on Application
- Full Payment on Application
- The following options will be required if a Payment is required (Mandatory when Deposit Payment or Full Payment on Application is chosen)
- Fee Type
- Select from drodpown
- Invoice Line Item Description
- Defaulted from selected Fee Type
- Can be edited
- Payment Amount
- Defaulted from selected Fee Type
- Can be edited and must be greater than 0
- Click Save
- Fee Type
6
Ready to receive payment
- Any update you make to the Course Offer will automatically update the published data in Sales+
- Your Application Form will dynamically include/exclude the Payment Step based on what is configured for the selected Intake and Application Type
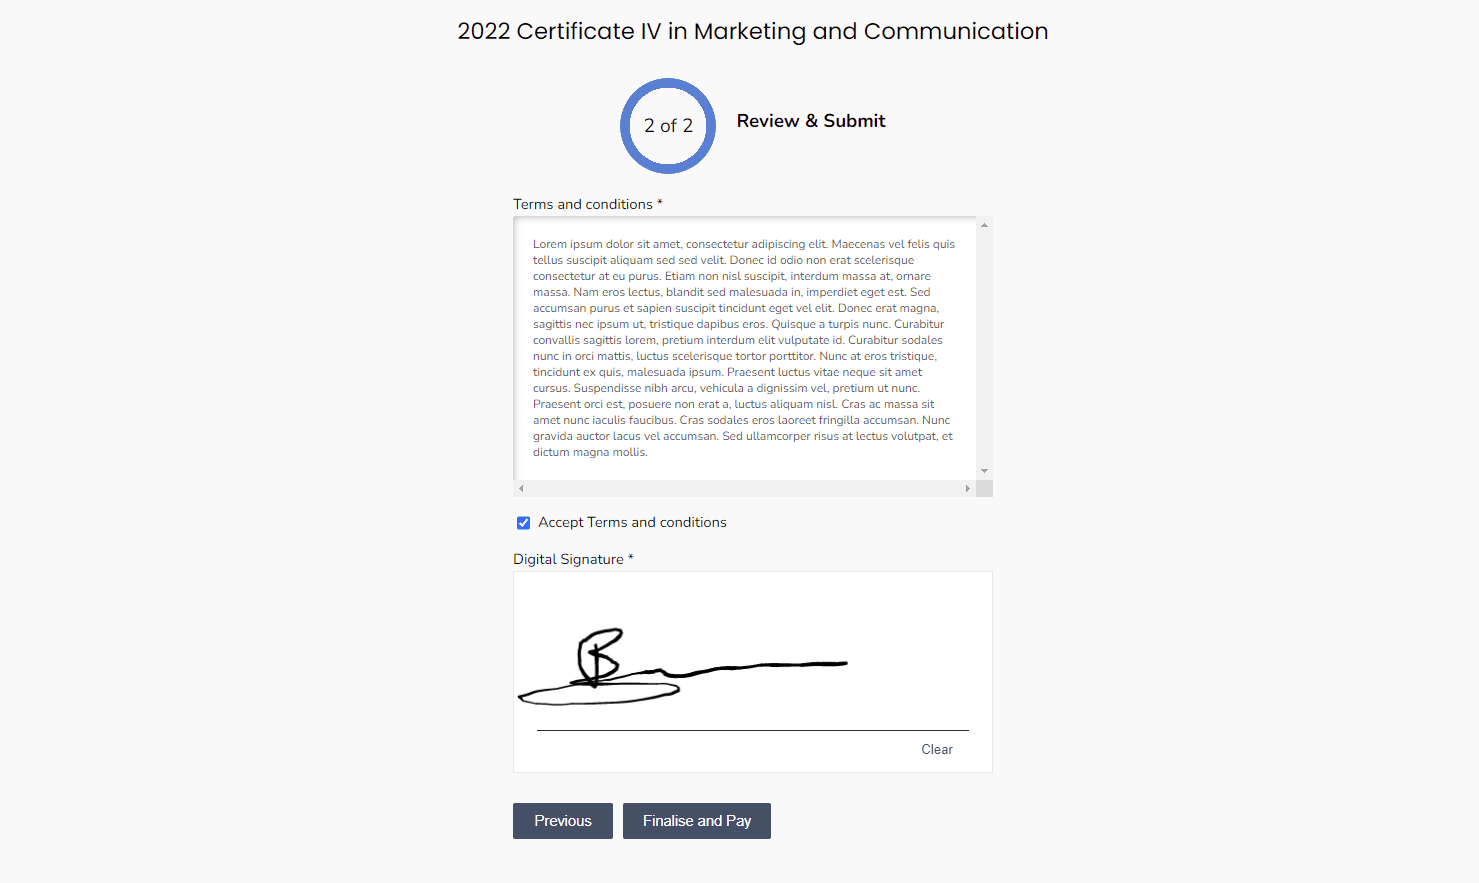
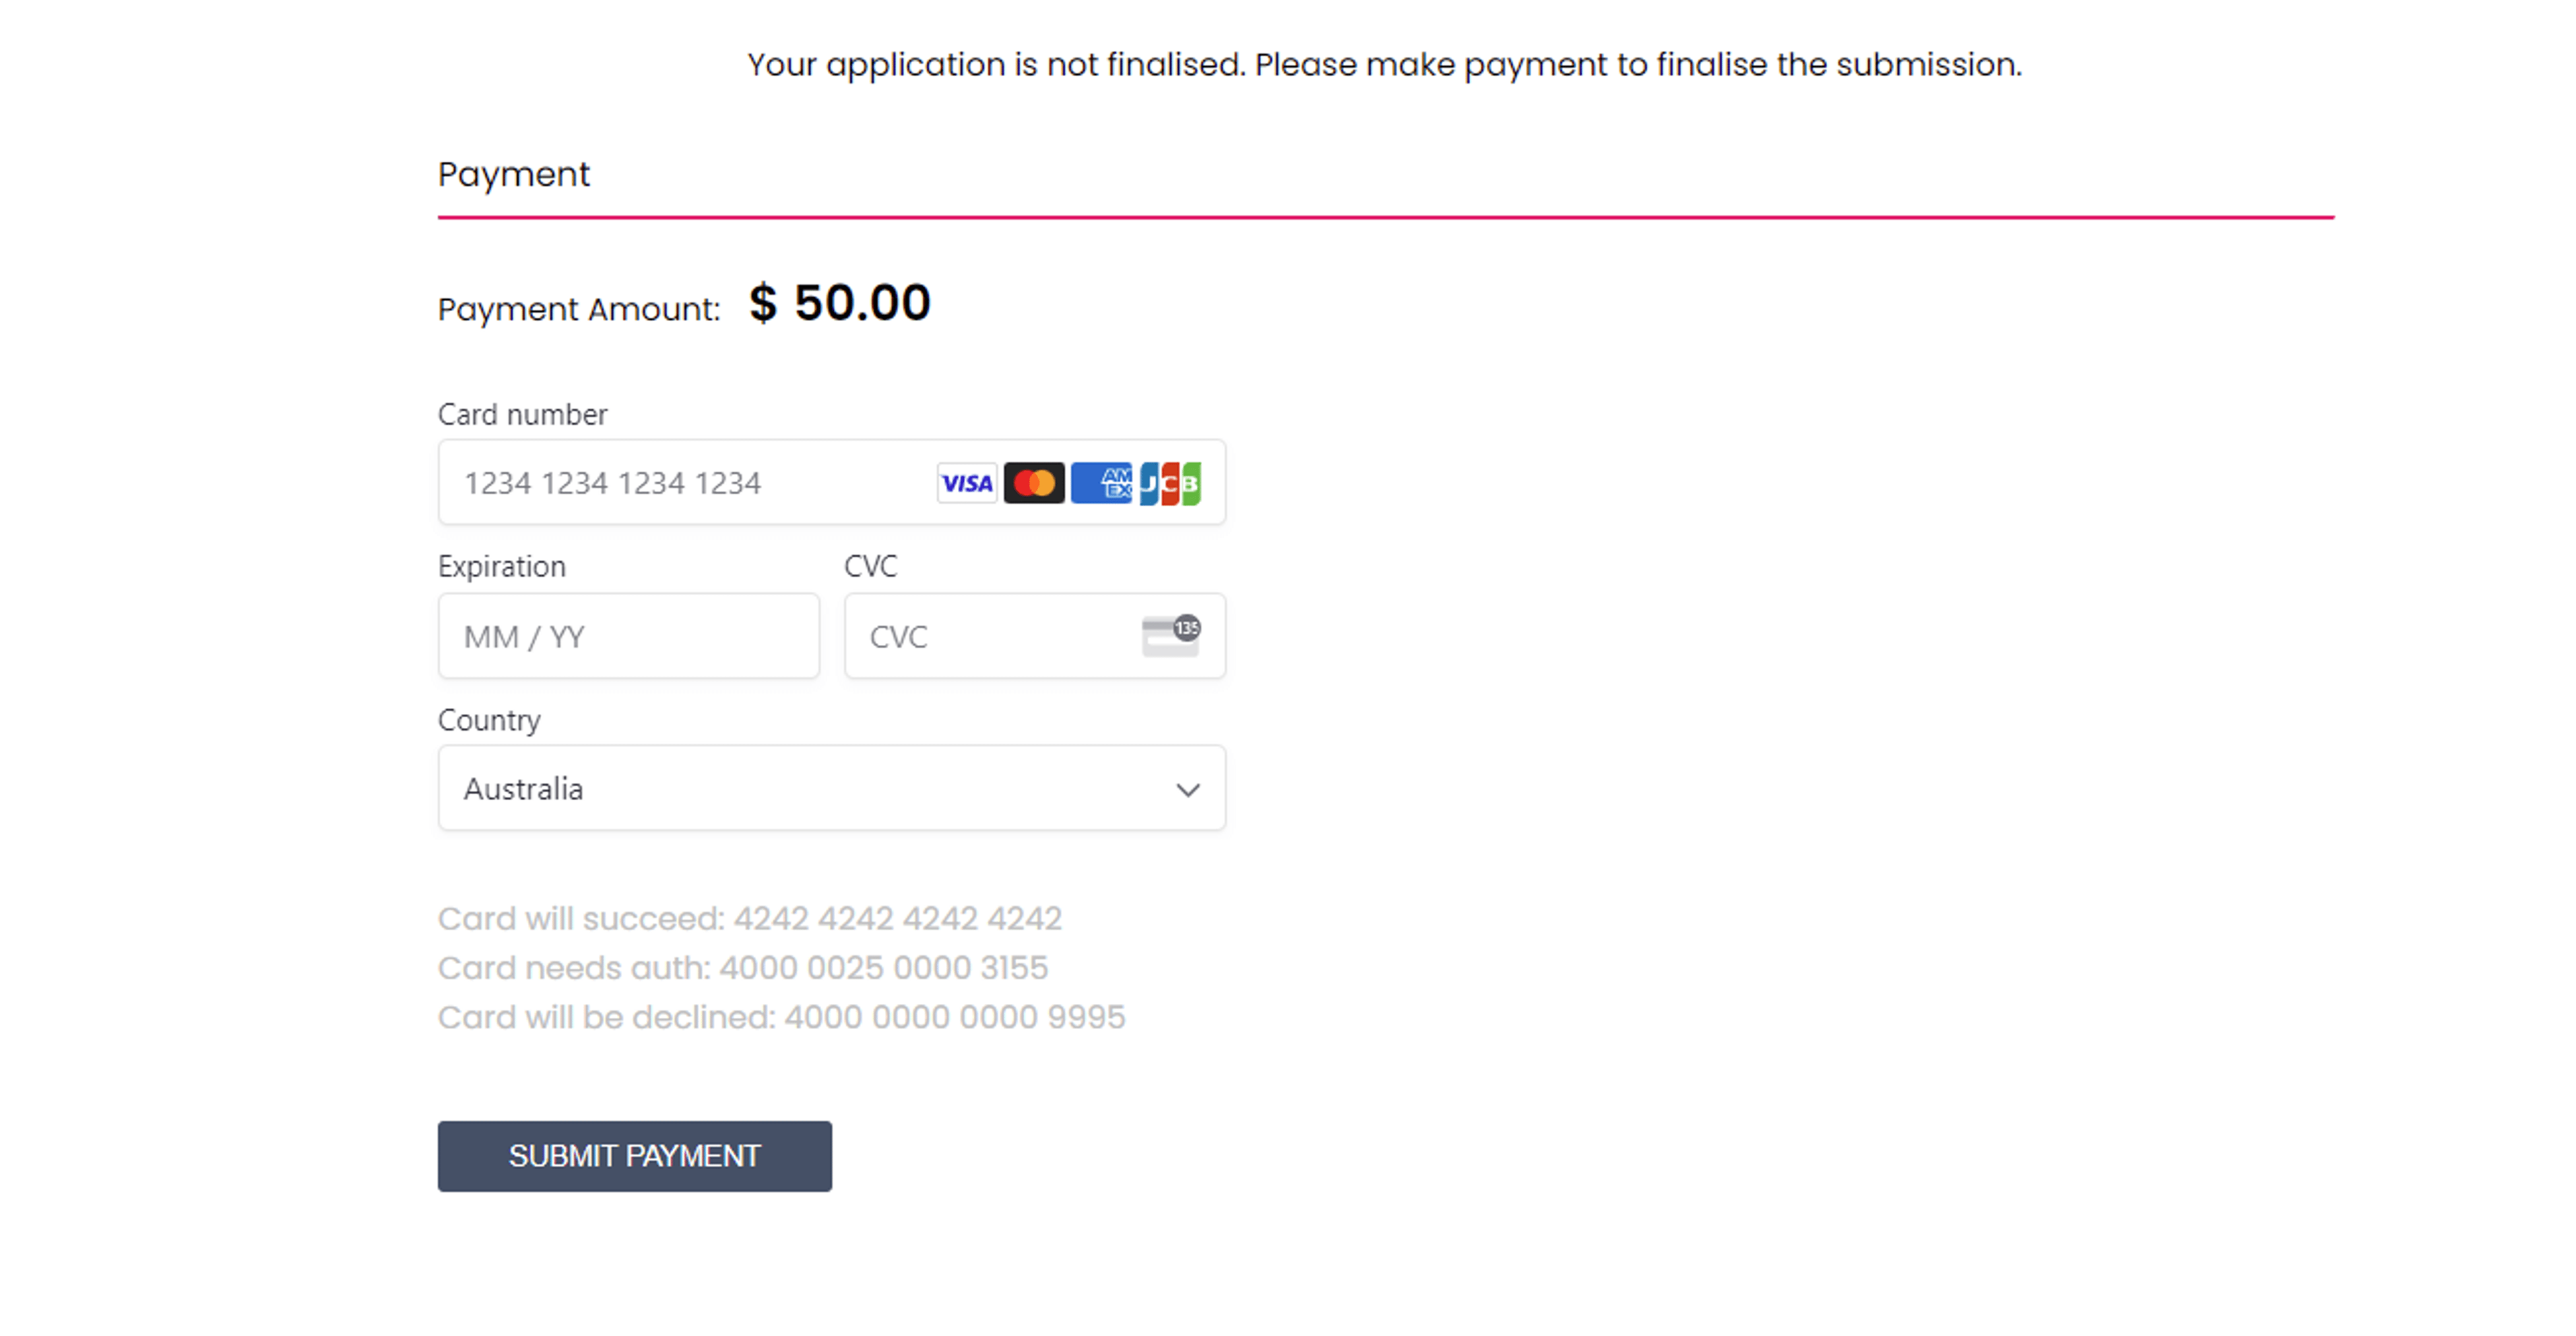
- When Payment is included in the Application Form the ‘Submit’ will change to ‘Finalise and Pay’ and redirect the Applicant to the Payment Step
- The Applicant can now complete payment
7
What happens when a payment is made
Payment is successful
- On successful payment the Applicant will be taken to the ‘Submitted Application’ success page.
- In Wisenet, an invoice will be created
- The Application will be processed with a Payment Status = Paid
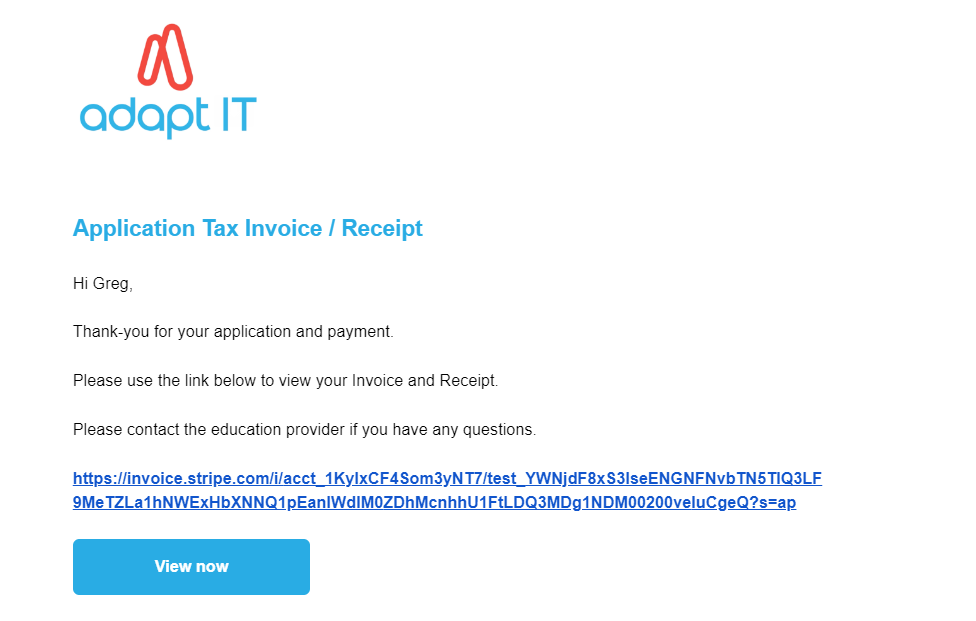
- An email will be sent to the applicant with the Application Tax Invoice / Receipt

Unable to make payment within 15 minutes
- If unsuccessful in making a Payment, after 15 minutes the application will be processed with a Payment Status = Failed
- An email will be sent with a link to view Invoice and make Payment and a Pay now Button which will automatically take the applicant to the Payment form to finalise payment
