PRODA is the authentication method for TCSI Portal and facilitates the secure access to government services online. Follow the steps below to set up your PRODA integration.
NOTES:
- If you do not see the option to connect to PRODA on the LRM then log a support request.
- If you need help with handling PRODA B2B Device Expiry, CLICK HERE
Contents
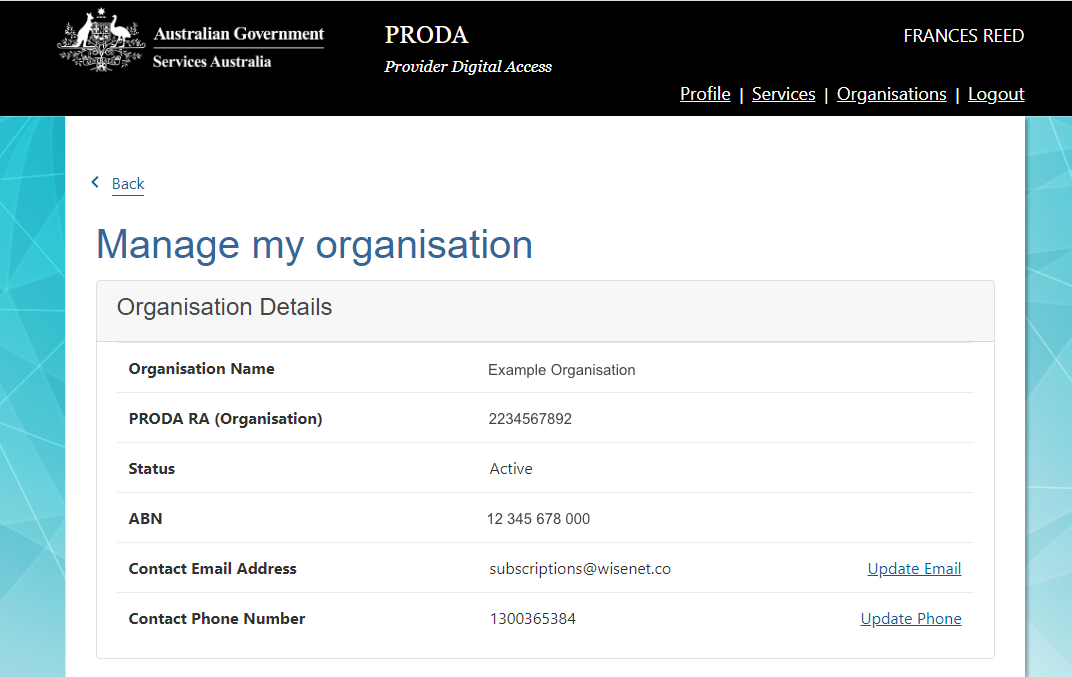
- 1 Before you begin, please obtain the PRODA RA (Organisation) number obtained from PRODA Organisation Details and keep it ready
- 2 Ensure PRODA and TCSI are added as a ‘Service Provider’.
- 3 Connect Wisenet to PRODA
- 4 Register a B2B Device
- 5 Generate the Device Activation Code
- 6 Connect Wisenet to PRODA
- 7 Connect Wisenet to PRODA
- 8 Connection Successful
- 9 TCSI Streaming
- 10 How to handle PRODA B2B Device Expiry
Before you begin, please obtain the PRODA RA (Organisation) number obtained from PRODA Organisation Details and keep it ready
See screenshots below for reference only
Ensure PRODA and TCSI are added as a ‘Service Provider’.
- Log-in to your PRODA account by navigating to https://proda.humanservices.gov.au/
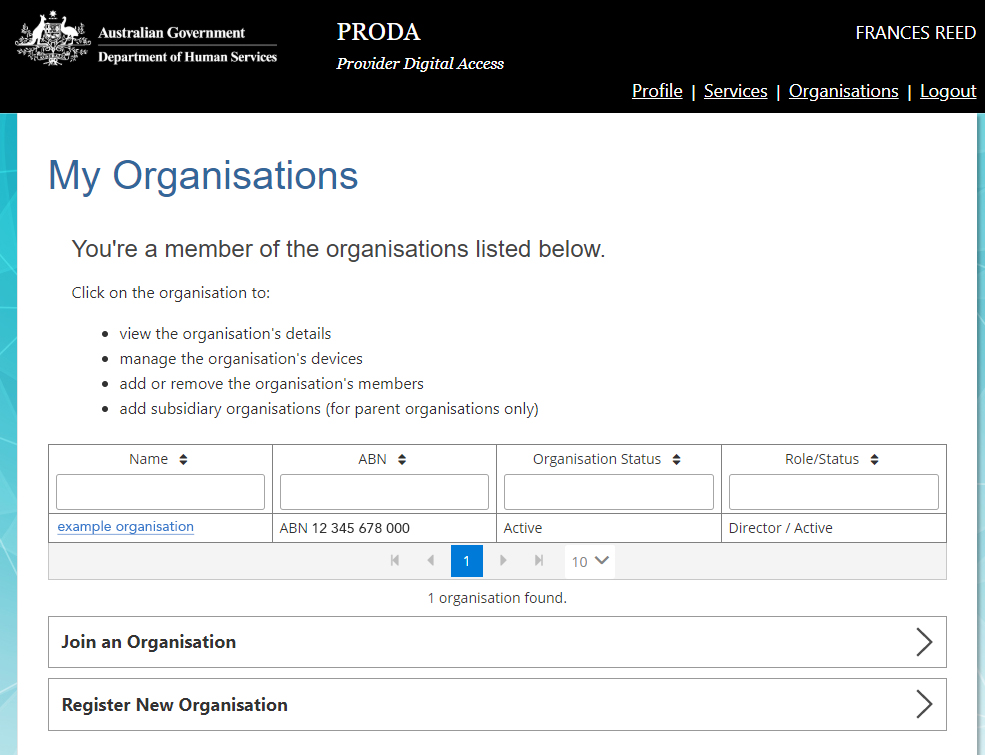
- Select “Organisations” located in the top right of the screen.
- Select the organisation from the list of organisations you are a member of.
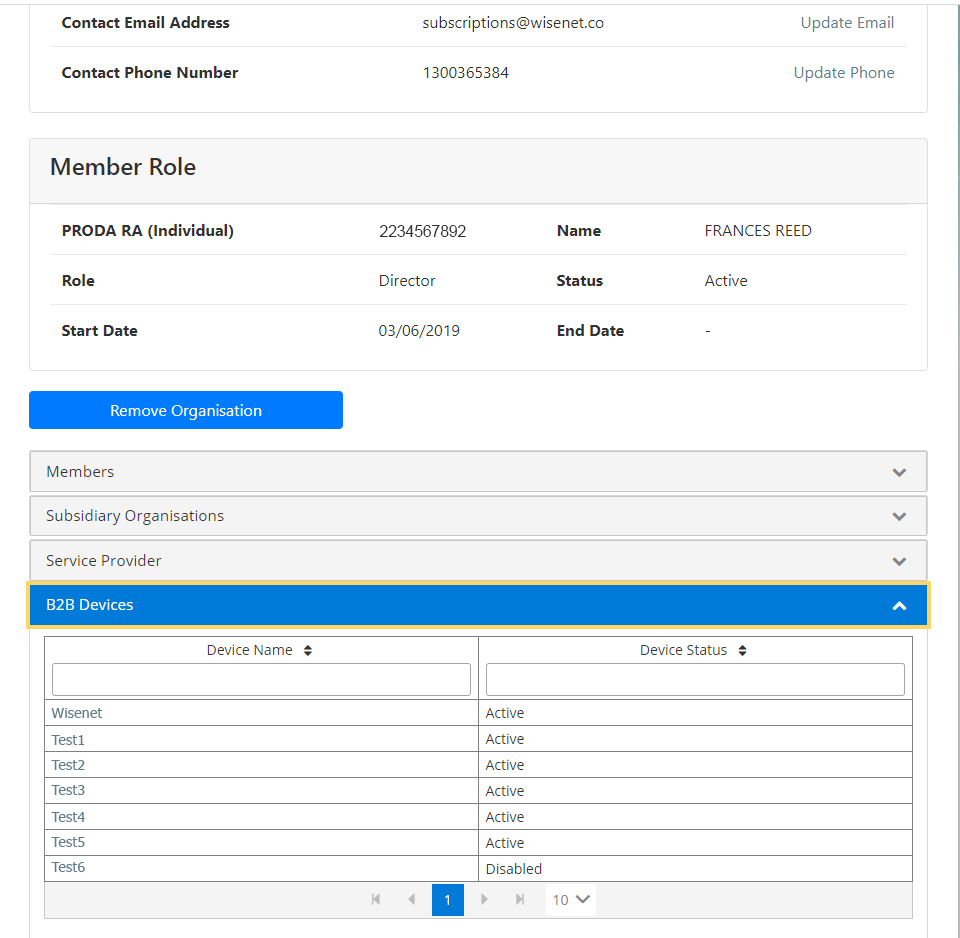
- Expand the “Service Provider” dropdown, and click “Add Service Provider”
- Select “Tertiary Collection of Student Information” and click the “Add Service Provider” button.
See screenshots below for reference only
1
Connect Wisenet to PRODA
- Go to the PRODA Services Australia website
- On the Top Navigation Bar, Click Organisations
- You will see a list of all your Organisations, Select the organisation by clicking on the blue hyperlink.
See screenshots below for reference only
2
Register a B2B Device
- Select B2B Devices
- Then, click on ‘Register New B2B Device’
See screenshots below for reference only
3
Generate the Device Activation Code
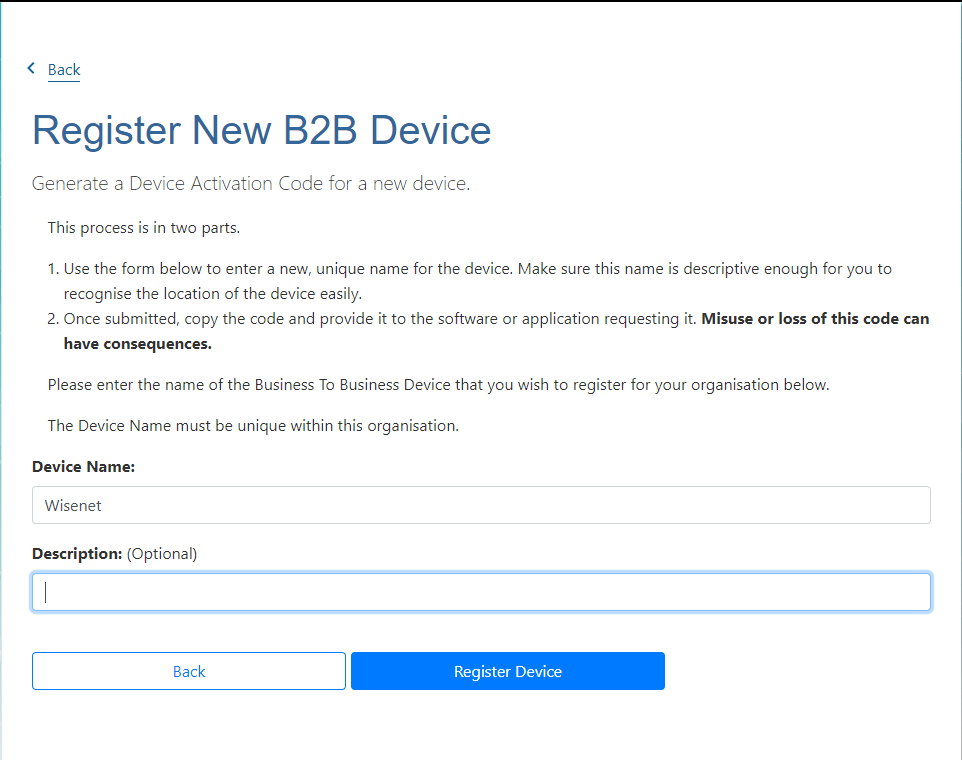
- Please enter a valid name for the Device
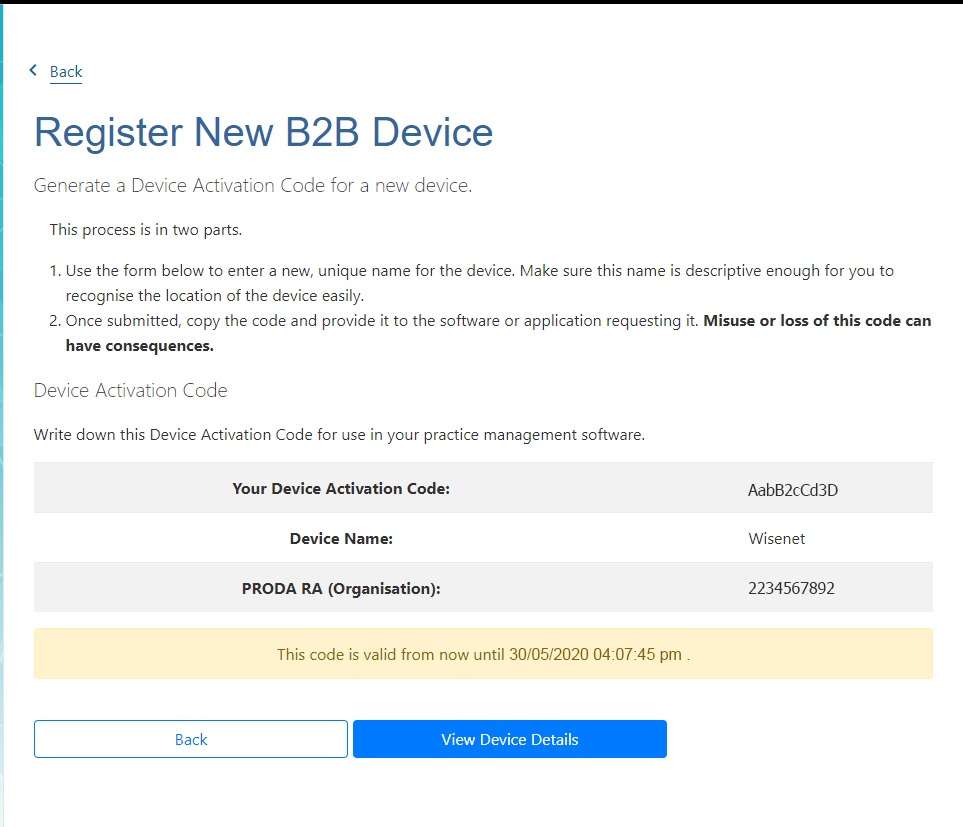
- Then, click Register Device. This will generate a Device Activation Code (See screenshot 2).
See screenshots below for reference only
4
Connect Wisenet to PRODA
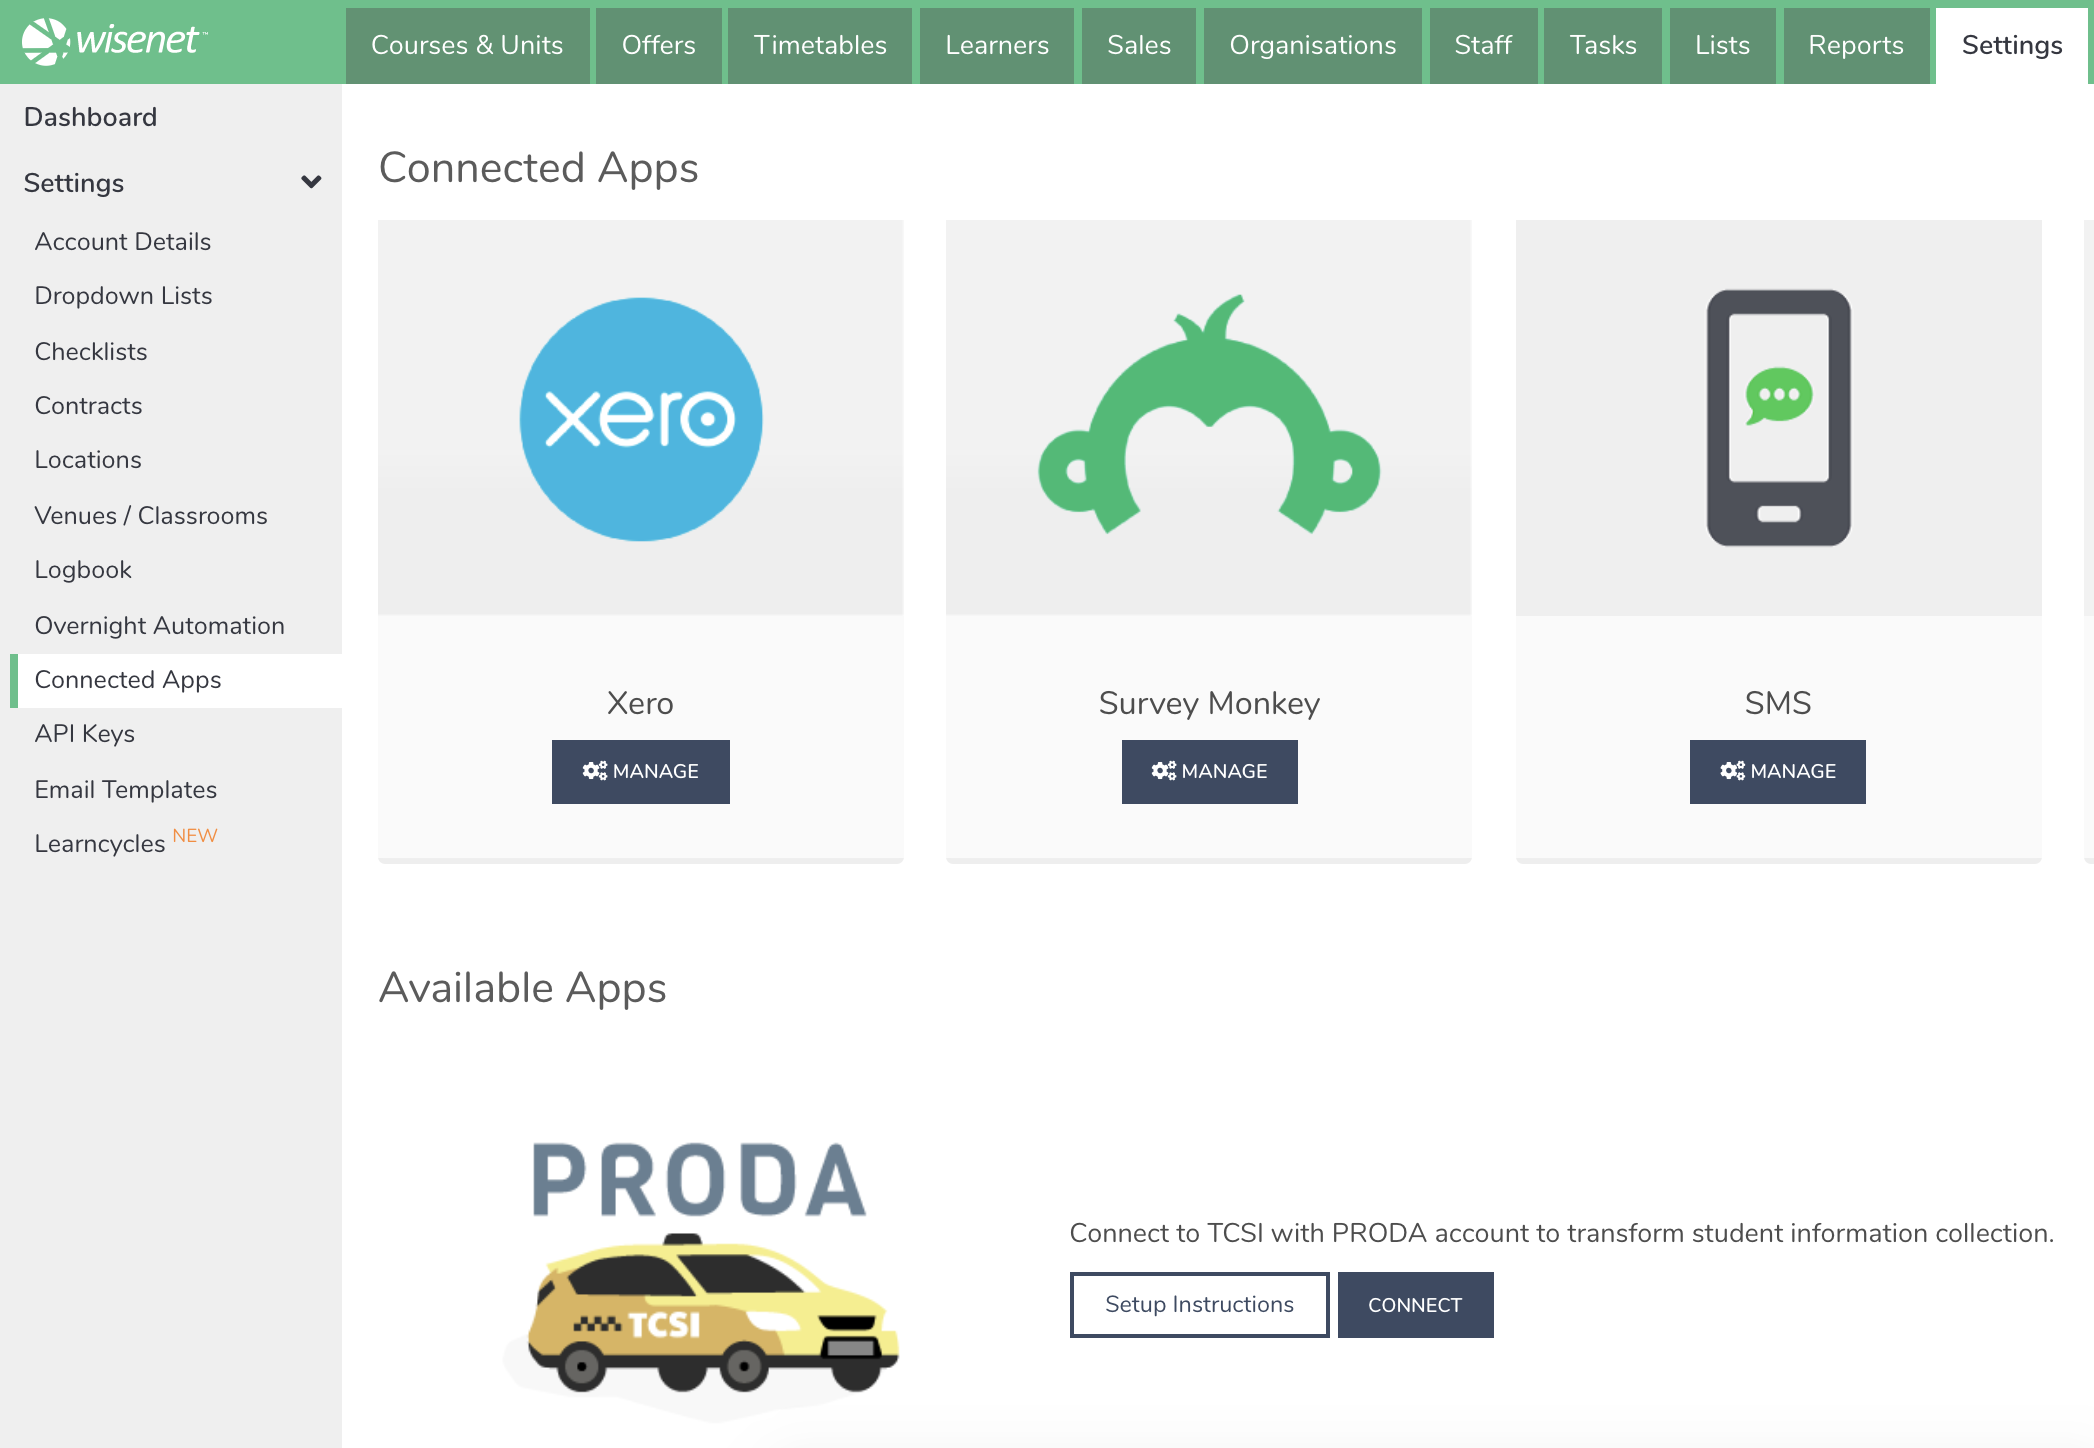
- Navigate to Wisenet LRM > Settings
- In the Integration box, Click Connected Apps
- You will see a list of all your connected Apps as well as available Apps. Next to the PRODA Application select Connect to begin the authorisation process.
See screenshots below for reference only
5
Connect Wisenet to PRODA
You will be taken to the Connecting to TCSI with PRODA page
- Enter your:
- Organisation Id – Enter the PRODA RA(Organisation) number obtained from PRODA Organisation Details
- Device Name – Enter the device name used while registering for a new device in PRODA
- Device Activation Code – Enter the device activation code generated after registering for a new device in PRODA
- Then, click Connect
See screenshots below for reference only
6
Connection Successful
- Wait for the Connected Apps page to load and you will see it showing as Device is connected successfully next to PRODA Connection Status.
See screenshots below for reference only
7
TCSI Streaming
Once PRODA is connected, data will not begin syncing to TCSI until Wisenet enables Data Streaming. This is a manual process that allows us to complete a number of checks.
This process is only required ONCE on initial connection. You can skip this step if you are not new to TCSI. Else please log a support to advise that you need TCSI Streaming enabled.
How to handle PRODA B2B Device Expiry
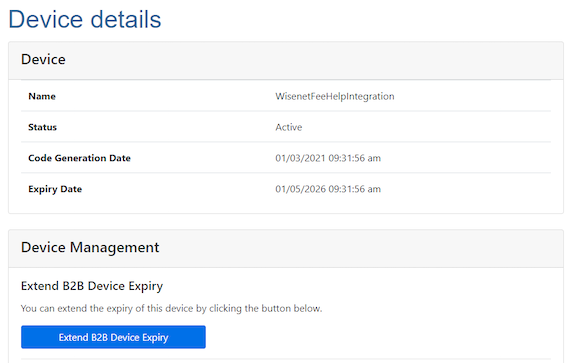
The PRODA device expires after 6 months. Wisenet raises an Event Alert when the device is about to expire. If you do not do extend the extend the expiry in time, the device will expire and you will need to disconnect and go through the PRODA connection process.
Extend Device Expiry Date
- Login to PRODA and go to device details
- Under Device Management look for the option to Extend B2B Device Expiry
- IMPORTANT NOTES:
- The Extended Device Expiry will NOT reflect immediately. It it only reflect in the Connected Apps the next morning.
- This option will not be available if your device has expired and you will need to Create a new Device (follow steps 1, 2 and 3 above)
- IMPORTANT NOTES:
- Once extended the event alerts will stop sending until the device gets close to expiring again
