Attendance is recorded to indicate which Learners attended, or in more detail by specifying times that the Learner attended. Both of these actions can be performed in bulk.
1
Required Pre-Steps
2
Search for Class
- Navigate to LRM>Timetables
- In the Class Search field, type in the date of the class and/or part of, or all of the class code or description, i.e:
- Date only: enter date as dd/mm/yyyy, eg: 21/09/2012
- Class code i.e: TAEC14338
- Date and code combination i.e: 21/09/2012 TAE
- Click Search
3
View Class Roll
- A list of classes matching your search will be returned
- To view your relevant class roll click on the Actions Dropdown box next to the relevant class
- Select View Class Learner List
- The class roll will now open
4
Mark Attendance
There are a number of ways of entering attendance into Wisenet – you will need to check with your Training Organisation on how you are required to enter attendance.
Trainers can also mark attendance through the Trainer Portal by:
- Navigating to the Trainer Portal home page in the Classes section, select the relevant date range you wish to view in the dropdown box
- Click Attendance to the right of the relevant class
- Tick each Learner that attended class
- Click Action and select Mark Attendance
- On the Set all Dropdown list, select Attended
- A Pop-Up Message will appear in RED saying “All selected records have been set as Attended 100%. Review and update individual records as required”.
- To Edit individual Time, For Learners who:
- Arrived late or left early: over-type their Time In and/or Time Out fields as applicable
- Did not attend part of the class tick Was client absent from class for a period of time? In the Dropdown list select the relevant time period
- To Edit individual Time, For Learners who:
- A Pop-Up Message will appear in RED saying “All selected records have been set as Attended 100%. Review and update individual records as required”.
- Click Update Learners
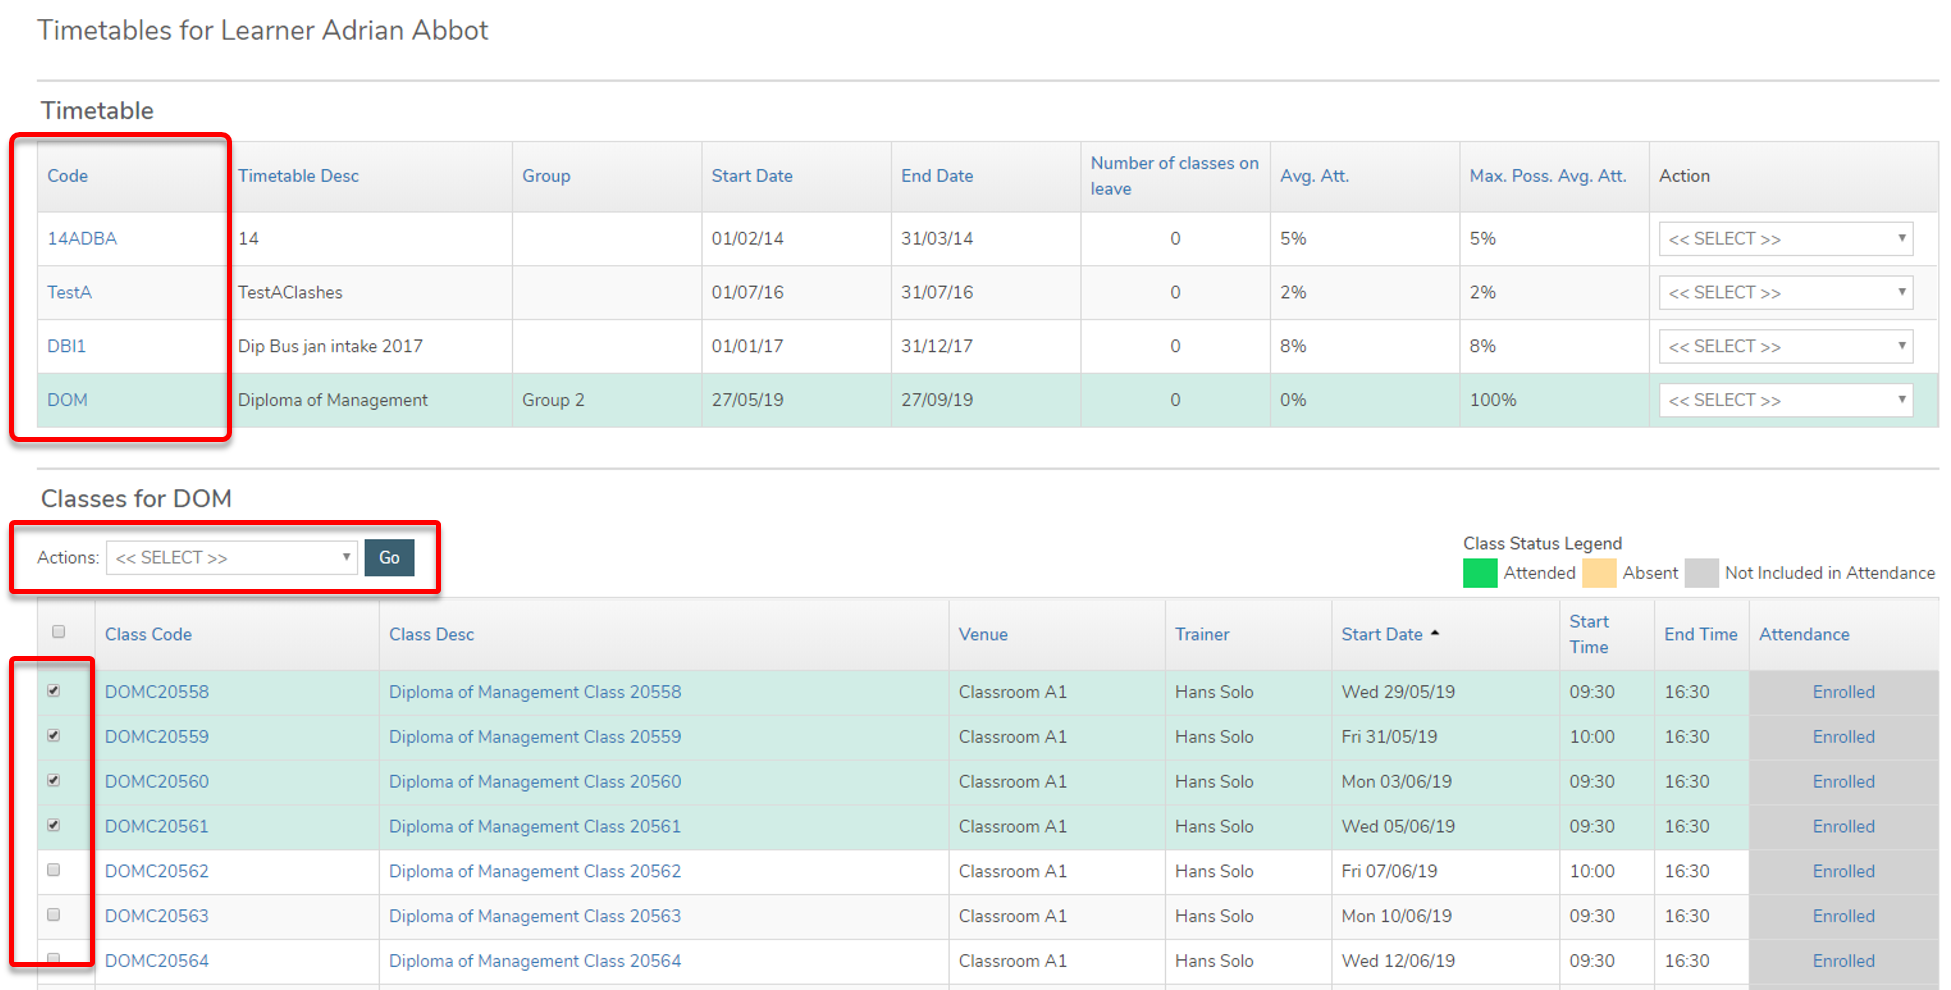
- Click on the Learner’s First Name that attended all classes that he/she is enrolled into
- A list of timetables for the individual Learner will appear
- Click on the Timetable Code to view a list of all the classes per Timetable
- Tick the classes that the Learner has attended, then from the Actions Dropdown box, Select Set Status: Attended 100%
- It should now show 100% in Green under the Attendance column for the selected classes
Absent
Marking Absence can be done individually or in bulk as per instructions in the previous tabs. Simply chose Absent from the Status list.
Excused Absence
This is used for when the Learner has a valid excuse for their absence such as medical appointment or approved leave.
You will need to:
- record the details of that absence
- ensure that the class is not counted in their attendance calculations
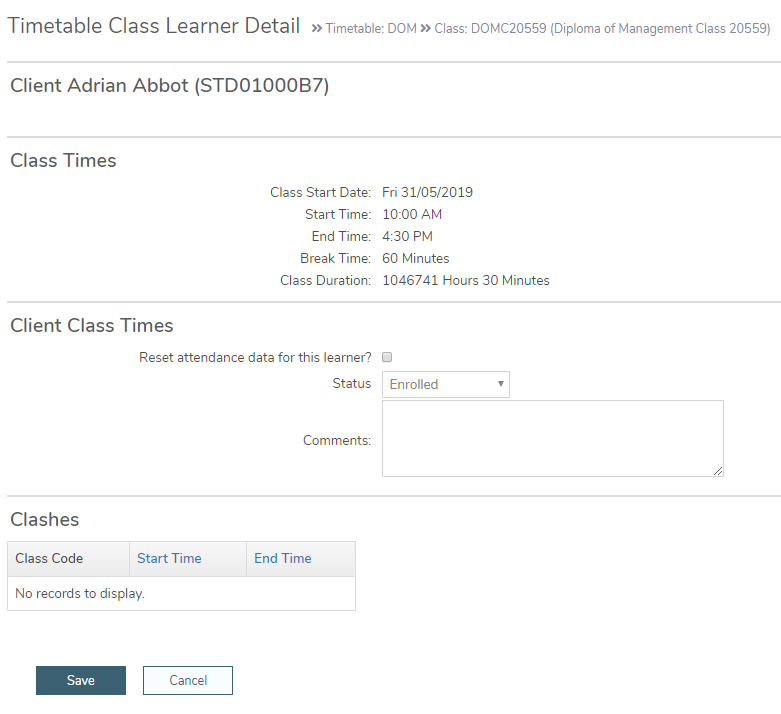
- On the right hand side click on Edit for the relevant Learner
- Click on the Status Dropdown and change to either Medical Leave or Approved Leave
- Add Comments
- Click Save
- Learner’s attendance should now say Medical Leave 0% or Approved Leave 0%
- Note: This is not calculated towards the Learner’s overall attendance. Learn More? How Attendance is Calculated
Resetting Attendance
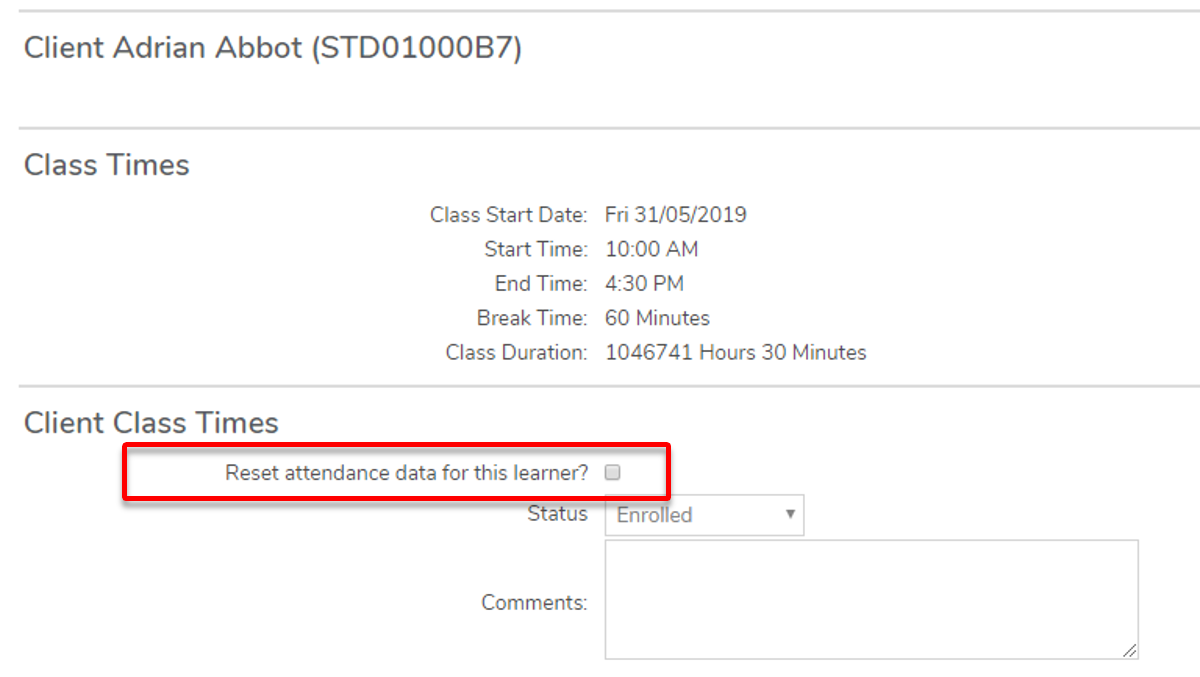
- On the right hand side click on Edit for the relevant Learner
- Under Client Class Times, Tick the box Reset Attendance data for this client?
- Add Comments
- Click Save
- Learner’s attendance should now say Accepted 0% and no time will be recorded
- Note: This is not calculated towards the Learner’s overall attendance. Learn More? How Attendance is Calculated


