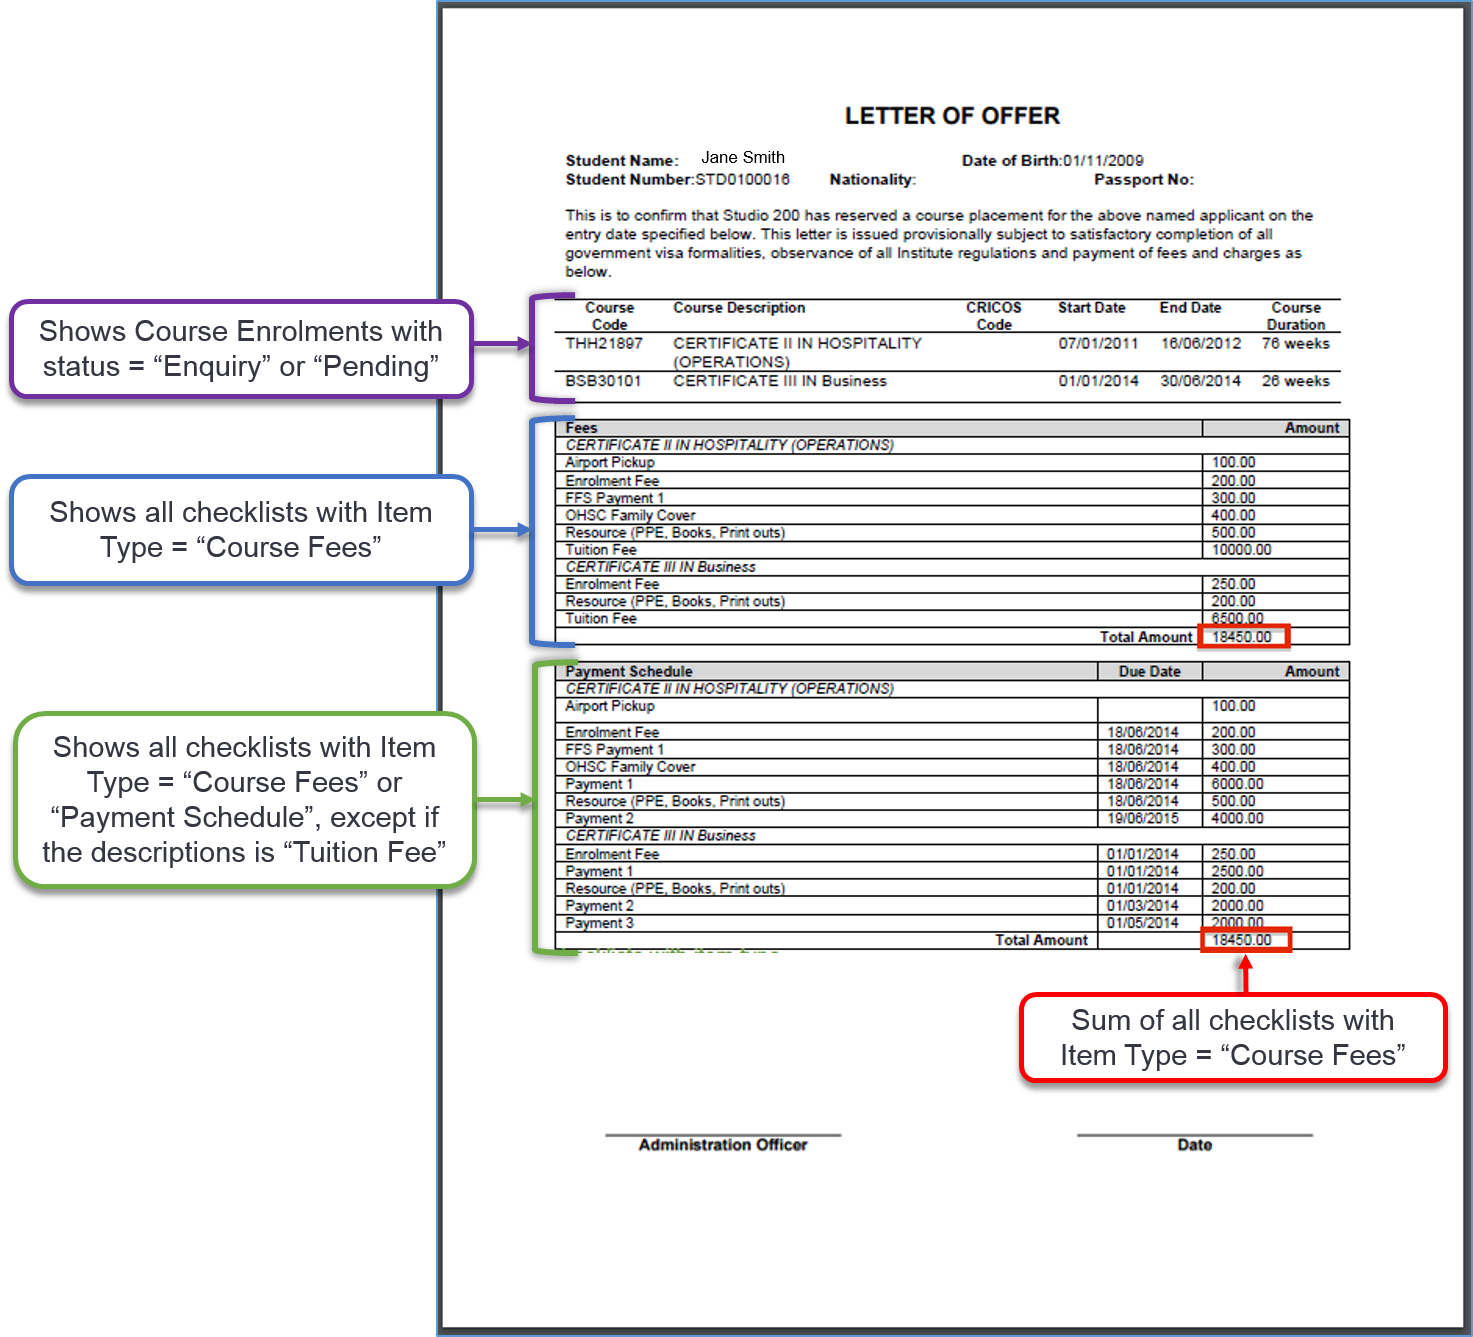
Generating a Letter of Offer is achieved using the uReport feature. It uses Letter of Offer template documents to format and input required Letter of Offer information.
If this is the first time your company is generating Letters of Offer we recommend to first test the process using our generic templates. Then once confident with the process you can create you custom templates for live situations.
1
Prepare Course Enrolments
A Letter of Offer will only generate when a Course Enrolment exists with:
- Application Status = New, Reviewing or Pending
OR - Enrolment Status = Enquiry or Pending (This is the old approach before new Application feature)
Letter of Offer Checklists will also need to be linked to Course Enrolment.
It is important to have all appropriate fields set up against the Learner and Course Enrolment including Letter of Offer Checklists.
Note: For the purpose of testing you could create a dummy Course Offer and Enrolments.
Learn how to Add Course Enrolments
2
Generate a Letter of Offer
- Navigate to the Learner’s profile
- Click on the required Course Enrolment
- Note: This will only work if the Enrolment Status = Pending or Enquiry
- On the Left Navigation Bar, select Enrolment Logbook
- In the Action Menu select Generate uReport
- From the uReport Template Type Dropdown, select Letters of Offer
- From the uReport Template Dropdown, select your desired template
- Choose additional options
- Click on Save
This will take you back to the Logbook page where the generated pdf document will be saved. Click on the document link and it will download a copy to your computer. You can now print or send out your Letter of Offer.
- Navigate to LRM > Course Offers, find the Course Offer from the list
- From the Action Dropdown Menu to the right of the Course Offer, select View Enrolments
- Tick the boxes for the learners that you want to run the template
- From the Action Menu at the bottom of the page, select Generate uReports
- From the uReport Template Type Dropdown, select Letter of Offer
- From the uReport Template Dropdown, select your desired template
- Choose additional options
- Click on Save
The Letter of Offer will now be stored against each Learner’s Course Enrolment Logbook. The quickest way to navigate here from the Course Offer > Enrolments list is:
- Open in new tab each Learner by holding ctrl while clicking on the Learner’s name in the Course Offer > Enrolments list
- Then from the Profile > Enrolments Panel find the Course Enrolment and choose View Logbook in Action Menu
3
Review the generated Letter of Offer
This step is more important during initial testing however due to the importance of the information on Letters of Offer it may always be a useful step.
Download the generated Letter of Offer, review contents and make necessary changes:
- If fields are incorrectly populated
- Ensure that the data has been correctly entered into Wisenet for this Learner
- Ensure the custom ureport template is referencing the correct regions or fields
- If layout and formatting is not correct
- The custom ureport template will need to be updated to resolve any issues
If this is a generic template then take a copy and create a custom template.
In any case if you require changes to a template follow the instructions on How to Create a Custom Letter of Offer Template
Next Step
You may be finished at this point or you may wish to Create your Custom Letter of Offer Template

