You can customise User Invite in Moodle to send a default message to Learners containing their login details.
1
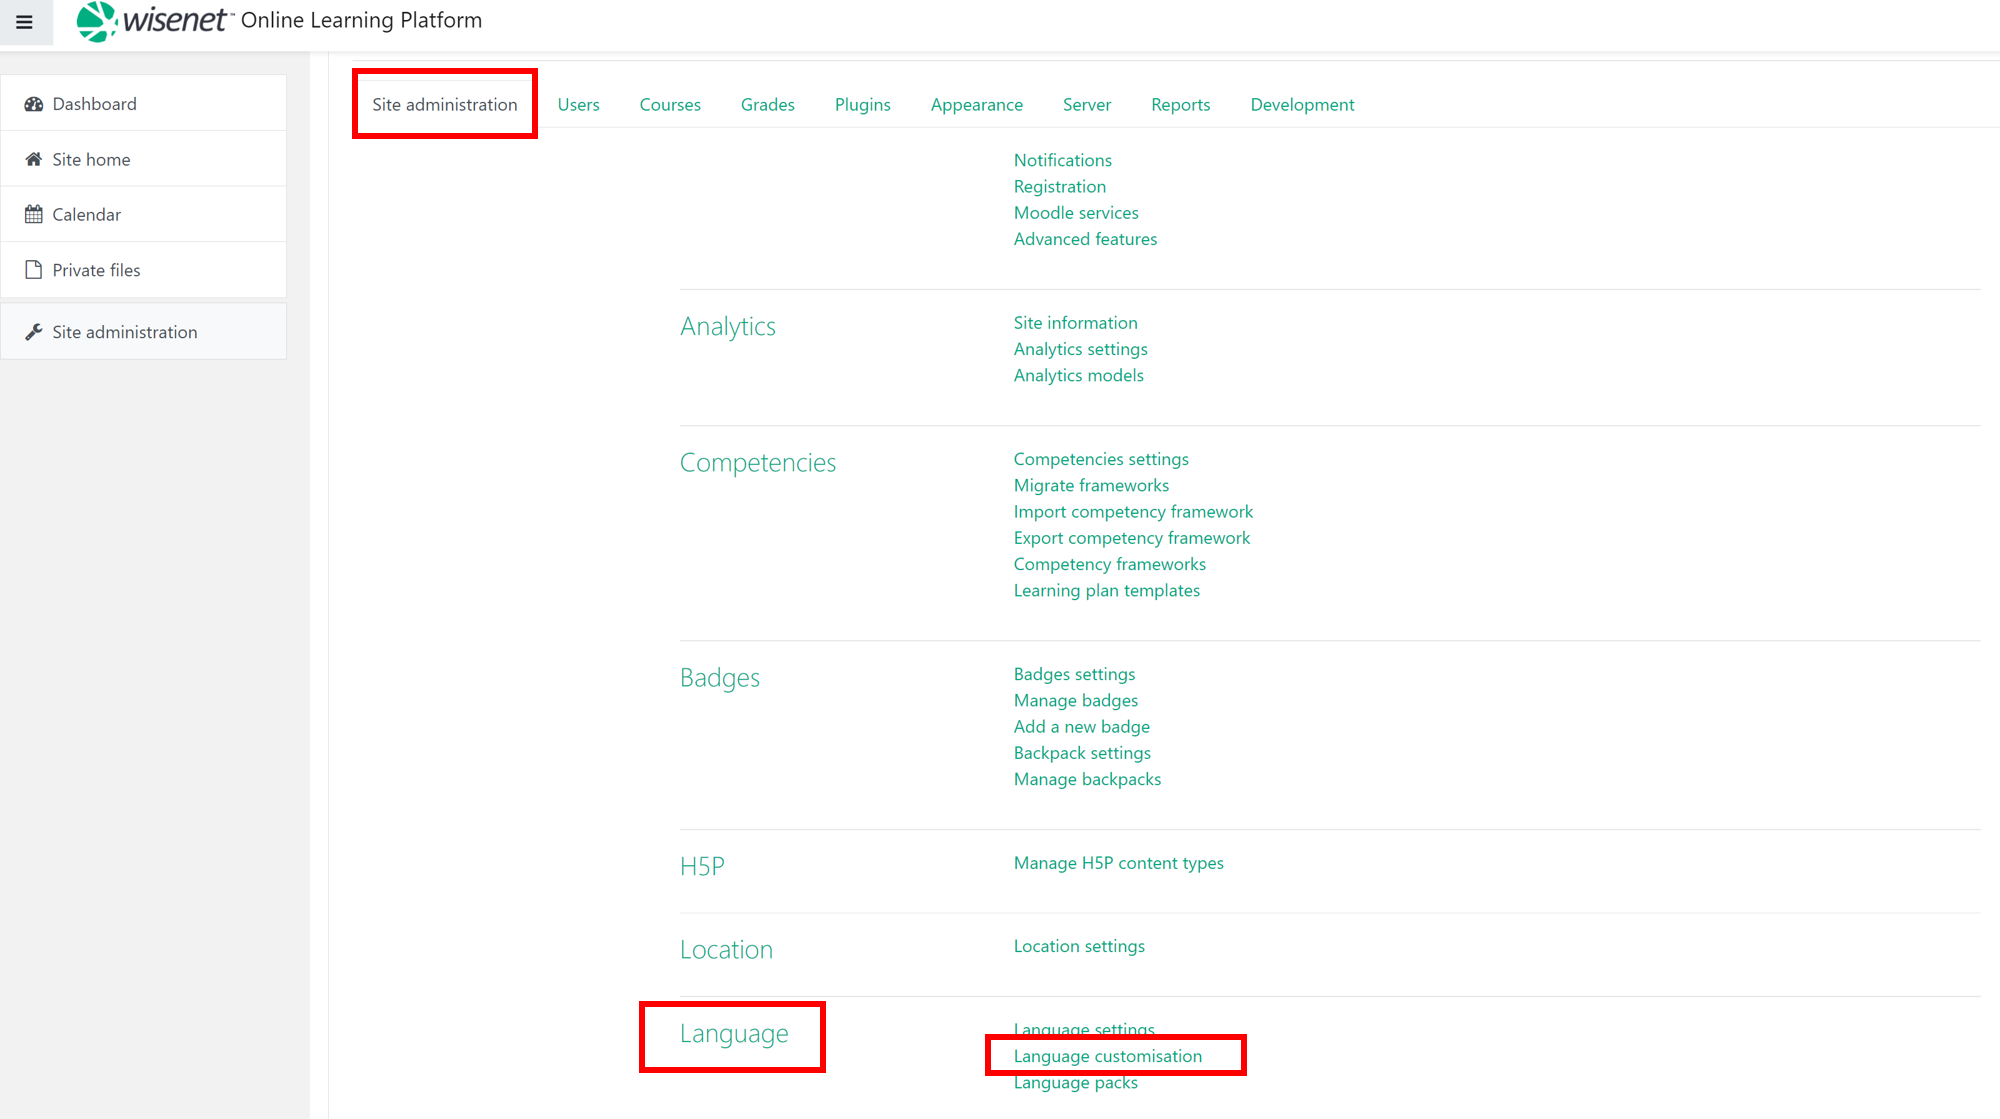
- In Moodle, Navigate to Administration
- Select and Click Site Administration
2
- Within the Site Administration Tab, Scroll down to find the Language Category
- Select and Click on Language Customisation

3
- From the DropDown Box choose and select the relevant language pack for your needs. i.e. English (en)
- Click Open language pack for editing
- When the loading percentage has reached 100% you will be able to click on the Continue button

4
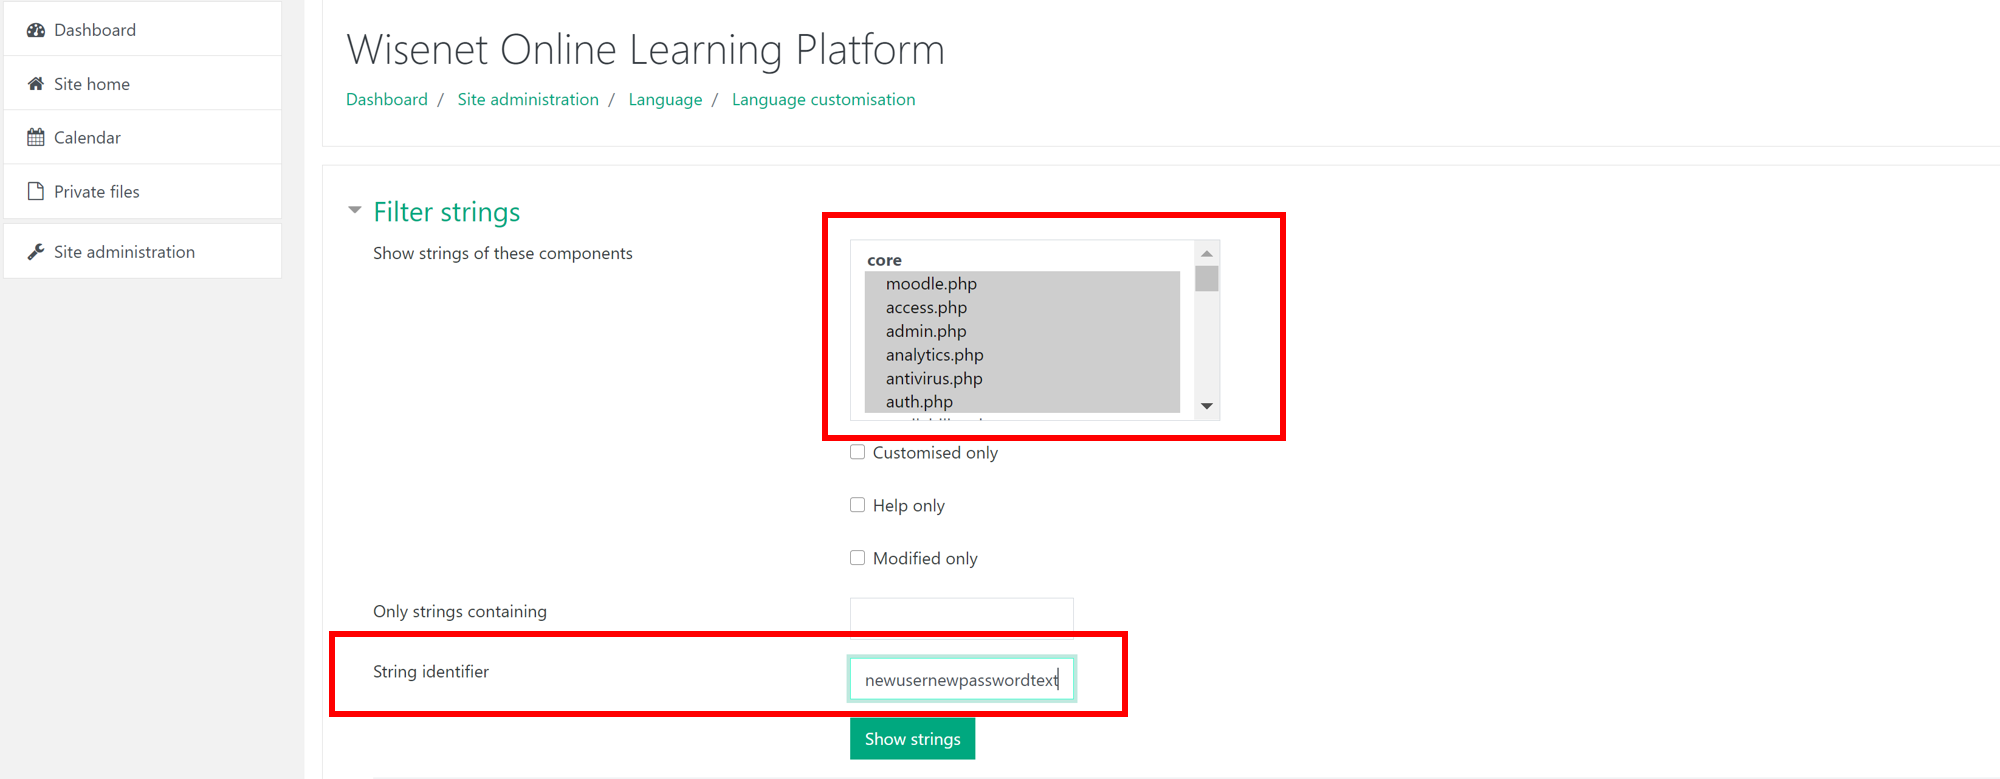
- Select all the strings that are located in the Show strings of these components box
- To select all, simultaneously press the Shift key on your keyboard and click on each string by using the scroll option
- Type newusernewpasswordtext into the String identified text field
- Click Show strings

5
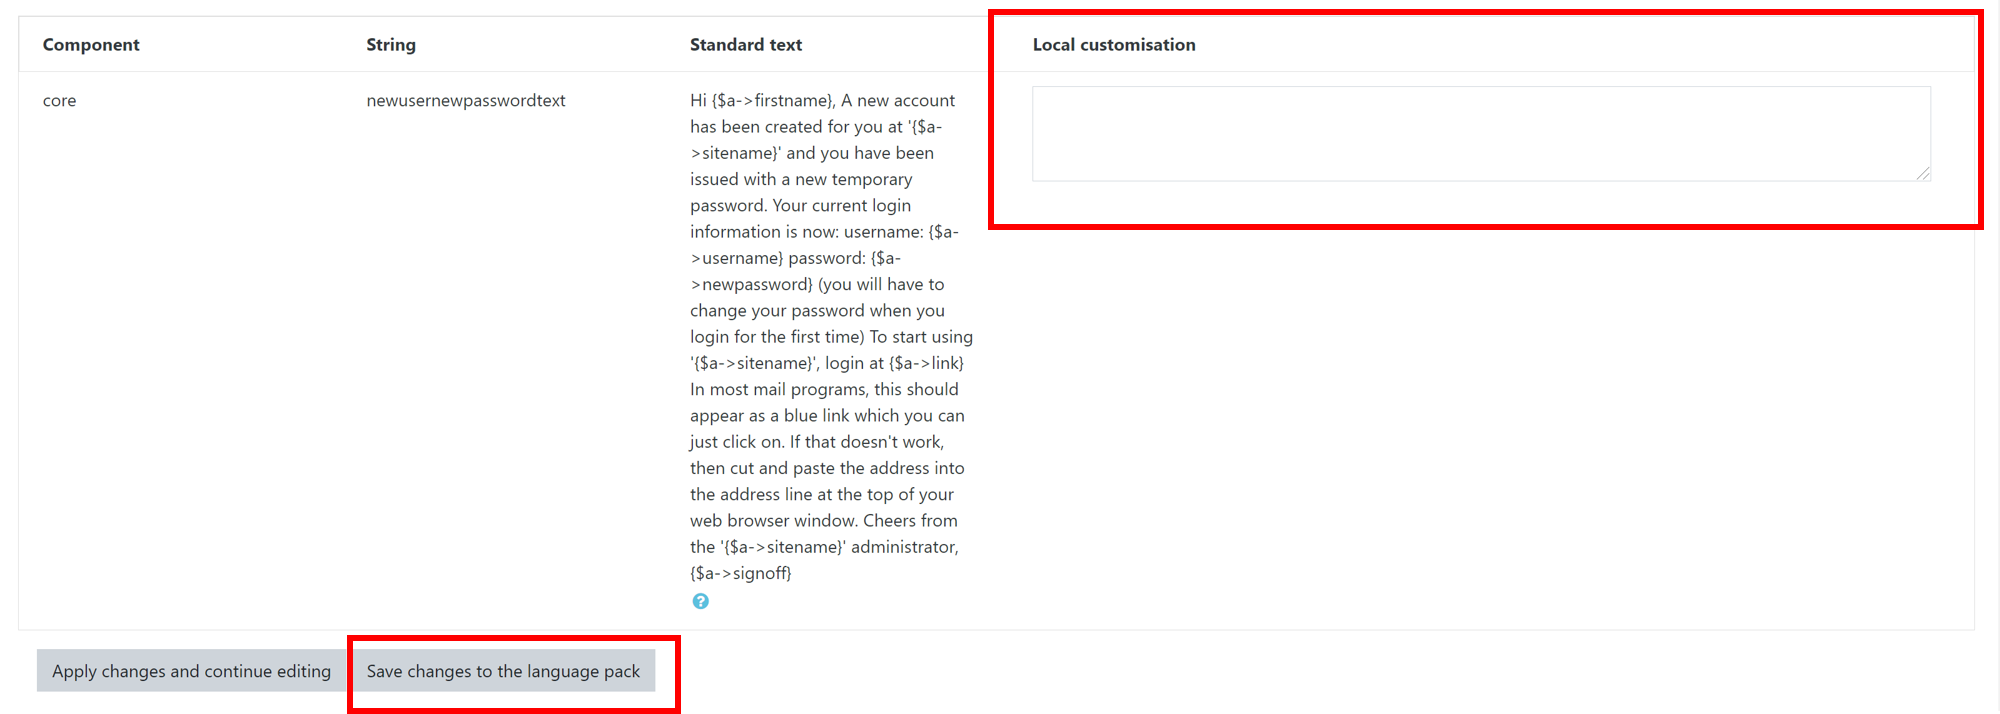
- In the Local Customisation Section, Add your customised message

2. Click Save Changes to the language pack
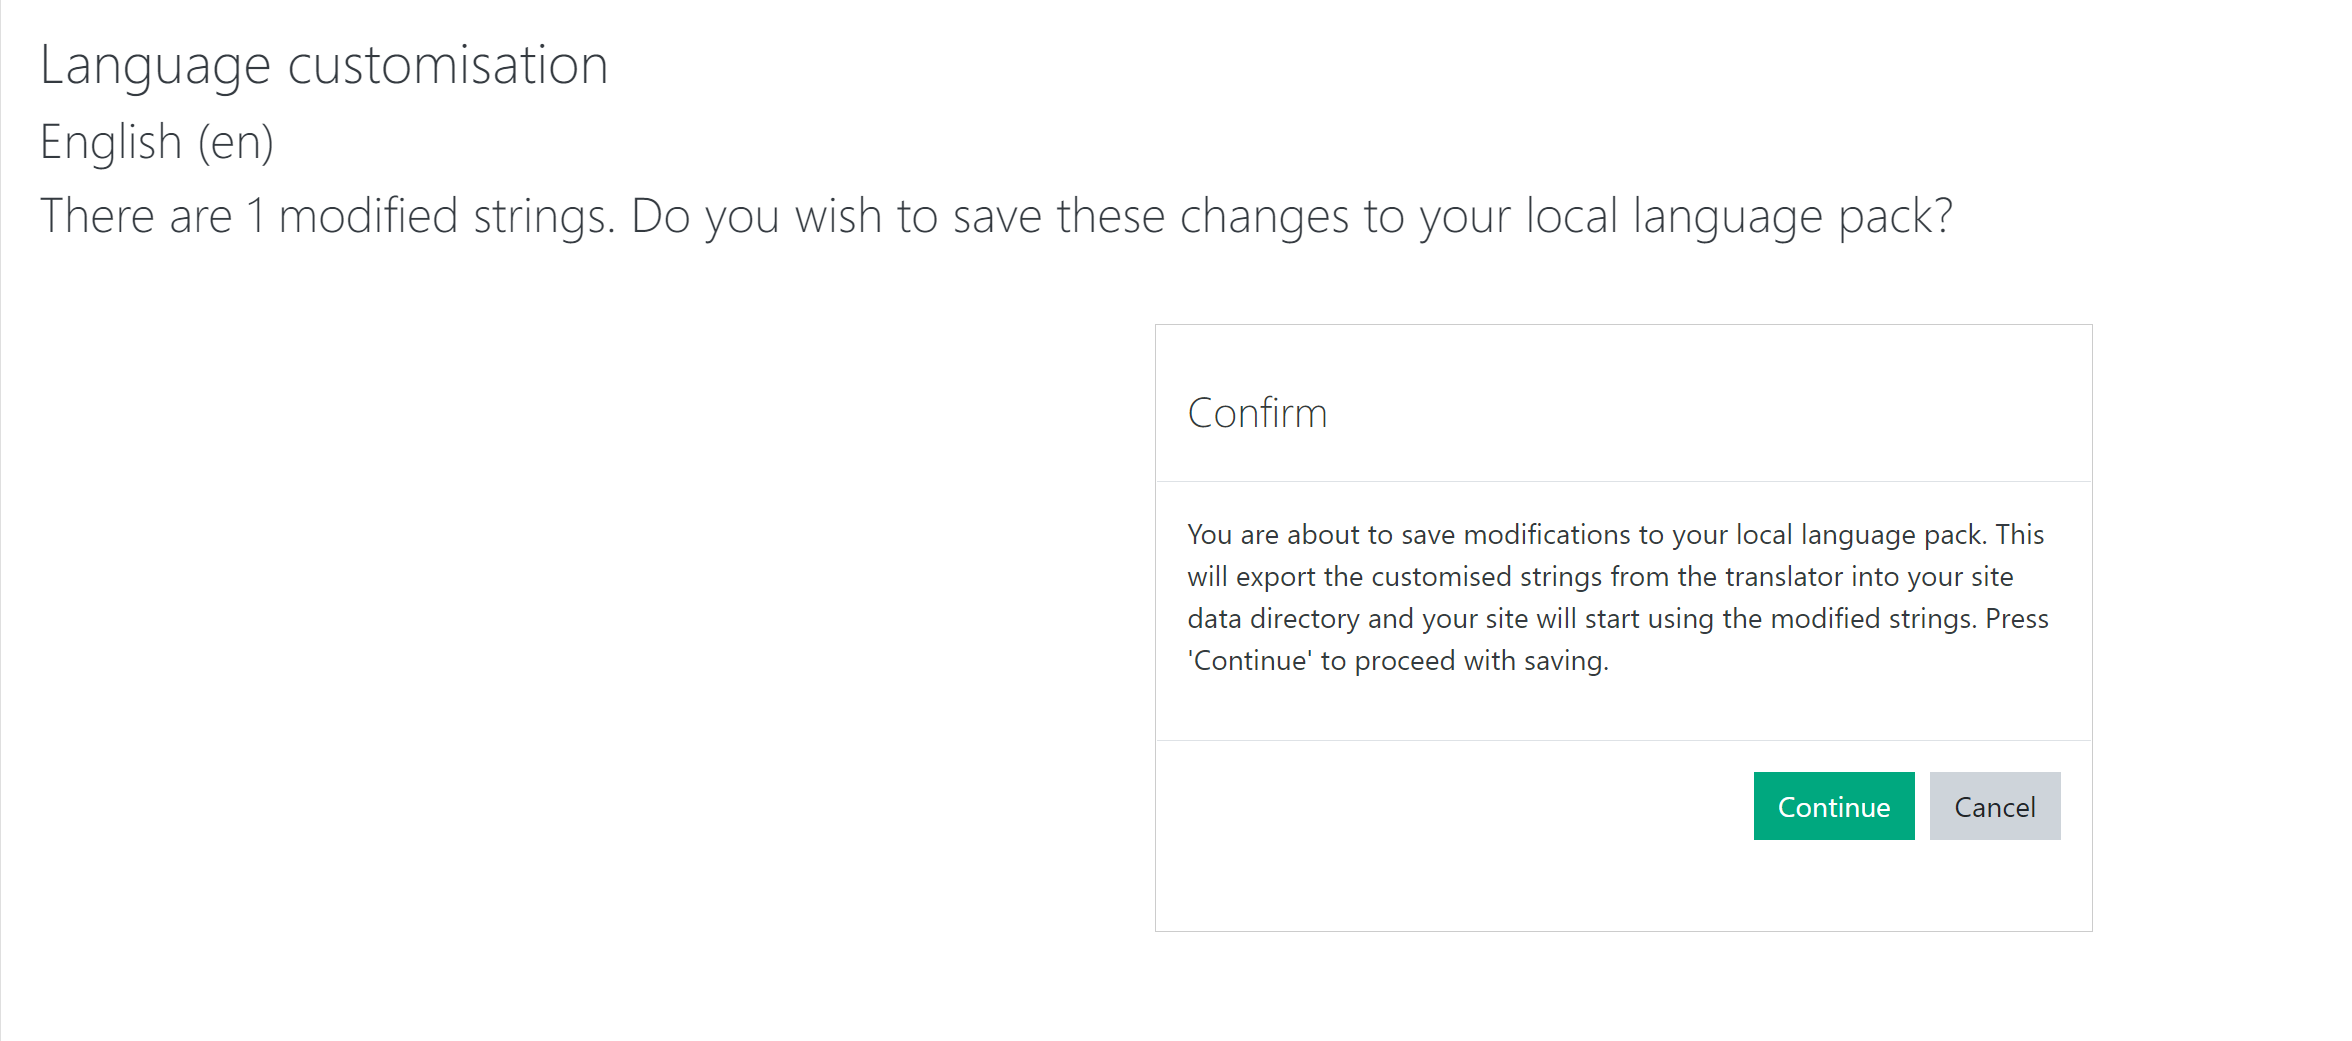
3. Click Continue to save the strings into your Moodle data directory

