Use StudyLink batch payments to record payments received from StudyLink, match them to the correct debtors, and allocate them to invoices. Importing a StudyLink file creates a batch and its payment records together, so you can review and reconcile the payments as one group.
1
Import a StudyLink batch file
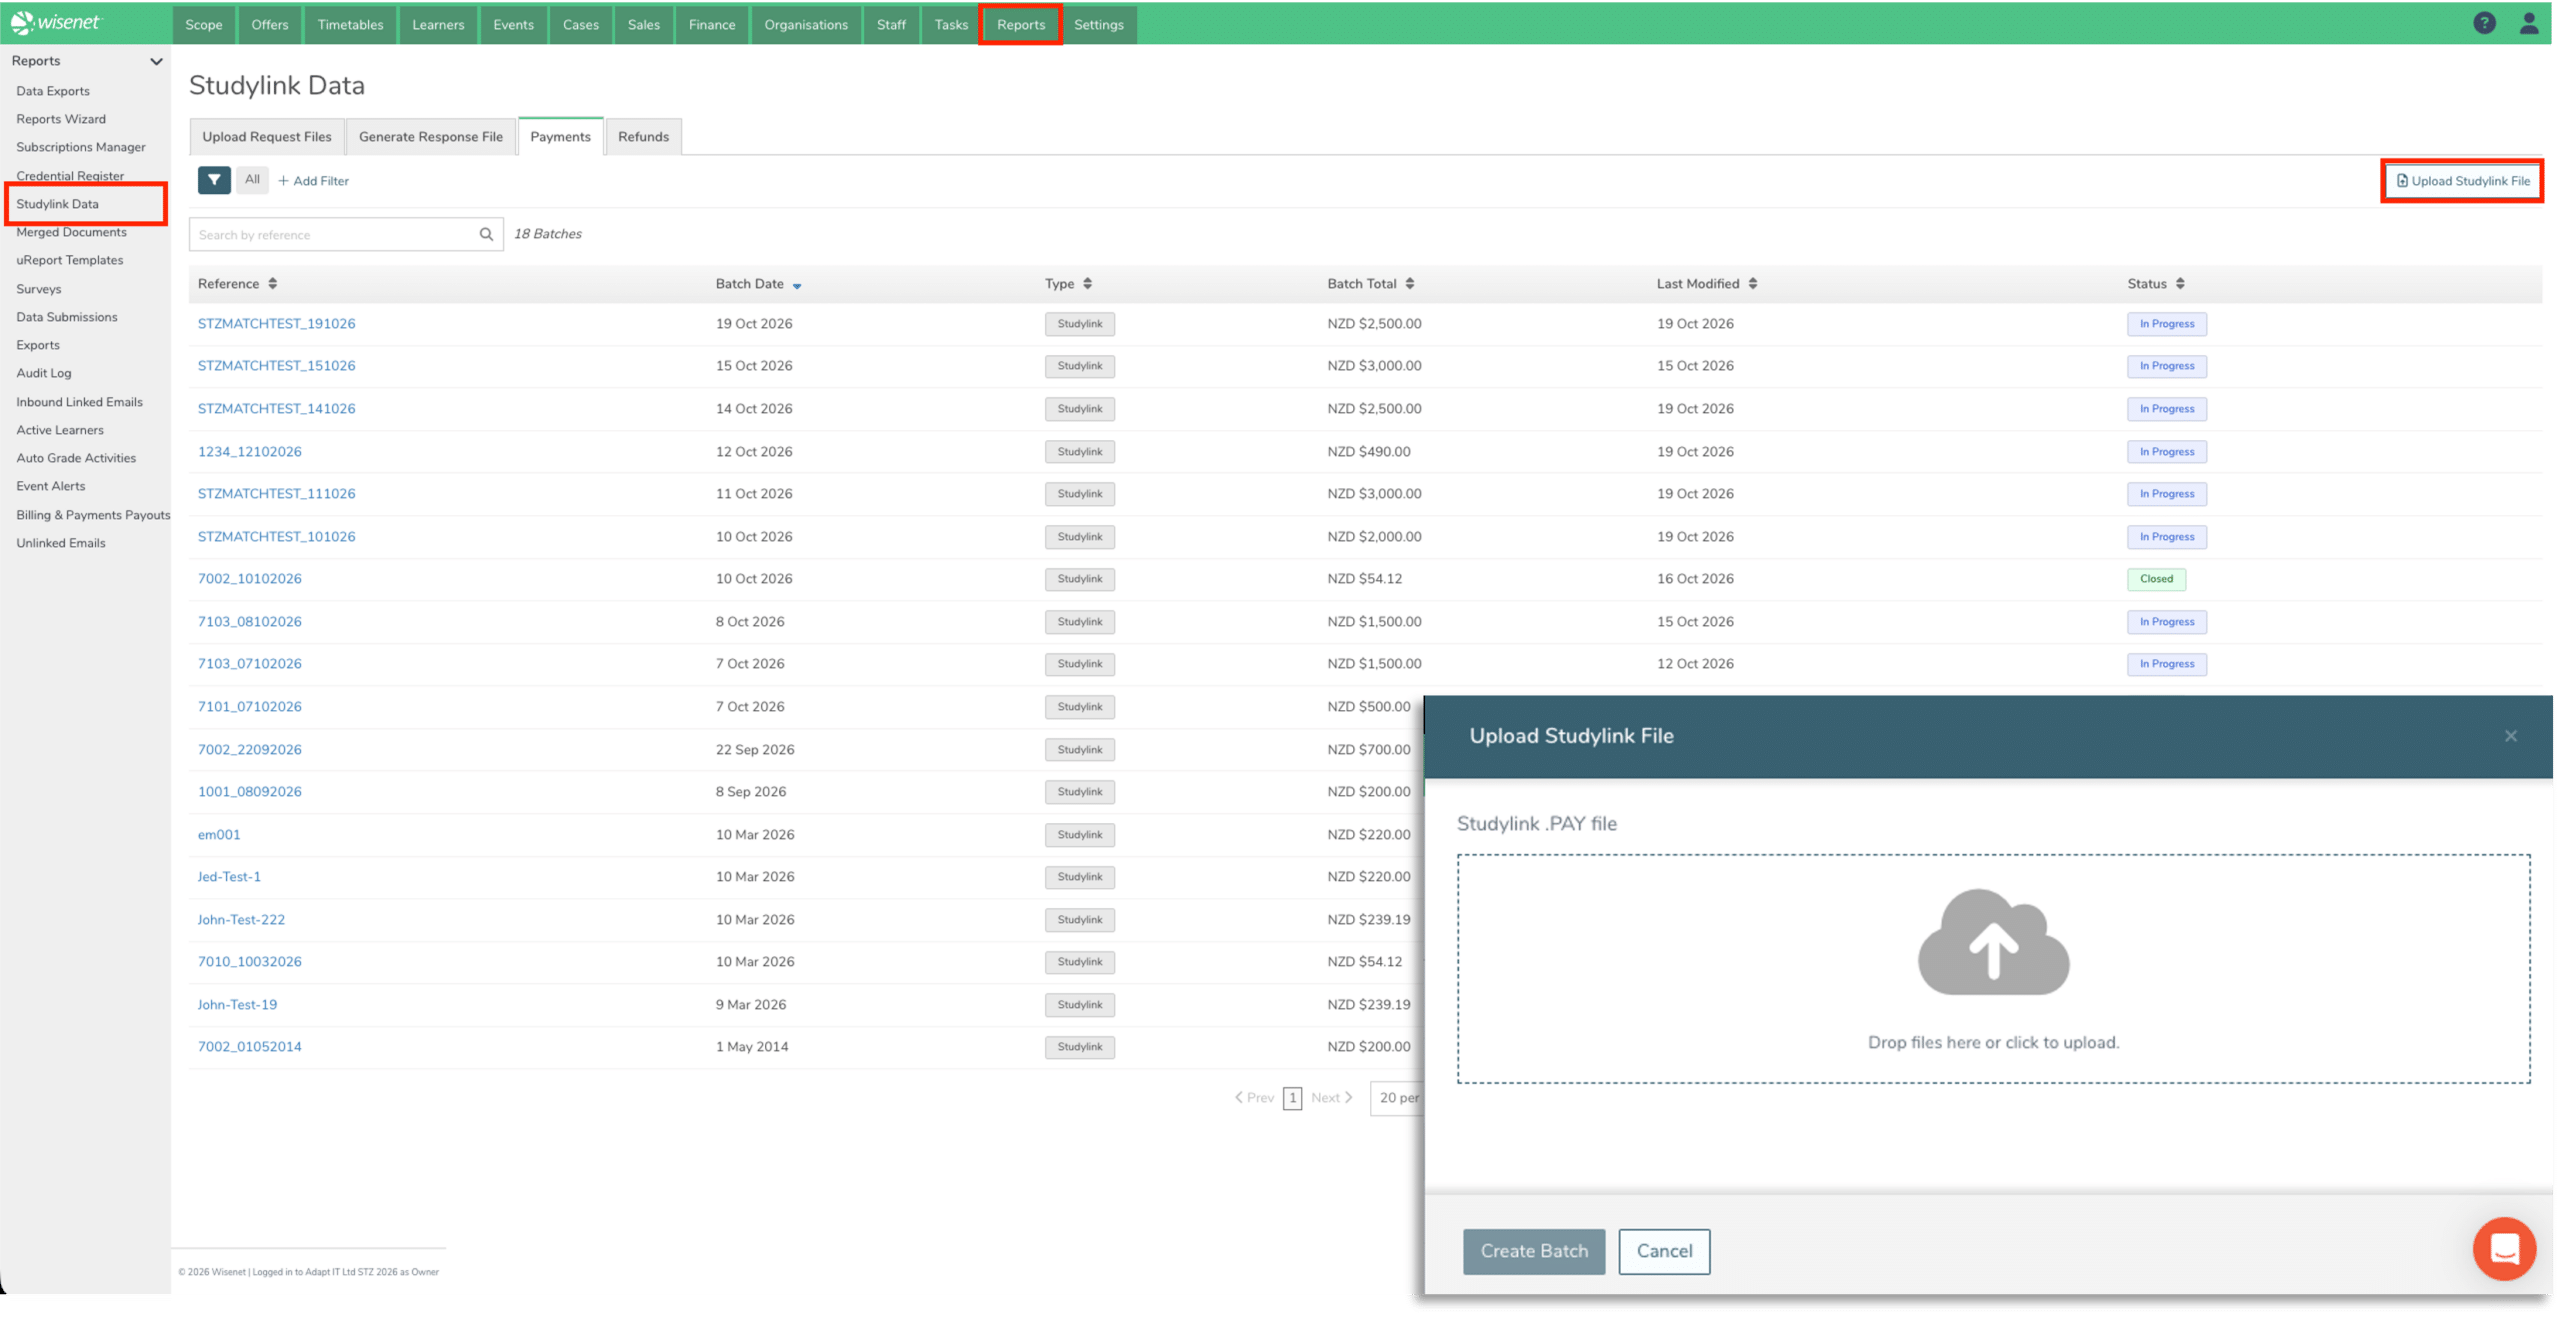
- Navigate to LRM > Reports > StudyLink
- Click Payments
- Click Upload Studylink File
- Drag and drop the relevant file or click to upload.
- Click Create Batch
Wisenet creates an In Progress batch with its reference, batch date, type, and batch total from the file. The batch type is StudyLink. These batch details cannot be edited after upload.
Wisenet also creates one payment record for each record in the file. The number of payment records must match the Number of Records field in the batch file. If the counts do not match, Wisenet does not create the batch.
You can upload more than one StudyLink batch file on the same day, provided each file has not already been linked to an In Progress or Closed batch.
2
Review the batch and its payment records
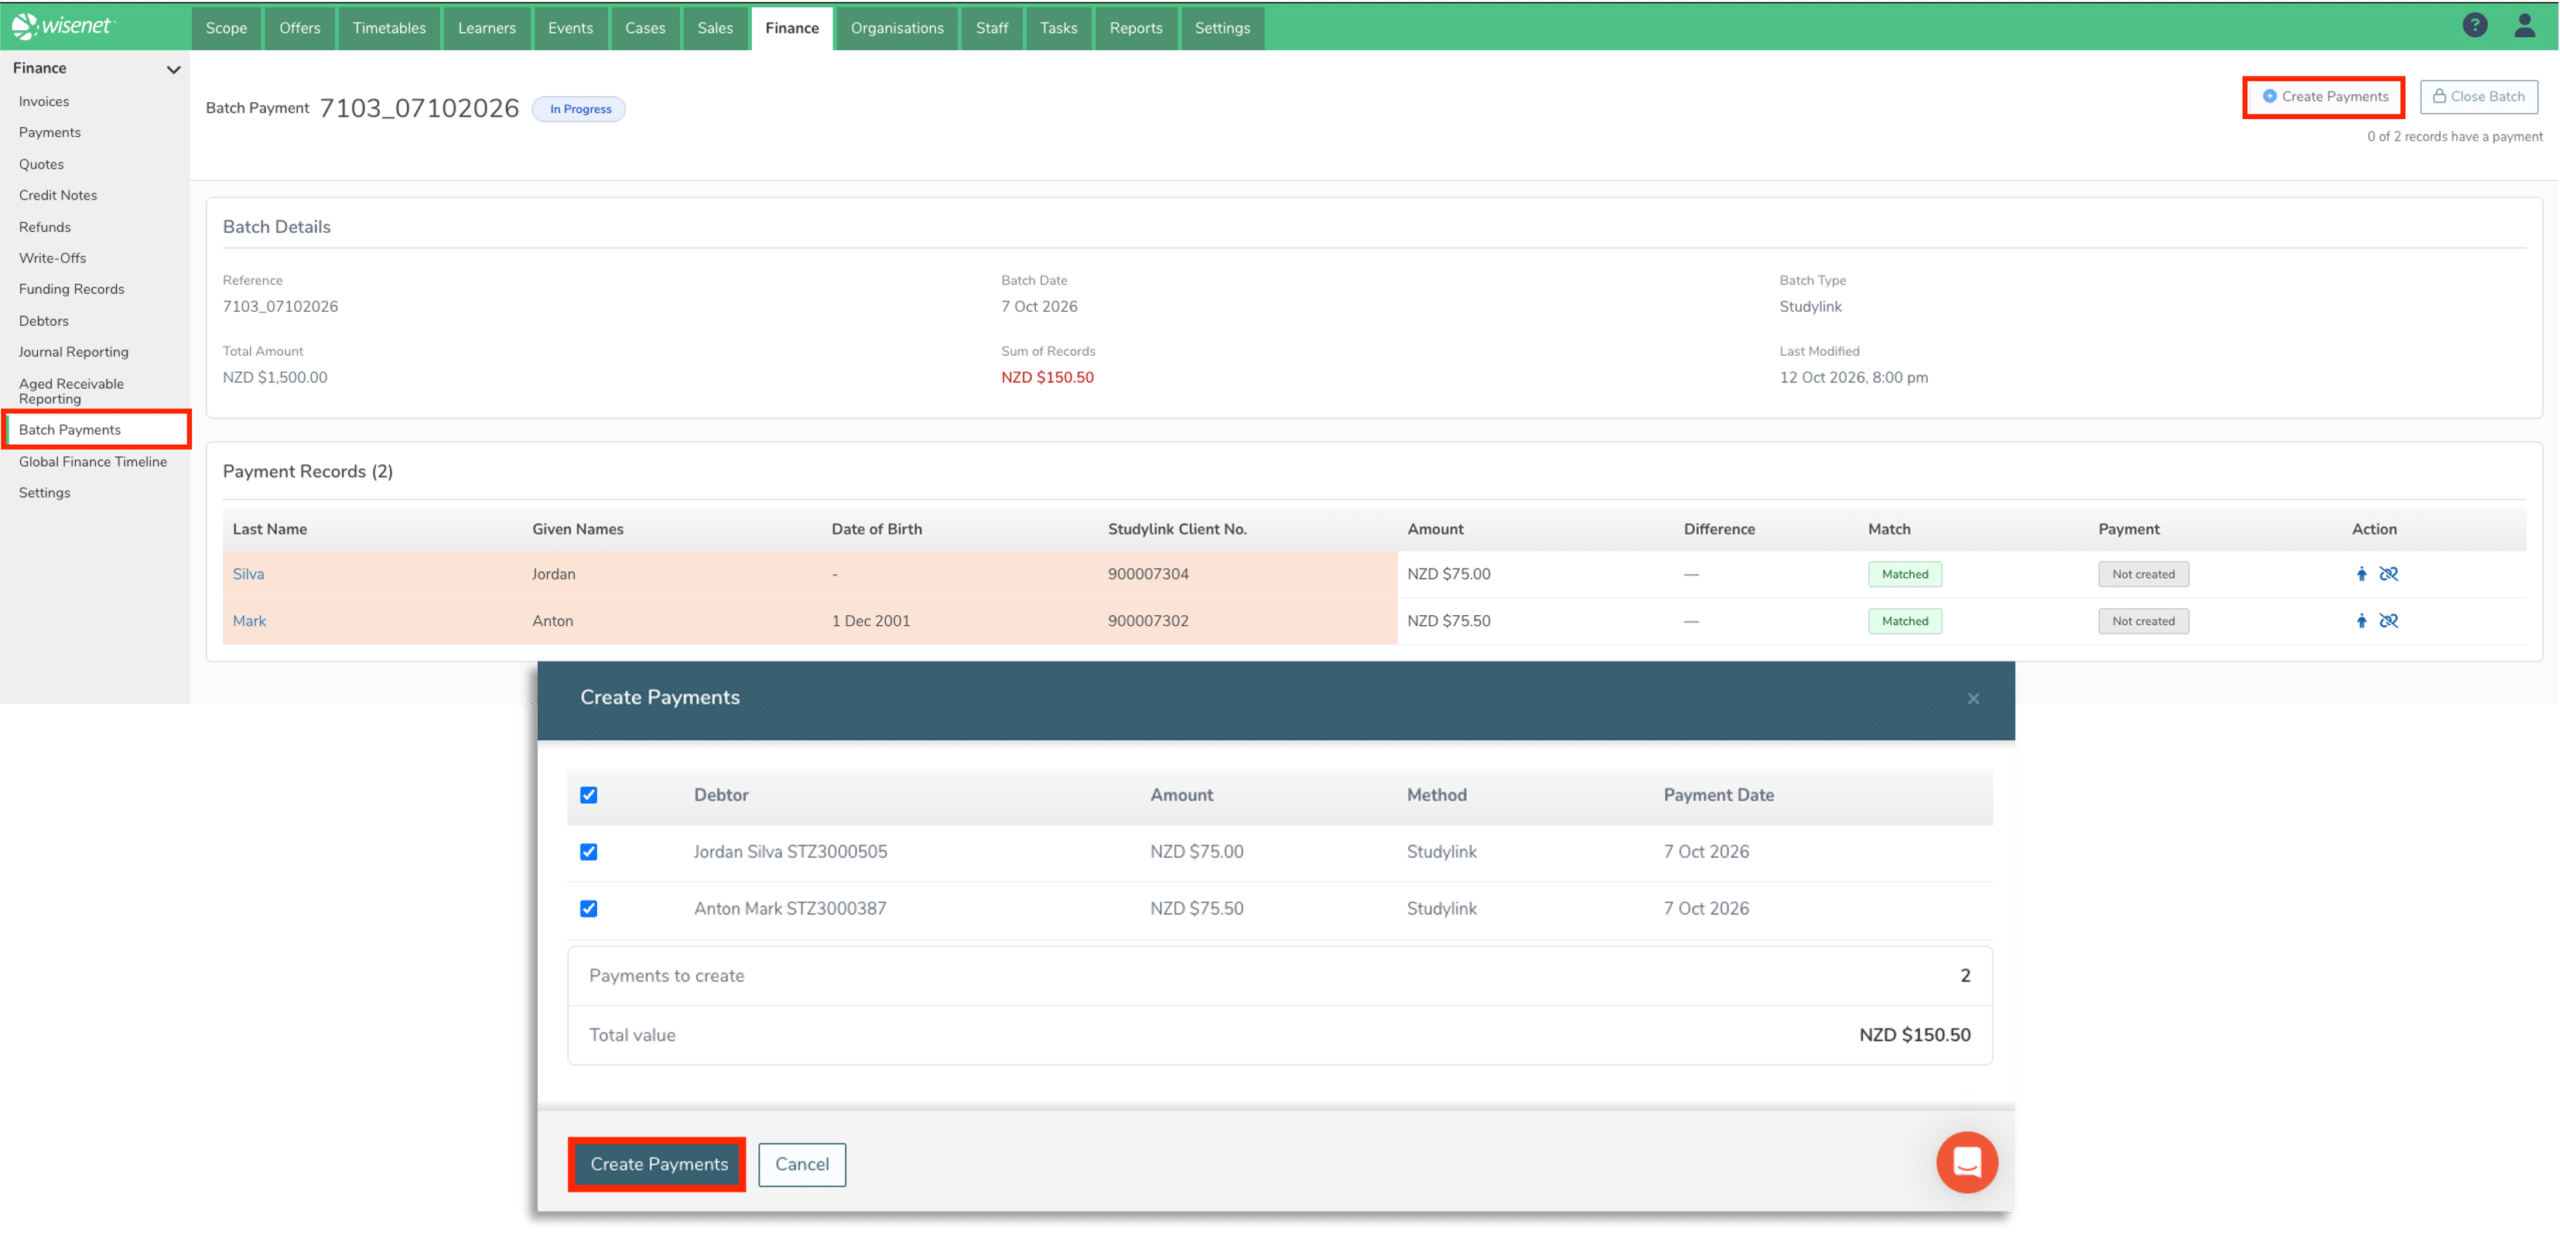
Open the StudyLink batch to review its status, payment date, reference, total amount, and payment records by clicking on the reference details.
Each payment record shows the amount from the file and uses StudyLink as its payment method. These payment details cannot be edited.
A payment record may also show a debtor and an Amount Difference indicator. The indicator appears when the corresponding record in the .PAY file contains an asterisk, meaning the amount paid differs from the amount requested by the education provider. A debtor can have more than one payment record in the same batch.
3
Match payment records to debtors
Check and correct the debtor on each record before creating payments. The payment amount and payment method remain as provided by the StudyLink file.
If you see a No Match status, click on the  icon to match the payment to the appropriate learner.

4
Create payments and allocate them to invoices
After reviewing and matching the batch payment records, create the payments from those records. The created payments retain their StudyLink payment method so they can be identified as StudyLink-funded payments later.
- From the Batch Payment Details Page
- Click Create Payments
- Review the debtor details
- Click Create Payments
- Choose Go to Payments list page to allocate payments to allocate them now, or
- Choose Continue to create the payments and allocate them later from the Payments list.
Allocate each payment to the appropriate invoice using the standard payment allocation process. A StudyLink payment can be allocated across eligible invoices for the same debtor.